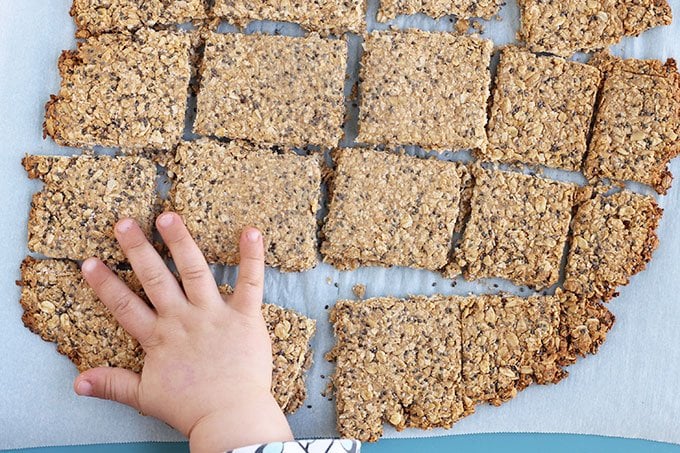
Homemade Granola Bars are one of my go-to healthy snacks for kids. They’re super easy to make, require minimal added sweeteners, have a texture that even babies and younger toddlers can chew, and store SO well. And you can make them allergy-friendly as needed too!

Homemade Granola Bars
These bars are seriously delicious—and versatile. They’re a great way to save money on groceries (since a batch is much less than buying a similar amount of store-bought bars) and you can vary the flavors by adding fruit or veggie puree.
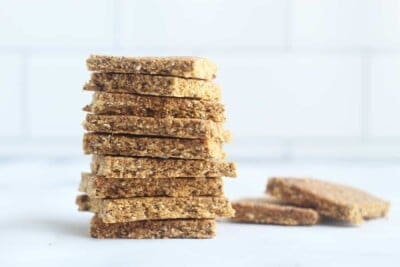
Plus, they’re loaded with nutritious ingredients and minimal sweeteners, so they’re a satisfying healthy snack for kids. The texture is a nice balance of crisp edges, but a softer texture.
And the flavor is so, so good!
Soft-Baked Granola Bars
I made these granola bars regularly when my middle child was one—she loved nibbling them—and I always shared them with her.
There’s a subtle peanut butter flavor in this healthy bar recipe, though you can trade in almond butter or sunflower seed butter if you prefer. The nut or seed butter adds healthy fats, which help this bar satisfy those little bellies longer.
TIP: This recipe is super streamlined for busy parents and stores nicely.

Ingredients You Need
Here’s what you’ll need to make this recipe:
- Rolled oats
- Shredded unsweetened coconut
- Flour
- Chia seeds
- Honey
- Nut or seed butter
TIP: You can use you can use gluten-free flour if needed.
Step-by-Step Instructions
Here’s a look at the easy process involved in making this granola bar recipe. Scroll down to the bottom of this post for the full recipe.
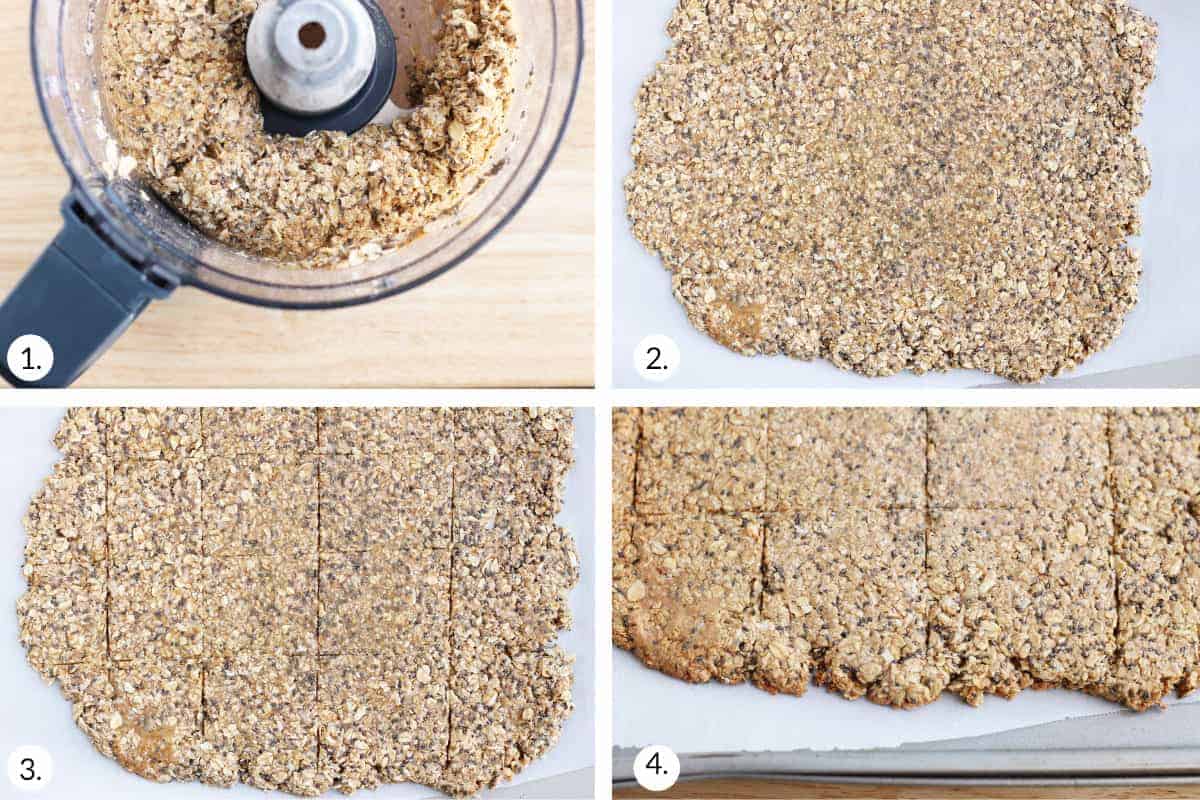
- Add ingredients to a food processor, choosing your flavor. Grind until the mixture starts to hold together.
- Pour the batter onto a parchment-lined baking sheet and press flat.
- Score the batter with a knife, which makes them easy to break into pieces once they’re baked.
- Bake, let cool, and enjoy.
TIP: In Step 1, you’ll see the batter start to pull together and you can also check it by squeezing a bit between your fingers—it should be sticky enough to hold together when you squeeze it. Add a little more water or puree if it’s not quite sticky enough.
Can I make these without chia seeds?
Sure! See the variation at the bottom that calls for omitting them and slightly increasing the nut butter. This keeps a good amount of healthy fats to ensure that the bars hold together and that the kids get a nicely balanced snack.
Can I make these gluten-free granola bars?
These bars are naturally egg-free and dairy-free. They’re also easy to make gluten-free by choosing gluten-free oats and a gluten-free flour blend.
How long do these healthy granola bars last?
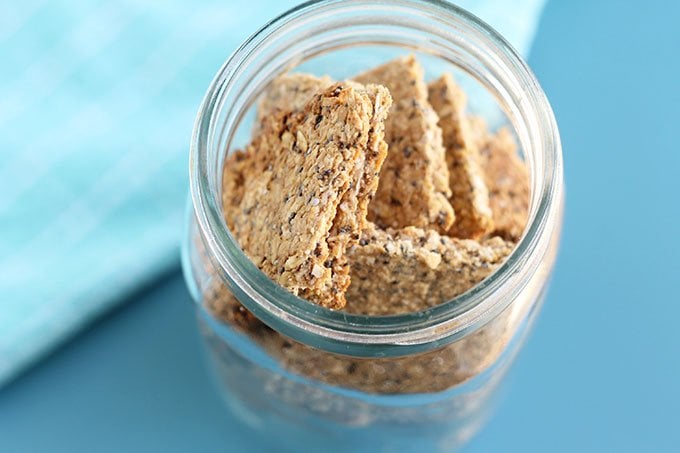
I store our homemade granola bars in the fridge (because I like them cold) in an airtight container and serve them up until we run out.
- In the fridge in an airtight container, they’ll stay fresh for about two weeks.
- At room temperature in an airtight container, they’ll last about 1 week.
- In the freezer, you can place cooled bars in a sealed zip top freezer bag for up to 3 months. Thaw overnight in the fridge before serving.
Can I freeze granola bars?
Yes, this granola bar recipe freezes really well. Simply let them cool and place into a zip top freezer bag. Freeze for up to 3 months. Thaw in the fridge or at room temperature, or directly in a lunchbox.
Flavor Variations
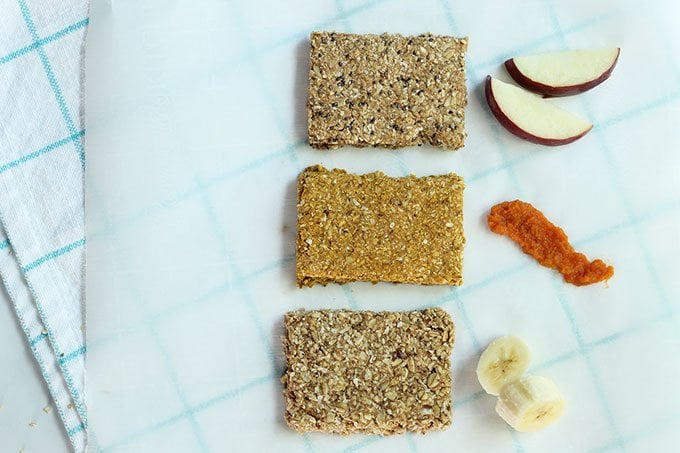
I’m so happy that a reader suggested this because it works so well to use a fruit or veggie puree instead of water in the original recipe! I’ve tried making Applesauce Granola Bars, Banana Granola Bars, Butternut Squash, Sweet Potato, and Pumpkin Granola Bars.
Look in the Notes at the bottom of the recipe for the info.
Best Tips for Success
- For kids under one, you can substitute brown rice syrup for the honey. You can also try using applesauce.
- You can make them in the basic flavor, or banana, apple, sweet potato, butternut squash, or pumpkin.
- To make these without coconut, omit and use additional oats.
- To make these without chia seeds, omit and increase the nut butter to ¼ cup.
- To make this without a food processor, use quick or instant oats and stir everything together. (Or grind the oats and coconut in a blender, then stir the ingredients together in a bowl)
- Add chocolate chips to this recipe by pressing a few into the top of the rolled out batter just before baking.
- Use room temperature honey and nut or seed butter to make the batter come together easily, or warm them briefly.
- Wet your fingers or use a piece of parchment to press the batter down if it’s sticking to your hands.
- You may also like No-Bake Granola Bars, Breakfast Bars, my Easy Oatmeal Bars, and my 3-Ingredient Cereal Bars.
I’d love to hear your feedback if you try this recipe so please comment below to share!
This post was first published Jun 2017.
Easy Homemade Granola Bars
Ingredients
- 1½ cups rolled oats
- ½ cup shredded unsweetened coconut (or use ½ cup additional oats)
- ¼ cup honey (or maple syrup or applesauce)
- ¼ cup whole-wheat flour
- 3 tablespoons peanut butter (or sunflower seed butter or 1 egg)
- 1 teaspoon vanilla extract
- ½ teaspoon cinnamon
- ⅛ teaspoon baking powder
- ⅛ teaspoon salt
- 2 tablespoons chia seeds
- ¼ cup water (or ¼ cup mashed ripe banana, pumpkin puree, applesauce, butternut squash puree, OR sweet potato puree)
Instructions
- Preheat the oven to 325 degrees F and line a baking sheet with parchment paper or a Silpat. Warm the honey and peanut butter for about 15 seconds if not stored at room temperature.
- Place the oats and coconut into the bowl of a food processor and blitz to grind into a coarse texture (similar to quick oats).
- Add the remaining ingredients, including the peanut butter and honey, and blend well.
- (You can also grind the oats or use instant oats, then mix everything together in a bowl.)
- Add ¼ cup water and blend until batter comes together like thick cookie dough. You should be able to press the batter together between your fingers and have it stick together. If it doesn't, add a bit more water.
- Place batter onto the center of the prepared baking sheet and use your hands to press thin, about ¼-½-inch thick and about 8x8-inches big. I measure roughly using an 8x8-inch baking pan. (You can also roll out the dough—just cover it with a piece of parchment paper first to make sure it's easy to do.) Use a knife to lightly score lines for squares in whatever size you like.
- Bake for 18-20 minutes, remove from oven, and let cool completely on the pan.
- Break into squares and serve.
- Store in an airtight container for up to 2 weeks in the fridge or a week at room temperature. To freeze, place cooled bars in a sealed zip top freezer bag for up to 3 months. Thaw overnight in the fridge before serving.
Notes
- To make these with fruit or a veggie flavor, omit the water in Step 4. Choose one flavor from below. Proceed with the recipe as directed, though know you may need to bake up to an additional 10 minutes. Look for the edges to start turning golden brown. It just seems to take a little longer when you add a puree.
- Banana: Add ¼ cup mashed recipe banana or banana puree.
- Pumpkin: Add ¼ cup pumpkin puree.
- Apple: Add ¼ cup applesauce or Apple Puree.
- Butternut: Add ¼ cup butternut squash puree.
- Sweet Potato: Add ¼ cup sweet potato puree.
- To make these without coconut, omit and use additional oats.
- To make these without chia seeds, omit and increase the nut butter to ¼ cup. Or use ground flaxseeds.
- To make this without a food processor, use quick or instant oats and stir everything together. (Or grind the oats and coconut in a blender, then stir the ingredients together in a bowl)
- Gluten-free: Use gluten-free cup for cup flour in place of the whole-wheat.
- Add chocolate chips to this recipe by pressing a few into the top of the rolled out batter just before baking.
- Use room temperature honey and nut or seed butter to make the batter come together easily, or warm them briefly.
- Wet your fingers or use a piece of parchment to press the batter down if it's sticking to your hands.
Nutrition


I doubled my first batch of these (used a sheet pan), leaving out 25%-ish of the honey, subbing 1/2 c raw quinoa in the 3 cups of oats, and using applesauce as the moistener instead of water. They turned out great and the kids loitered around the stove asking for more bits!
I forgot to score the dough beforehand, so when I pulled them out I ran a pizza cutter through them, and much later even used a fun cookie cutter shape to make little circles and triangles! I am a big fan of this new recipe and think it’d be ideal to always have them on hand!
These taste delicious! Made them on the thicker side (1/2”) and cooked for less time (~16 min) and they came out chewy! I added chopped mini chocolate chips to the mix, and a drizzle of PB on the top once they were cooled – toddler approved. Will definitely be making these again to try some of the other variations and flavour combos!
These came out a bit dry for me. Is the 1/4 cup water in step 5 in addition to what’s listed in the recipe ingredients? Step 3 says to add all remaining ingredients, but I’m not sure if this is meant to exclude the water (which I substituted with mashed banana anyway).
Super easy and tasty! I’m looking forward to playing around with the variations. These were fast to make and are a great addition to lunchboxes.
My 1 year old has been developing some taste preferences and has been pickier about his snacks (roll eyes and a deep sigh) but he loves these! He ate them up so fast! I made it with maple syrup and sweet potato puree.
These are great! I used apple puree and peanut butter. My 1 year old loves it, even though they came out a little dry. Maybe I baked them too long? or maybe my combination didn’t yield the best result. I will definitely try again.
Made 2 batches so far 1 with pumpkin/egg combo, 1 with peanut butter and chocolate chips and I love them! My 2 yr old kept biting them but kept spitting them out. I’m going to try another batch without chia seeds. Wondering if it’s a texture thing. Great recipe!
My 2 year old, 6 year old and I all love these! I’ve only done them with pumpkin and they’re fantastic. We love cinnamon so I always do a little extra but otherwise follow the recipe exactly