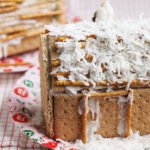
Easy Graham Cracker Houses
Each batch of icing will make enough icing for 2-3 houses. I make the houses ahead of time (with glue because is much faster) and let the kids do the decorating. Such a fun activity!
Servings 1 -3 houses
Calories 99kcal
Cost 5
Ingredients
Houses
- 7 full-size sheets of graham crackers (plan to have extras in case some are broken)
- 2 lb bag powdered sugar
- 2/3-3/4 cup milk
Assorted Toppings
- 2 cups Pretzel sticks, Chex cereal (they make great windows), mini marshmallows, shredded coconut (perfect for snow), dried cranberries, yogurt covered raisins, slivered almonds (they make great shingles), pumpkin seeds, banana chips, sugar cones
Instructions
To make the house:
- Heat up a glue gun and stick. Make a box starting with one long graham cracker as your base. Glue on sides and a top. (You can also use royal icing, but I find this part to be faster to do in advance so the kids just do the decorating.)
- Add two long graham crackers to make a pointed roof.
- Cut 2 square graham crackers (either break a full size one in half or pick up a box of the square graham crackers) into triangles with a serrated knife.
- Glue triangles to the ends to finish.
To make the Royal Icing:
- Stir together the powdered sugar and milk, starting with the lower amount, in a very large bowl. Add milk, one tablespoon at a time, as needed to make a very stiff, but uniform icing. (You want it to be stiff so it doesn't drip out of the bags too quickly. You should be able to stir it together, but it should require a little bit of muscle.)
- Divide the icing into 2-3 quart size storage bags. Remove air and seal.
To decorate:
- When ready to decorate the houses, snip off one bottom corner from each bag to make a very small opening.
- Decorate with assorted toppings.
Notes
- Plan to make the houses yourself or with the help of an older child.
- You can make the houses up to a few days ahead of time if desired.
- Make additional icing and use it to hold the houses together if you prefer. Make sure it's stiff so it's as secure as possible. You may have to hold pieces for a minute or two to allow them to dry.
- Make each house on top of a paper plate so it's easy to transport when completed.
- Put out an assortment of toppings so the kids can pick and choose what they want on their house.
- If doing this as a playdate, request that each child bring two toppings to contribute.
- Expect the table you do this project on to get very sticky.
- Expect the floor under the table to be covered with crumbs.
- The houses will last at room temperature for a few weeks. The kids can eat their toppings if they want to, but this is more an idea to be used as a decoration.
Nutrition
Serving: 1g | Calories: 99kcal | Carbohydrates: 8g | Protein: 5g | Fat: 5g | Saturated Fat: 3g | Polyunsaturated Fat: 1g | Monounsaturated Fat: 1g | Cholesterol: 16mg | Sodium: 70mg | Potassium: 215mg | Sugar: 8g | Vitamin A: 264IU | Calcium: 184mg | Iron: 1mg