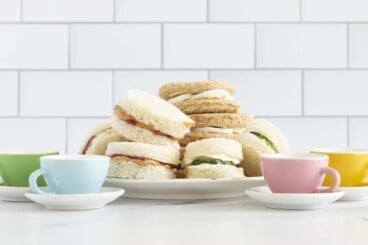
Learn how to make a batch of healthy, homemade Uncrustables to stash into the freezer for fast kids’ lunches. I love this method so much because you can decide exactly what to put inside, they’re crazy fast, AND they freeze beautifully. (Plus, you can adjust for allergies as needed!)
Uncrustables
Before becoming a mom to three kids, I would have laughed so hard if you told me that I’d ever make PB&J sandwiches ahead of time to stash in the freezer. Ah, but then life happened and I realized that having such a simple food ready and waiting in the freezer for easy meals is GENIUS.
You can pull them out and pack in a lunch and they’ll thaw by lunch time, you can fill them with anything you want (so they are easy to adjust for allergies or preferences), and you can make them with any kind of bread you like. Win!
You can also just make them to serve or pack on the same day. They’re so fast and easy. They’re one of my Top Ten Lunch Ideas for Kids and for good reason!
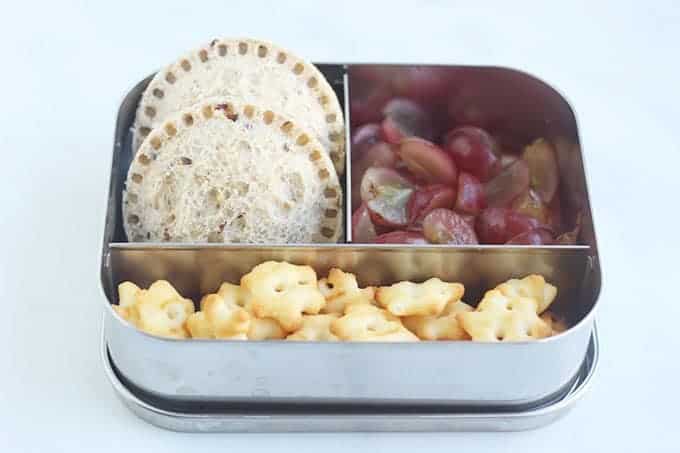
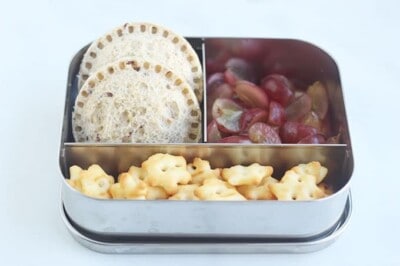
(The stainless-steel lunch box shown here is from Lunchbots. It’s a great size for a younger toddler.)
Table of Contents
Sanity-Saving Kids’ Lunch Guide
Best gear, recipes, tips, and more, delivered right to your inbox.
Wait—What’s an Uncrustable?
If you’re new to this term, an Uncrustable is a PB&J sandwich, without crusts, that Smuckers has made for us and sells in a box in the freezer aisle. So handy! But they’re also so easy to make at home, they’re usually less expensive, and this DIY option has more variations available to suit our kids than the boxed variety.
(I totally understand buying them for convenience, though.)
They’re one of our favorite vegetarian lunch ideas.
(You may also like my Pizza Uncrustables or Broccoli Muffins.)
Ingredients You Need
To make these sealed crustless sandwiches, you’ll need to have the following ingredients on hand.
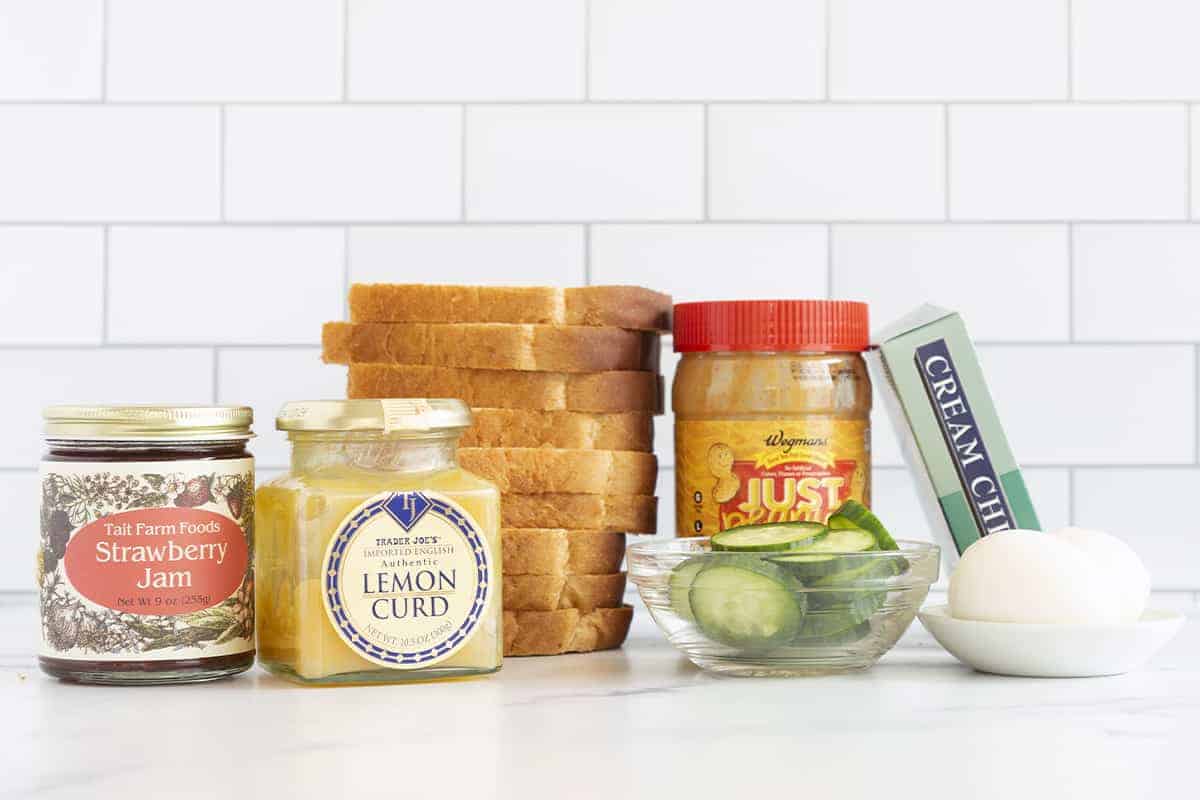
- Bread: This works best with a soft sliced sandwich bread. I usually use whole wheat store-brand sandwich bread. It will not work as well with an artisanal loaf.
- Filling such as PB&J, jam, sunflower seed butter and jam, or even cream cheese and jam
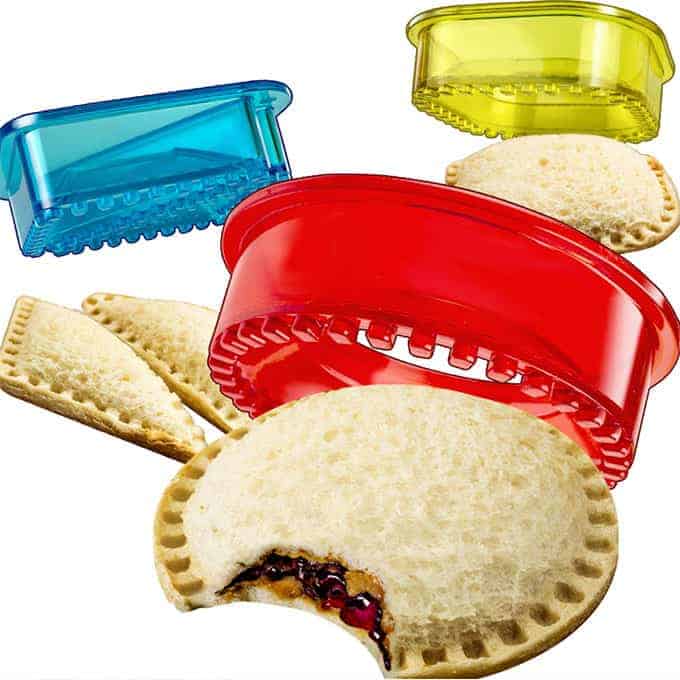
- Sandwich Sealer or a fork and a round cookie cutter
TIP: I’m going to show you how to make them with both a Sandwich Sealer and a fork. I think the sealer method is easier and seals them more firmly, but a fork works, too, if that’s what you have.
Step-by-Step Instructions with a Sandwich Sealer
Here’s a look at how to make these kids’ sandwiches using this handy tool.

- Use a Sandwich Sealer to press the outer round down to cut rounds from a stack of two pieces of bread. If the bread is at all dry, warm it briefly.
- Add your fillings to one side of the bread.
- Assemble the sandwich.
- Put the round back around the bread, then press down with the smaller insert to crimp the edges. If it’s not sealing well, flip the sandwich over and press it again.
TIP: You can find these sealers in all shapes and sizes, so read the description to make sure it’s not too giant! This is the one I have.
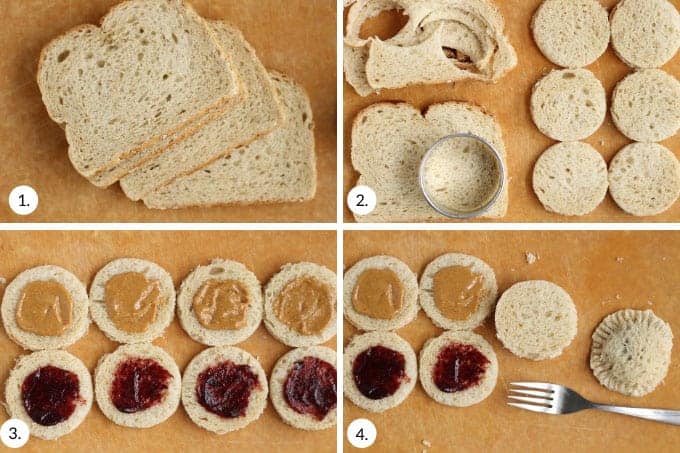
Step-by-Step Instructions with a Fork
If you don’t have or want a sealer, I get it. Here’s how to make these using a fork. Scroll down to the bottom of the post for the full information.
- Place your bread on a cutting board.
- Cut out rounds using a cookie cutter.
- Add fillings in the center.
- Assemble sandwiches, then use a fork to crimp the edges of the bread together, pressing hard.
TIP: This works best if the bread is warmed up slightly. I usually do 5-10 seconds in the microwave.
Filling Ideas for Uncrustables
There are so many options but these are my favorites:
- PB&J
- Sunflower seed butter and jam
- Apple butter and nut or seed butter
- Apple butter
- Jam
- Cream cheese and jam
- Chia seed jam
- Turkey and cheese
- Hummus
- Thinly sliced hard-cooked egg
- Lemon curd
- Sweet potato puree and almond butter
TIP: You could even try another savory filling if you wanted to get more creative. Just try not to overfill the bread to avoid the sandwich bursting.
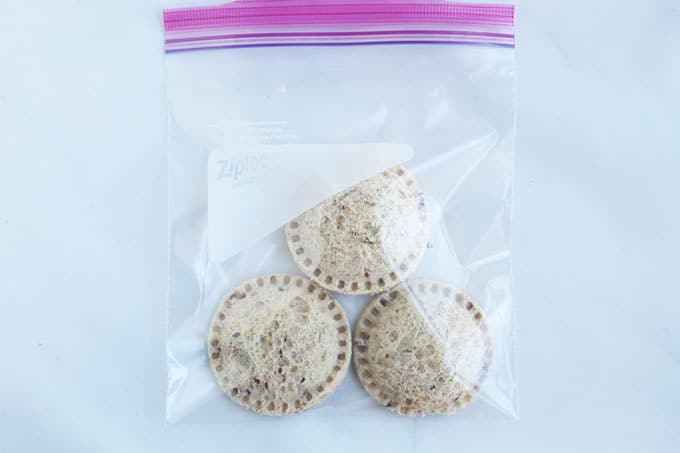
How to Store in the Fridge or Freezer
You can serve these sandwiches for kids right after making or store in an airtight container or lunch box overnight. Or, add to a freezer bag and freeze the sandwiches for up to 3 months. Try to remove as much air as possible from the bag, which will help them from getting any ice crystals.
You can also wrap each one in plastic wrap to help ensure they stay super fresh, then freeze in a freezer bag.
product we love
This sandwich sealer makes homemade Uncrustables a cinch to make.
Best Tips for Success
- Try filling such as PB&J, jam, sunflower seed butter and jam, or even cream cheese and jam. Or go savory with turkey and cheese.
- I prefer to use soft whole wheat sandwich bread. I typically buy store brand. (This works best with a soft sandwich bread, not an artisanal-style loaf.)
- I find the bread seals best if it is warmed up slightly. I usually do 5-10 seconds in the microwave.
- Sandwich sealers come in all shapes and sizes, so read the description to make sure it’s not too giant! This is the one I have.
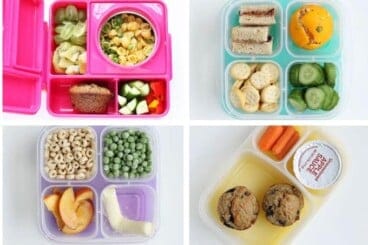
- Pack or serve for lunch with simple sides like fruit, crackers, cheese, or veggies. Find more lunch snack ideas, too.
- Gluten-free: Use a favorite soft gluten-free bread.
- Nut-free: Use sunflower seed butter in place of peanut butter.
- Use crusts in this French Toast Casserole. Or fry eggs in them!
Related Recipes


If you try this kids sandwich idea at home, please let me know how it goes below by leaving a comment and a rating!
Easiest Homemade Uncrustables
Ingredients
- 8 slices soft whole grain bread
- About 1-2 tablespoons filling of choice such as PB&J jam, sunflower seed butter and jam, or even cream cheese and jam. Or go savory with turkey and cheese.
- Sandwich sealer or fork
Instructions
- To make with a fork: Warm the bread in the microwave briefly for about 5 seconds. Place your bread on a cutting board. Cut out rounds using a round cookie cutter (3-4 inches is usually a good size). Add your fillings, leaving some space around the edges of the bread so the filling doesn’t seep out. Assemble sandwiches, then crimp the edges of the bread together with a fork, pressing hard.
- To make with a Sandwich Sealer: Warm the bread in the microwave briefly for about 5 seconds. Stack two pieces of bread and press the outer round down to cut rounds. (Or according to the directions of the sealer if you use a different kind than I have.) Add your fillings, leaving some space around the edges of the bread so the filling doesn’t seep out. Put the round back around the bread, then press down with the smaller insert to crimp the edges.
- Serve or freeze for later.
Notes
- You can serve them right after making or add to a freezer bag and freeze for up to 3 months. You can also wrap each one in plastic wrap to help ensure they stay super fresh, then freeze in a freezer bag.
- To pack a frozen sandwich, simply place it in a lunch box in the morning and it will thaw by lunchtime.
- Try filling such as PB&J, jam, sunflower seed butter and jam, or even cream cheese and jam. Or go savory with turkey and cheese.
- I prefer to use soft whole grain sandwich bread.
- I find that the bread seals best if it is warmed up slightly. I usually do 5-10 seconds in the microwave.
- Sandwich sealers come in all shapes and sizes, so be sure to read the description to make sure it’s not too giant! This is the one I have.
- Pack or serve for lunch with simple sides like fruit, crackers, cheese, or veggies.
- To use the leftover crusts, cut into smaller pieces and serve with a dip, use in a French Toast casserole, or use in Baked French Toast.
Nutrition
This post was first published August 2020.


This recipe has saved us money and it’s a fun cooking project to do together. I am glad to be rid of the preservatives and plastic in packaged uncrustables and the kids are excited to crimp the edges and make a copycat food themselves.
Really random question but if you’re only making say one sandwich per day for a school lunch, how do you store the bread crusts for when you’re ready to use them? On the counter in a ziplovk bag? Fridge? Freezer? Just worried they’ll go moldy in the bag on the counter and don’t know how long the leftover pieces will be good for like that?
I add them to a freezer bag as I make the sandwiches, then when the bag is full, I use them for French toast casserole.
What store brand bread is this? It’s nice you can get two circles from each slice!
That was a local Hyvee storebrand, using the smaller of the sandwich sealer sizes.
I make these all the time to stash in the freezer for my son and myself! I don’t have a sealer or a circle cookie cutter but I use a large rimmed glass to cut them out after assembling! I just make sure to put the filling only into a circle on the center of the bread, then I put the second piece of bread on top and stamp the circle out with the glass rim. With a little twisting the edges of the bread seal. Works great for me!
I make these all the time to stash in the freezer for my son and myself! I don’t have a sealer or a circle cookie cutter but I use a large rimmed glass to cut them out after assembling! I just make sure to put the filling only into a circle on the center of the bread, then I put the second piece of bread on top and stamp the circle out with the glass rim. With a little twisting the edges of the bread seal. Works great for me!
I just got the recommended sandwich sealers and have been using the smaller triangle cutters for my 2-year-olds. They love it!
The only way my toddler will eat a sandwich at this point! Best way to introduce him to PB&Js. My technique is totally off thought — even if I cut them first and limit the filling, they don’t look nearly as beautiful as Amy’s. What am I doing wrong?
Maybe make sure to try a soft sandwich bread (versus a heartier grain bread) and warm it for 5 seconds first? Sometimes people have more success if you seal it on one side, then flip it over and seal it again. I hope that helps!
Do you mind sharing what brand of bread you typically use? I’ve got the same sandwich cutters and am having difficulty finding bread large enough.
If you look in the sandwich aisle, brands like Orrowheat or Brownberry make whole grain or oatmeal breads that should be plenty big enough. At least in my experience!
I use Dave’s Killer whole wheat and it’s big enough.
Why on earth would you feed these to kids?
No wonder the US had an obesity crisis!
How is a sandwich with whole grain bread and a protein filled nut butter causing the “obesity crisis”? That’s an uninformed statement at best.
I’m going to try these for my toddler! But what do you do with the leftover bread?
I typically give it to her little brother (who doesn’t seem to mind the crusts!). You could use it to make breadcrumbs or French Toast sticks though.
Thank you so much! I have made this so many times since you posted it and my kiddos love it. And I just made a batch for my sister who is a new mom to have as grab ’n’ go postpartum snacks!!
I’m so glad and that is SUCH a great postpartum snack idea!
I saw this on your Instagram and cannot wait to try! I have a 3 inch biscuit cutter I am going to try first with a fork. I really want to order that cutter, so cute! I am always looking for easy lunch ideas that my toddler will find fun to eat. I LOVE that these can be frozen. I am going to prep a bunch of these tonight and keep for future lunches. Thank you for another great idea!