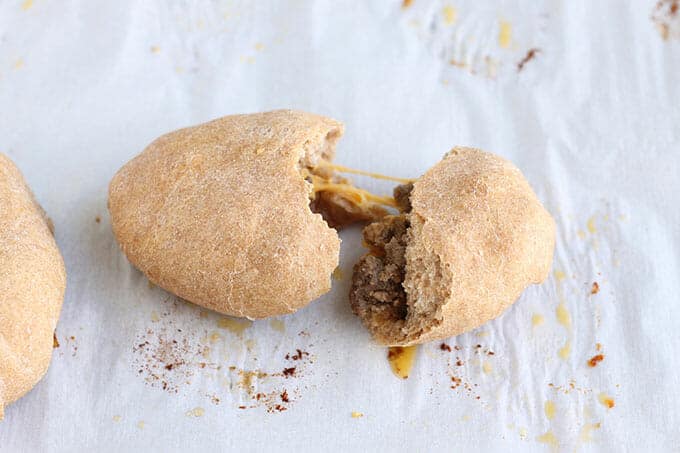
These Cheesy Meat Buns are a favorite make-ahead meal. The meat rolls are basically a cheeseburger tucked inside of a bun, so they are super easy for kids to eat!

When my middle kiddo was a toddler, she wasn’t a huge fan of the texture of meat. So I tried to find ways to help her enjoy it with easy to eat options—because I know the importance of iron-rich foods for kids—including this dinner recipe with hamburger meat which she still loves.
Quick Look: Cheesy Meat Buns
- Prep Time: 1 hour 15 minutes
- Cook Time: 28 minutes
- Total Time: 1 hour 43 minutes
- Serving: 8
- Flavor Profile: Tender ground beef with herbs and cheese inside fresh bread
- Difficulty: Easy, perfect for everyday dinners and meal prep
- Why to Make: It’s an easy-to-eat meal all in one
SUMMARIZE & SAVE THIS CONTENT
Table of Contents
The bread here is super soft and the meat and cheese are moist, which makes them easy for toddlers to chew. They have similar flavors to my Cheeseburger Pasta and are an easy hand-held toddler dinner.
Why This Recipe Works
An easy homemade dough surrounds browned ground beef and cheese for a Meat Bun that is similar in flavor to a cheeseburger, but way easier for little kids to eat.
This is a great freezer meal for new moms or an easy weeknight dinner for family to share since they store and reheat so well.
(You may also like my Pizza Rolls and Zucchini Burgers.)
Ingredients You Need
To make this Cheesy Meat Buns recipe, you’ll need to have the following ingredients on hand and ready to go.
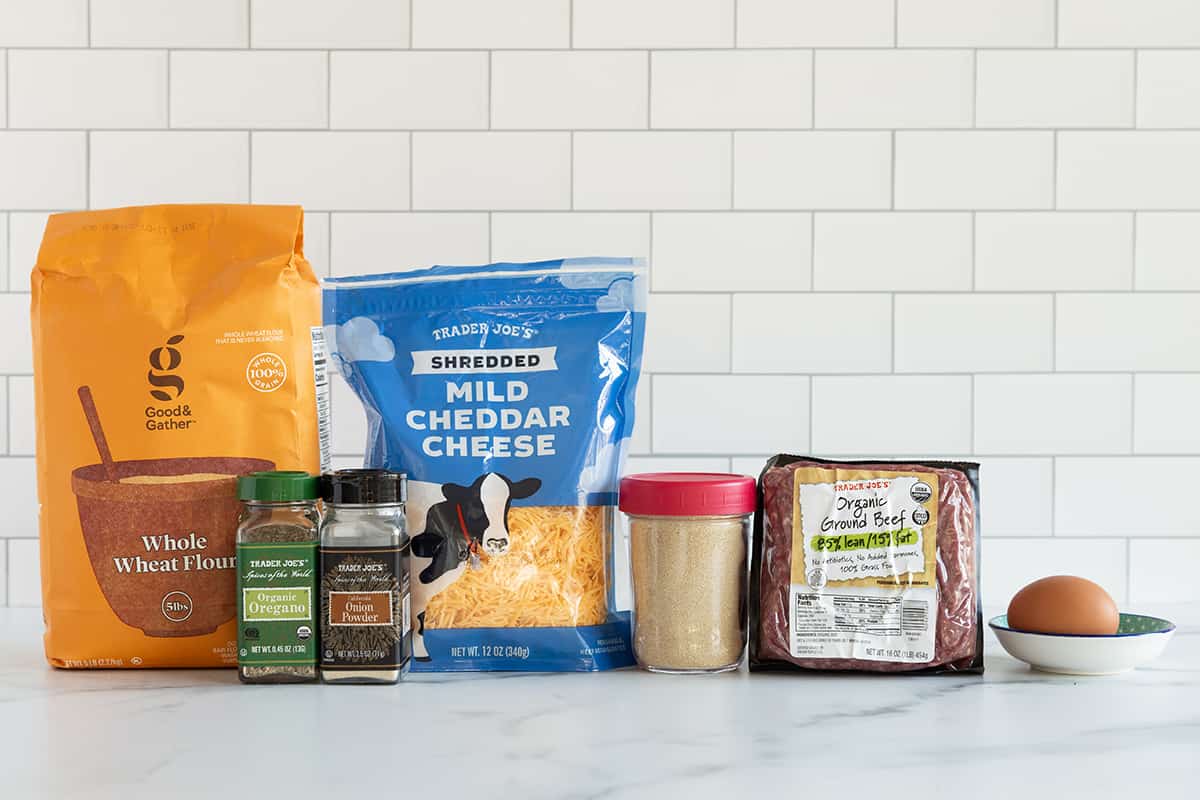
- Instant yeast: This works quickly and helps the dough to rise. You’ll want to look for little bubbles or for the mixture to look foamy when you add it to the water.
- Sugar (or honey): Either of these helps to activate the yeast.
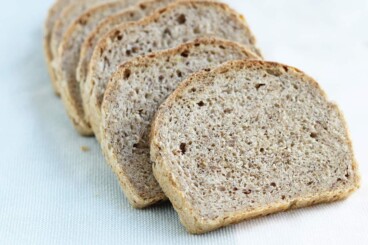
- Whole wheat flour and all-purpose flour: A mixture of the two help the dough both have some whole grain and also still be tender and fluffy.
- Egg: Adding egg to the batter ensures that it’s soft and tender. (If there’s an egg allergy, you can omit it. Just be sure to knead the dough well.)
- Olive oil: Olive oil in the dough also helps add moisture and tenderness. I use extra-virgin olive oil in my cooking.
- Ground beef: I cook the beef with spices before adding it into the dough to ensure that it’s properly cooked. You can use any percentage fat of meat you like. If you see a lot of fat or liquid in the pan once the meat is cooked, you can drain it off.
- Oregano, onion powder, and salt for added flavor.
- Shredded cheddar cheese: This goes inside the bun with the seasoned meat for flavor and comfort.
Featured Review ⭐️⭐️⭐️⭐️⭐️
“Delicious! The dough was soft and stretchy, almost pillowy. I really enjoyed these. My kids did too!” —Jen
How to Make Cheesy Meat Buns
Here’s a look at the process involved in making these Cheesy Meat Buns. Scroll down to the end of the post for the full recipe, including the amounts and timing.

Step 1. Make the dough and let it rise for at least an hour. Brown the meat. Cut the dough into portions. Flatten each into a disc and top with a little meat and cheese.

Step 2. Fold the dough over the filling.
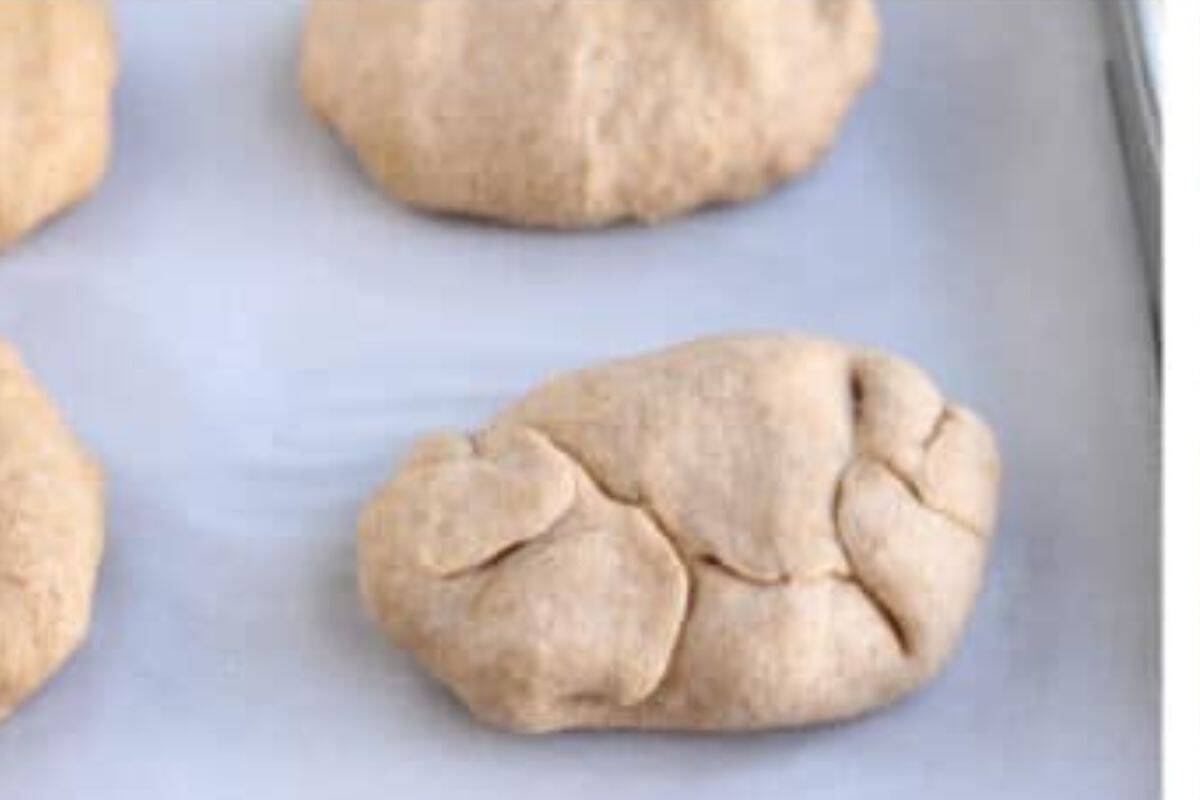
Step 3. Fold the dough over again to completely close the bun.
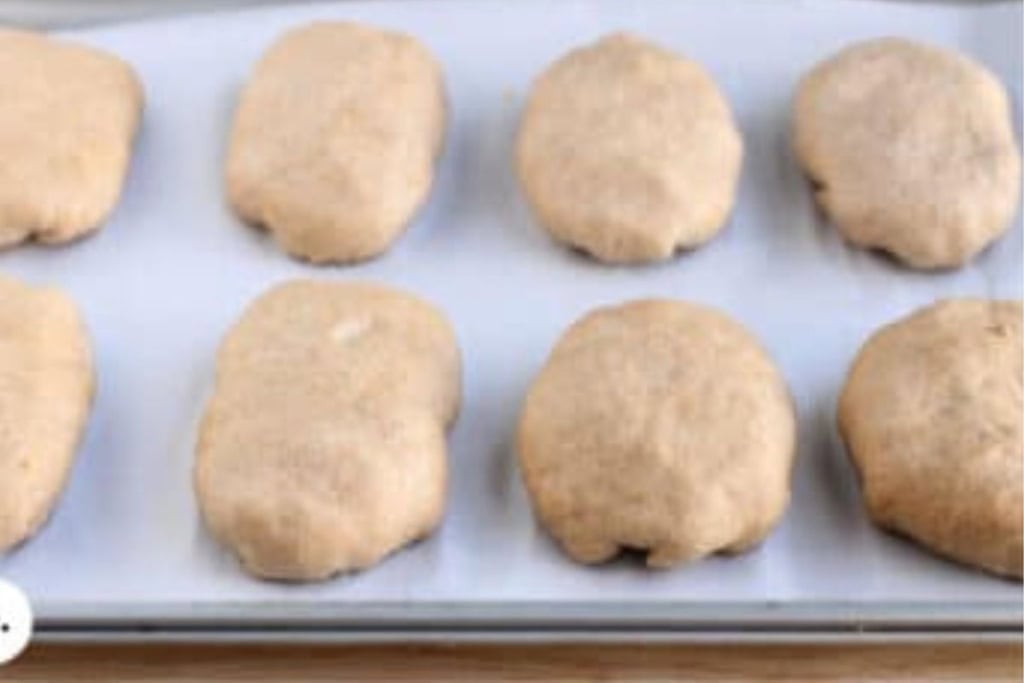
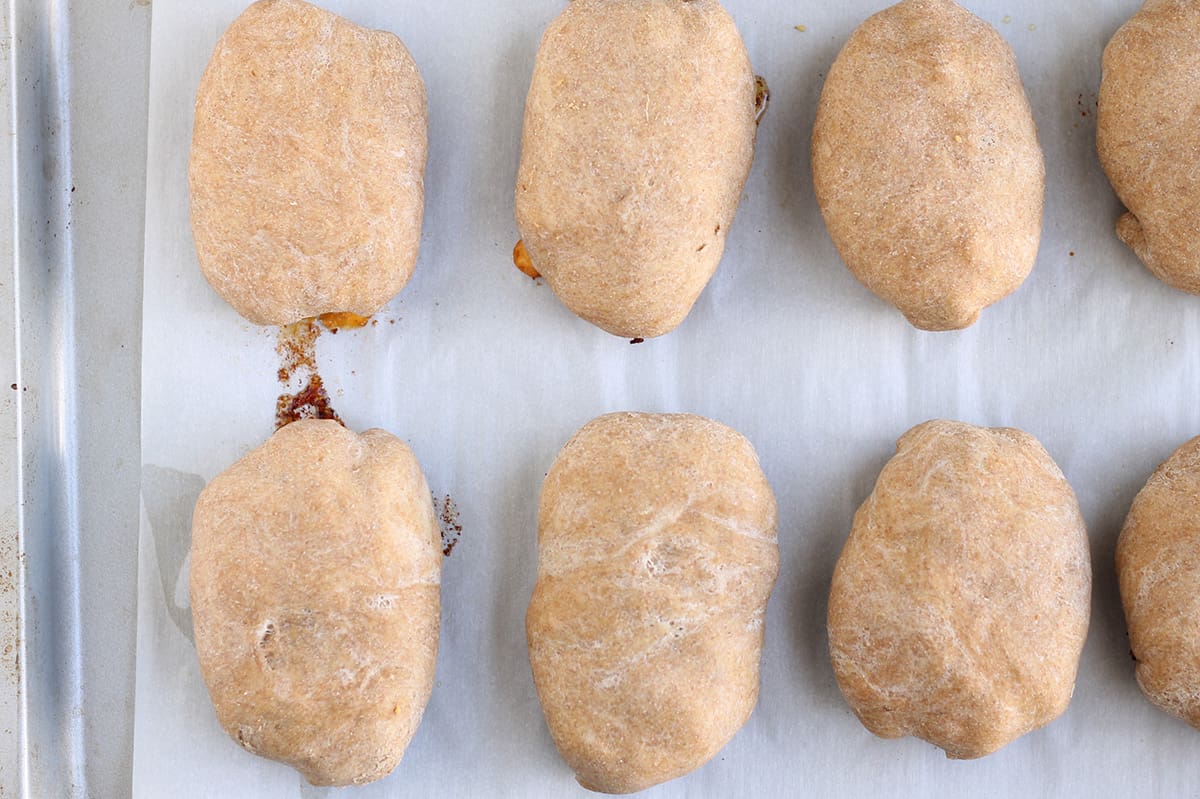
Step 4. Place crease side down on a parchment-lined baking sheet. Bake!
TIP: These reheat really well, so they’re great to make ahead and warm up for a quick meal.
Your toddler won’t eat? Help is here!
Sign up for our email updates to get tips and ideas sent your way!
Cheesy Meat Buns FAQs
I make this recipe whenever we have a night coming up on our calendar that’s busy and when I know I won’t have time to make dinner in the moment. I store these in the fridge and then simply warm them in the oven or microwave. You can also freeze them, once fully cooled, in a zip top freezer bag, and warm them quickly.
They are just as good reheated as when freshly cooked, which is a must with make-ahead dinners!
They can either pick one up and bite it like a roll or you can cut the whole thing into smaller pieces for easier chewing.
They are best when you make the dough from scratch and it gets kneaded well. That, plus the egg, ensures that the baked bread is super soft, which is key when serving these to toddlers who are still learning to chew complicated textures.
BUT, you can definitely make these with purchased (or homemade) whole wheat pizza dough to take a shortcut. The bread will be slightly less tender, but they are still pretty delicious.
Best Tips for Success
- Poke the top of each bun with a fork to allow steam to escape and minimize the amount of cheese that leaks out.
- Add some finely chopped baby spinach, kale, or steamed broccoli florets to add a veggie into the mix.
- Try not to overfill the buns to ensure that they hold together.
- Cook the ground beef up to 3 days ahead and store in an airtight container in the fridge if desired.
- Swap in ground turkey or chicken if desired.
- To make these egg-free, you can use egg-free pizza dough or omit the egg from the recipe and add 1-2 tablespoons additional water.
More Easy Toddler Meals


I’d love to hear your feedback on this recipe, so please comment below to share!

Cheesy Stuffed Meat Buns
Ingredients
- 2¼ teaspoons instant yeast
- 1 teaspoon sugar (or honey)
- 2 cups all purpose flour
- 1 cup whole wheat flour
- 1 egg
- ½ teaspoon salt
- 1 tablespoon olive oil
- ½ pound ground beef
- 1 teaspoon oregano
- ½ teaspoon onion powder
- 1½ cups shredded cheddar cheese
Instructions
- Stir the yeast and sugar into 1 cup warm water. Let sit for 5 minutes or until puffy.
- Add the flours, salt, egg, and water-yeast mixture to the bowl of a stand mixer fitted with a dough hook. Mix on medium-low for 10 minutes. Remove dough hook. Cover with a clean towel and let rise for 1-2 hours or until about doubled in size. It should look puffy.
- Heat the olive oil in a medium skillet. Add the beef and stir to break. Sprinkle with a little salt, add the spices cook for 8-10 minutes or until fully cooked through. Remove from heat.
- Divide the dough into 8 even sections. (I use a paring knife to cut it in half, then in half again and again, to make a pinwheel shape with 8 even triangles.)
- Working with 1 piece of dough at a time, coating with flour as needed if sticky, flatten into a disc that's about 6 inches wide. (It doesn't need to be precise!)
- Place 2 heaping tablespoons each of cooked meat and cheese into the center and fold in the dough to enclose the fillings. The seams should press and hold together with slightly pressure and a little gentle pressing.
- Place roll onto a parchment-lined baking sheet and repeat to make all 8 buns. Set aside and cover with a towel while the oven preheats.
- Preheat the oven to 400 degrees F. Bake the buns for 20-22 minutes or until firm to the touch. Let cool slightly and serve warm.
Equipment
Notes
- Shortcut Dough: Use my Greek Yogurt Pizza dough (or store bought) in place of homemade dough for an option that requires no rise time.
- To store: Let cool fully and store in an airtight container in the fridge for up to 5 days. Reheat for about 30-45 seconds in the microwave or about 6 minutes in a 375 degree F oven. Freeze fully cooled meat buns in a zip top freezer bag for up to 3 months. Reheat in a 375 degree F oven for 8-10 minutes or until warmed through.
- Egg-Free: Omit the egg and add 1-2 tablespoons additional water.
- Dairy-Free: Use dairy-free shredded cheese.
- Poke the top of each bun with a fork to allow steam to escape and minimize the amount of cheese that leaks out.
- Add some finely chopped baby spinach, kale, or steamed broccoli florets to add a veggie into the mix.
- Try not to overfill the buns to ensure that they hold together.
- Cook the ground beef up to 3 days ahead and store in an airtight container in the fridge if desired.
Nutrition
This recipe was first published April 2018.


These turned out so delicious that I’m planning to make them for dinner for the whole family! I prepped a bunch and put them in the freezer as an easy to grab meal for my toddler.
Do you think I can use your Greek yogurt pizza dough for these?
My grandson loves these. A question on the recipe. When you click on 2x or 3x recipe the amount of water for the yeast and sugar still is only 1 cup. Should the water not increase as well?
Oh it should, I’ll see if I can fix that!
Delicious! The dough was soft and stretchy, almost pillowy. I really enjoyed these. My kids did too!
I actually made 16 buns instead of 8.
Thank you!
I only have active dry yeast. Could I adjust the recipe to make that work instead of instant?
Yes, the instructions will work fine for that type too.
I am out of whole wheat flour, can I sub with more AP or bread flour?
You can use bread flour, that will be great. Enjoy!
Hi Amy, Could you write a new recipe with this but make the filling for BREAKFAST?
This recipe is soooo good!
Great! Kid approved! My 2 year old is in his especially picky stage, but he loved his little bun.
I used my own pizza dough recipe and didn’t let it rise for any amount of time but it still worked great. Instead of being little pillows they were little pockets. A bit less bready but still delicious. I used mozzarella instead of cheddar – I had pizza on the brain. I realized my mistake later but the buns are still great! I added some shredded raw spinach as I filled them. I will make this again and try cheddar next time with broccoli as my veg.
We dipped ours in some warmed up pizza sauce.
Is it possible to use all all purpose flour? We’re out of whole wheat at the house.
I just made these and like them but found the dough bland. I’ve just noticed there’s no salt in the ingredients but in the method you mention salt…This is likely the culprit! How much salt for next time?
1/2 teaspoon!
My husband and I LOVED the bread from the homemade dough in this recipe and it made some tasty cheesy buns! However, our 2.5 year old did not even want to taste them even though she normally loves bread and happily eats hamburger meat + cheese. Any suggestions?
I don’t have a stand mixer or dough hook – what can I do instead? I have a hand mixer and a food processor.
You can knead briefly with your hand.
When doubling the dough recipe, do I double the amount of water as well?
Yes.
Made these today and they are lovely but I’m having real trouble getting my son (3) to eat any kind of meat. Any suggestions on what recipe to try next?
We especially loved the dough in these! And it was so easy. Do you have any other recipes that use this dough?
You could use the dough to make Pizza Bites: https://www.yummytoddlerfood.com/pizza-bites
This was a fast and easy recipe! I used store bought pizza dough to save time and filled mine with ground beef, corn, and cheese. My 1yr old loved them. I love how versatile this recipe can be with fillings. Definitely adding to the rotation.
Can you use sausage instead of beef?
Sure, just drain the pan at the end of cooking if needed
Dough turned out perfect. Came out hard on top out of oven, but brushed with melted butter and it turned out soft. Made cheeseburger filling. Can’t wait to try other fillings.
This was super simple and my 2 y/o approved. I used Trader Joe’s pizza dough and subbed turkey meat because that’s what we had and it came out beautiful. A nice basic recipe that you can adjust to your preferences and what you have in your pantry. Will definitely use recipe again and try different fillings.
How far ahead can I make the dough? Is it okay to let it refrigerate overnight?
You could make it the day before and store it in a bowl covered in plastic wrap or a big container. You’d just want to take it out and let it sit at room temperature for about an hour so it’s soft enough to work with
The crust on mine got really thick and hard. The dough underneath was nice and soft but it was tough to bite through the outside crusts. Anyone else’s have that issue? Any tips? I followed the recipe as written, but used a bread machine to mix instead of a stand mixer.
Is it possible that the difference is simply from the bread machine vs the stand mixer? I haven’t made them any other way than written so I’m not sure how that might change things…
The dough was flavorless (I made 24). I started rechecking the recipe to figure out why and realized the directions read: “Add the flours, salt, egg, and water-yeast mixture to the bowl of a stand mixer fitted with a dough hook.”
Rereading the ingredients and there’s no salt called for in the dough portion (only in the meet filling portion). Can you share how much salt is supposed to be added to the dough?
The 1/2 teaspoon salt is meant for the dough. Then “sprinkle with salt” in the step with the meat filling. Apologies if that was confusing.
I’m shocked that my very picky 2 year old is eating this!!!! She will barely eat Mac and cheese these days. I’ve tried many toddler friendly recipes and they all end up on the floor. I ate one and found it a little bland but that’s probably why she loves them. There’s so much room to spice up or season the meat too as tastes (hopefully) evolve. Thank you for helping me feed my kid something other than Cheerios. I am truly grateful <3
I’m so glad she likes them! And yes, you could totally take the flavorings up a notch too.
These look great!
Could I use only all-purpose flour? I know this wouldn’t be as healthy, but sometimes it’s all I have around. Would it change the baking time? Thanks!
Yes, that will work!
I would love to make these but our family is gluten free. Can I just substitute gf flour? Thank you!
I haven’t found a gf flour that holds it’s shape well enough to use it in this recipe, I’m sorry!
Have made these a few times and made some changes to subsequent versions.
For the dough on subsequent attempts, I added 1/2 tsp salt and 1 tbsp of oil. I make the dough the way America’s Test Kitchen does it – flour (11 oz bread, 5.5 oz whole wheat), yeast, salt into the stand mixer. In a liquids bowl, combine the water, sugar or honey, olive oil and egg and whisk then add the liquids into the stand mixer.
For the filling on subsequent attempts, we made a chinese filling version – minced meat with veg (kale, carrots, onions, chives, garlic) with soy sauce, hoisin sauce and ketchup and then we made a cheeseburger version (minced meat with veg seasoned with salt, basic seasonings and then later mixed with some ketchup and shredded cheese)
The first versions were too big for our family (kids aged 3,5,8) so next versions I cut dough to 12 pieces. Made 6 with the chinese filling, 6 with cheeseburger filling.
I changed up the filling method too because the first version had this lopsided bready side that was unappealing. Subsequent versions are made more chinese bao style. Fillings in the middle and pleat/pinch the edges as you push dough in with your thumb so you have sort of a swirl pattern on the seam side.
Also brushed the buns with an egg wash because the first version was kind of unappealing looking without the shiny top. Sprinkled furikake on the chinese versions and sesame on the cheeseburger versions.
Baked for 20 minutes at 400 degrees like the original recipe.
Both versions were big hit in the family. we tried it the next day too and microwaved it for like 15 seconds and they were perfect.
This is a great recipe with lots of potential. The dough is super soft and very yum.
Thank you for great lunch option for my kids’ lunches!
Thanks for the feedback and I love the sound of your variations!
Hi! That sounds like a very interesting recipe! Would love to make it for my 20 month old toddler. I was wondering if I could use the same quantity as specified in your recipe to make smaller buns (perhaps 16 mini-cheesy meat buns instead of 8!). I don’t want to double the recipe, but to just reduce the size of the buns. How do I adjust the baking time if I do so?
Thanks!
Hi! The baking time would likely be similar if you make them smaller, but you could check them 2-3 minutes sooner. Another option is to make them as the recipe states and then simply cut them in half. That’s what we do so my toddler gets a half and the rest of the family has a whole one. Either way should work!
Made these last night and they were a hit! Served (for the grown-ups) with a side salad and mustard vinaigrette–because what goes better with a burger? Quick question: Do you reheat directly from frozen or thaw first?
Yay! You can do either. If you thaw them, they’ll warm faster, but I did them from frozen last week and did 12 minutes at 375 and they were perfect.
These were delicious! My family loved them. We shaped the dough like pigs to make “ham”burgers, and the children really enjoyed that. Thanks for a great recipe!
So cute!
What would you substitute for the cheese if there’s a dairy allergy?
It would be okay to just leave it out!
So simple, and so great! My kids AND my husband loved them. We added more spices and chopped up pickle. Will definitely be making these again!
Oh, I love the idea of adding pickle!
How do you not get so much dough on the bottom of the bun?! Great flavor, but most of the filling was at the top and a lot of dough where I closed the pocket.
Thanks!
Spread the dough piece out a bit more so it’s flatter and more even would be my suggestion.
Made these tonight but took the shortcut and used Trader Joe’s pizza dough. They were great and the whole family approved, including our sometimes “selective” 5-yr old and 19-month old! Excited to try them with the scratch dough when we have more time. Thank you, Amy, for another great recipe!
Hooray! I’m so glad that everyone enjoyed them!
These look great! Do you think I could use Pillsbury biscuit dough for these? I can also buy pizza dough at my supermarket, but i’m not sure how the size they sell matches up to the size of your scratch recipe.
If you buy a standard pizza dough ball (which will be 13-16 ounces in most cases), that will work well with this. I haven’t tried it with biscuit dough so I’m not sure if the baking time would be the same but I bet it would taste delicious!!
I’m making theae but don’t have a mixer so I’m doing it by hand. Any tips? I’m kneading it like I do for bread but I’m worried it won’t get enough air to make it light. Also, I’m doing the egg-free version.
I’m sorry that I was away on vacation when you asked this. I hope it turned out okay. Generally, kneading by hand for 5-10 minutes should work just fine!
My 4 year old who isn’t always a meat fan inhaled 2 of these! The 10 month old was happy to gnaw on a piece of his own. They were great, I’d like to try adding peppers and onions next time.
This will also make a great grab and go dinner on nights she has dance class!
Yay, thanks for letting me know how they went over! And I love the idea of adding peppers and onions—that would be yummy!