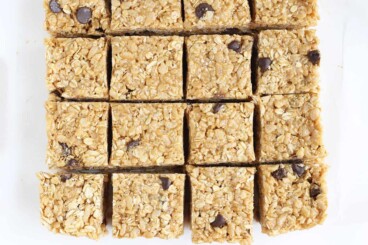
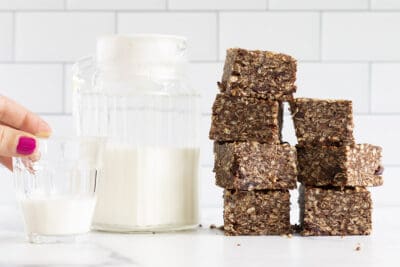
With just a handful of flavorful ingredients (including chocolate and peanut butter), these crispy no-bake Chocolate Granola Bars are delish as a snack or dessert. They take about 10 minutes to make and you can store them in the fridge or freezer for weeks.
Made with rolled oats, crispy rice cereal, peanut butter, chocolate and more, this recipe is a cinch to mix together and set up. And the texture is like a rice krispie treat, only with more flavor and substance. These are seriously delish and also super satisfying—a perfect easy snack to make at home to keep us fueled!
Along with my Fruit and Nut Bars, these chocolate granola bars are one of my go-to homemade snack recipes to make for friends when they have a new baby in the house or to make when I’m trying to stock up with freezer meals. They’re also great to take hiking or camping with kids.
The great thing about this recipe is that you simply stir the ingredients together, let it set, and slice up the bars. No cooking required. (And you can safely taste the batter, just like with my Bliss Balls, Peanut Butter Oatmeal Energy Balls, No-Bake Chocolate Peanut Butter Cookies, Edible Cookie Dough, and No-Bake Chocolate Balls.)
Table of Contents
Your toddler won’t eat? Help is here!
Sign up for our email updates to get tips and ideas sent your way!
Ingredients You Need
To make this easy no-bake Chocolate Granola Bar recipe you’ll need to have the following ingredients on hand.
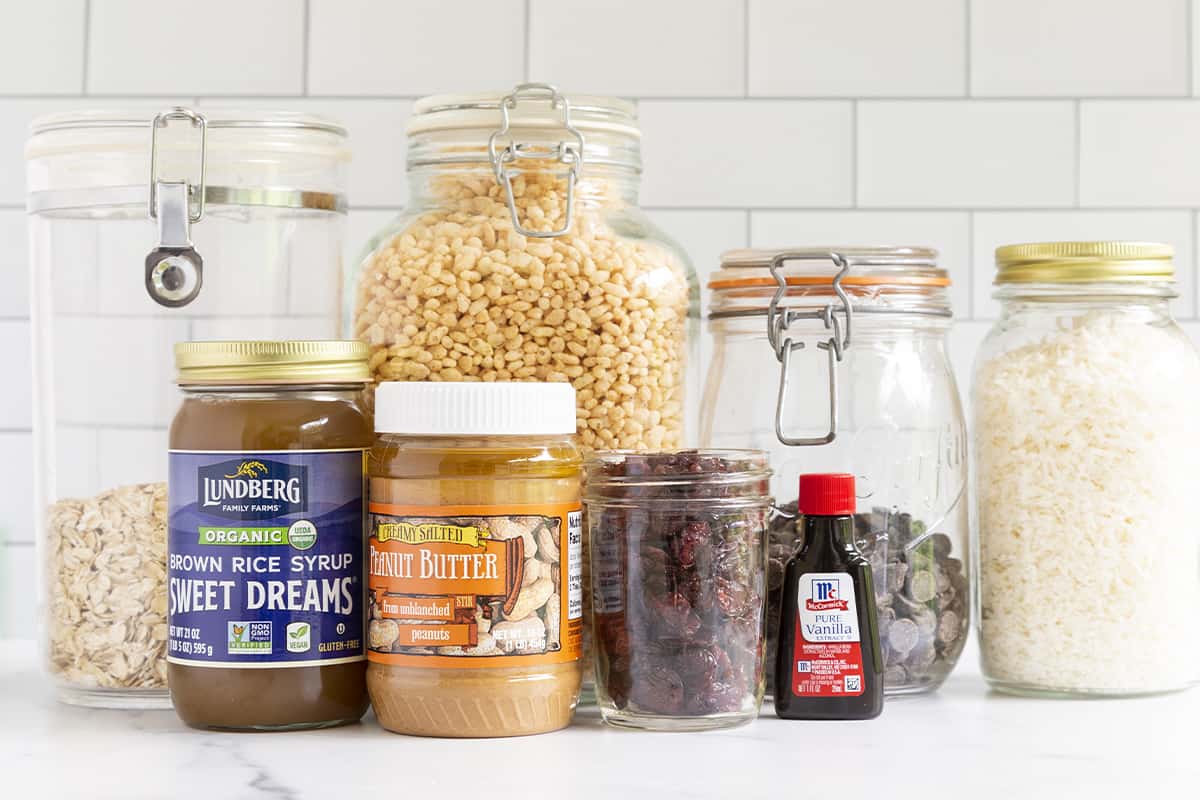
- Rolled oats: These oats add fiber and whole grains, and soften in the rest of the mixture.
- Crispy rice cereal: Rice Krispies or a store brand work the same.
- Chocolate chips: Semi-sweet or dark chocolate chips work well here.
- Unsweetened natural peanut butter: Brands like Smucker’s Natural or Teddie’s work well here. (I am sure a regular creamy peanut butter will work if that’s what you have.)
- Brown rice syrup: I use this syrup in my no-bake granola bars since it’s stickier than honey, so it helps the bars hold together really well. It’s also less sweet tasting, which is nice since there are other sweet ingredients here. It’s usually sold near the agave or you can order it on Amazon. One jar will make two batches of these bars.
- Dried cherries or raisins: I love this with dried cherries, but raisins work too. You can also skip this addition if you want to simplify.
- Shredded unsweetened coconut: I like the flavor this adds, so I sometimes use some in place of ½ cup of the oats, but that’s optional. Otherwise you can skip it.
TIP: You can use honey in place of the brown rice syrup. The bars won’t hold together quite as well, so be sure to store them in the fridge and serve them very cold for best results.
Step-by-Step Instructions
Here’s a look at the process involved in making this chocolate granola bar recipe for your family. Scroll down to the bottom of this post for the full information.

Step 1. Add the chocolate chips, peanut butter, and brown rice syrup to a big heat-safe bowl.

Step 2. Warm in the microwave. Stir to melt the chocolate.

Step 3. Add the dry ingredients to the bowl with the chocolate mixture. Stir with a wooden spoon, transitioning to using your hands when it’s hard to mix. Mix the ingredients well to form a uniform batter. It may take a minute or two.

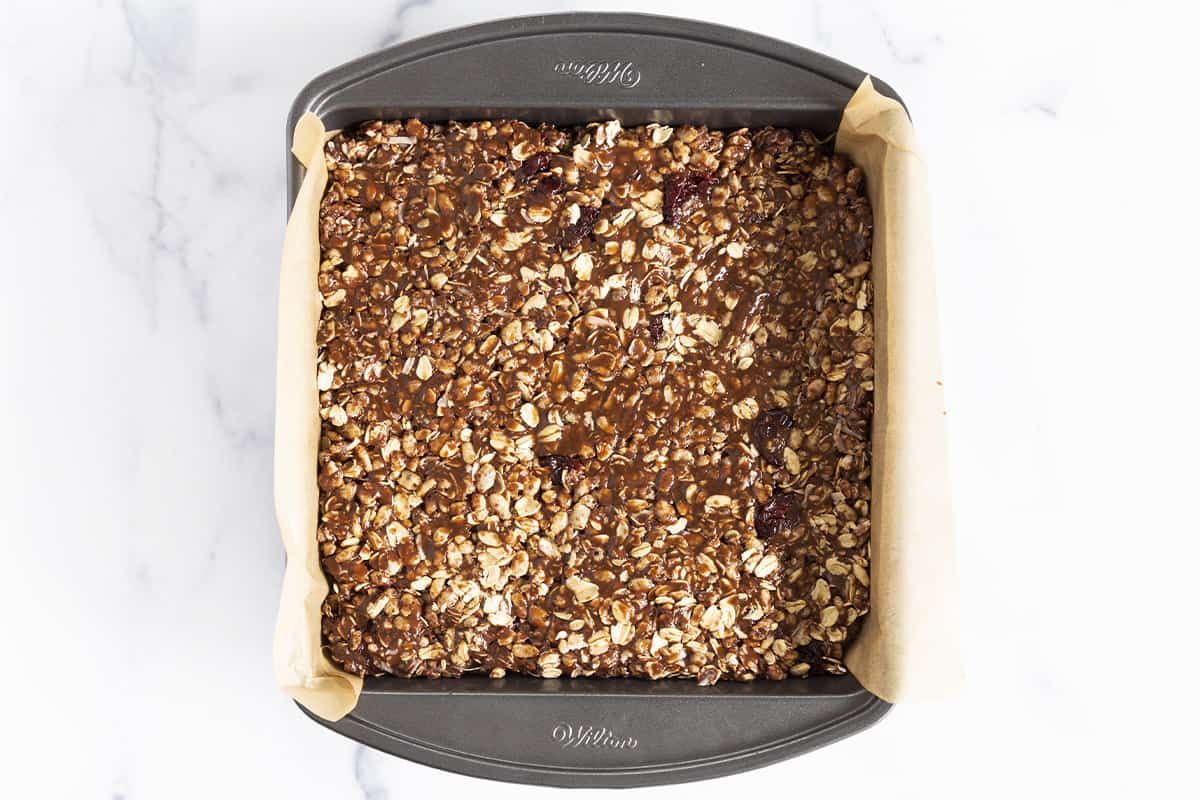
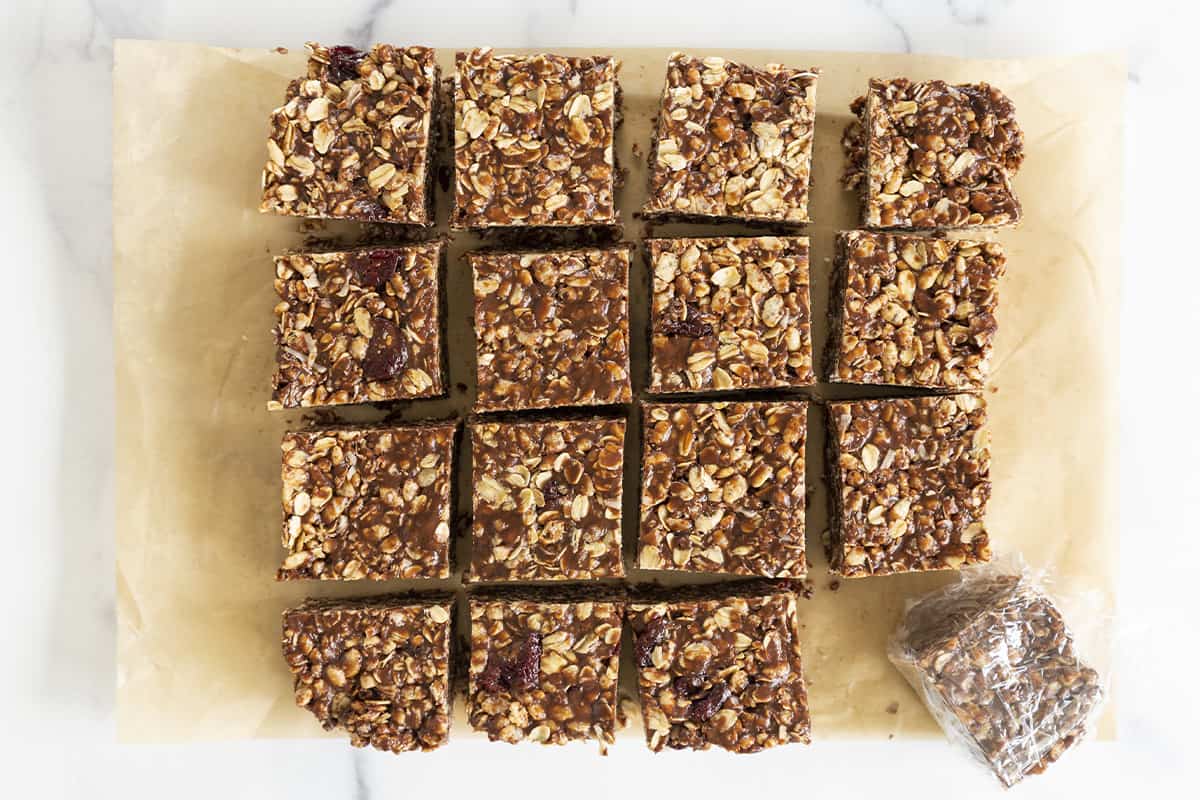
Step 4. Pour batter into a pan lined with parchment paper and press down evenly. Pop into the fridge briefly to firm up, then remove from the pan and slice into bars.
TIP: You can wrap these individually and store, or store them in a container loose. Both work!
Frequently Asked Questions
This recipe is easy to make gluten-free if you use certified gluten-free rolled oats, which you should be able to find at most grocery stores.
I know that brown rice syrup isn’t a pantry staple that most of us have in the house, but one jar will make two batches—and you can store it in the fridge until you’re ready to make the second batch. You can buy it online or look for it near the sugar or agave in your grocery store. My small town stores both carry it.
For whatever reason, peanut butter binds the best in this recipe. To make the bars nut-free, use sunflower seed butter instead and serve them cold out of the fridge.
How to Store
Store chocolate granola bars in the fridge for up to 5 days in an airtight container or in the freezer in a zip top bag for up to 3 months. You can wrap each bar in plastic wrap so they’re easy to grab and go.
Best Tips for Success
- Use smooth natural and unsweetened peanut butter.
- Leave an overhang on two sides of the pan with the parchment paper so you can lift the bars out to easily cut them.
- Use your hands to mix the batter as needed to get it evenly coated.
- Chill for a bit before slicing.
- I prefer to store these wrapped individually in plastic wrap.
- Use honey for the brown rice syrup, but be sure to serve them straight from the fridge as they will need to be cold to hold together as well.
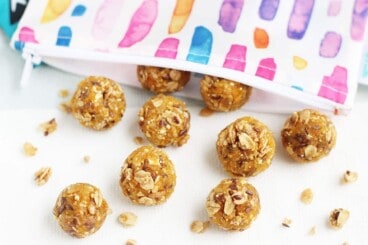
- Dice up into small pieces for younger eaters. Or make thinner bars by using a 9×11-inch pan instead of the 8×8-inch pan I show here, which will be easier to bite into and chew. Or try my Chocolate Rice Crispy Balls for a smaller format.
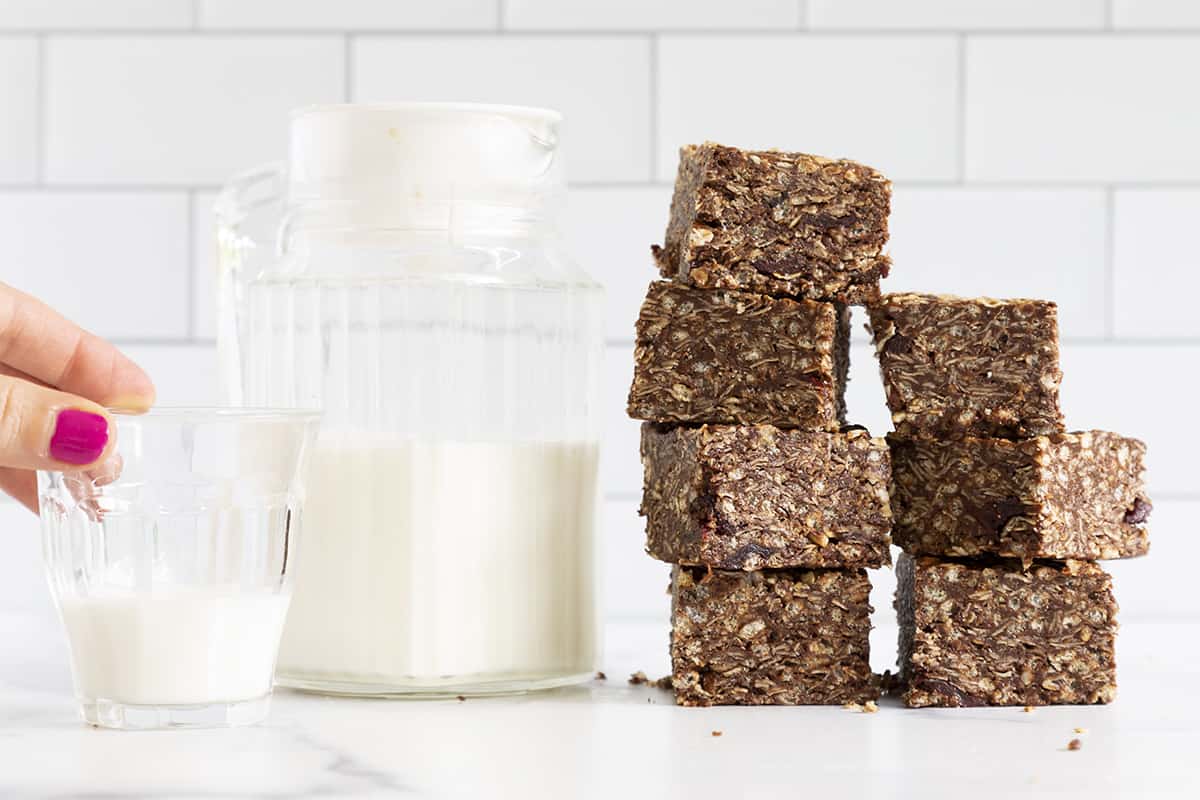
- Pair with a Strawberry Smoothie, Vanilla Milk, or another healthy drink for kids.
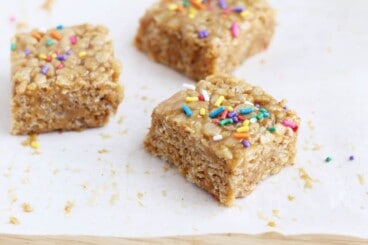
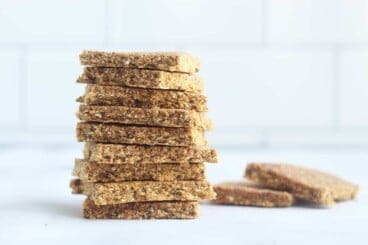
- For more flavor options, try my Chocolate Chip Granola Bars, Chocolate Crunch Bar, and Chewy Granola Bars.
Related Recipes
I’d love to hear your feedback on this recipe, so please comment below to share!
No-Bake Chocolate Granola Bars
Ingredients
- 1 cup unsweetened natural peanut butter
- 1 cup brown rice syrup
- 1 cup chocolate chips (dark or semi-sweet)
- 3 cups crispy rice cereal (or puffed flax cereal)
- 2½ cups rolled oats
- ½ cup dried cherries (or raisins; optional)
Instructions
- Line an 8×8-inch pan with parchment paper, leaving enough on the sides for you to lift the bars out of the pan. (Or, make thinner bars by using a 9×13-inch pan. You will have more bars but the recipe is otherwise the same.)
- Add the chocolate chips, peanut butter, and brown rice syrup to a large heat-proof bowl. Heat in the microwave in 30 second intervals until smooth, stopping to stir. (It should take a minute).
- Add the cereal, oats, cereal, and dried cherries.
- Stir with a wooden spoon, then use your (clean) hands to massage the ingredients together until well incorporated.
- Pour into pan and use your hands to press down firmly and evenly.
- Chill for 10-20 minutes, use the parchment to remove from the pan, and slice into bars. Serve chilled (they will be firmer) or at room temperature.
Video
Notes
- To store, wrap each bar in plastic wrap and store in a zip top bag in the fridge for up to 2 weeks or in the freezer for up to 3 months. To store in the freezer, place bars in a zip top bag and remove as much air as possible.
- Use smooth natural and unsweetened peanut butter.
- I prefer to use brown rice syrup in this recipe since it adds to the classic chewy granola bar texture and tastes less overtly sweet than honey. One jar will make two batches (and it lasts for months and months.) If you do not have it, you can use honey, though it holds a little less firmly.
- Leave an overhang on two sides of the pan with the parchment paper so you can lift the bars out to easily cut them.
- Chill for a bit before slicing so they firm up. (They do not lose their shape at room temperature though.)
- Nut-free: Use sunflower seed butter instead of the peanut butter.
- Gluten-free: Use certified gluten-free rolled oats.
- Sub ½ cup shredded unsweetened coconut for some of the oats, if desired.
- Slice into smaller pieces if desired. Or make thinner bars by using a 9×11-inch pan instead of the 8×8-inch pan I show here.
Nutrition
This recipe was first published August 2019.


Any recommendations to swap with PB? We have nut allergies.
Use sunflower seed butter instead of the peanut butter.
I really want to try these with puffed flax but can’t find it anywhere! Is there a brand you use? Would it work with puffed quinoa?
It might be discontinued but puffed quinoa should work!
In Australia, no oats are considered GF. Could I use quinoa flakes?
I bet you could. We have some in the US that are certified gluten-free but quinoa flakes usually work very similarly. Enjoy!
Made just a half batch and put it in a bread pan, wasn’t sure my girls would eat them. We all were taking spoonfuls of it warm, so good!
Will almond butter hold together well with the rice syrup or does it need to be served cold like a sun butter version would need to be? Trying to decide if I need to get the rice syrupl if the almond butter needs to be refrigerated no matter what.
Just to make sure I answer this right, are you planning to use almond butter with honey instead of the brown rice syrup?
Holy moly, these are GOOD! This recipe seems to be very flexible. We accidentally picked up Rice Chex instead of Rice Crispies, and we also used agave instead of brown rice syrup – they ended up tasting like Puppy Chow/Muddy Buddies in bar form! I’m looking forward to making these again in different variations.
I can see how cherries would be delicious as well. I can also imagine adding in pretzel bits for a crunch.
My only note is to remember to add some salt if your PB doesn’t have any – I remembered right at the end!
Hi! Is there a replacement for the brown rice syrup?
You can use honey. Enjoy!
Can I replace the rice syrup with honey?
This recipe sounds amazing. Can you sub the brown rice syrup with honey?
You can, though they won’t be quite as firm and they for sure need to be served cold. Enjoy if you try them!
Omg. This tastes AMAZING! Chewy and sweet and delicious… my picky 2 year old loves it, and I couldnt stop eating it while cutting it up. I was a bit worried my kids would turn their noses up at it but its sooo good!!!
So glad to hear that!
My kids love these and also: I make these with plenty of chocolate and bring them to my new mom friends as “lactation bars.” I make these for myself to take when I am working a shift. Also if you want to add protein, a few scoops of chocolate protein powered tastes awesome and helps keep me full when I have 2 min to eat and need some chocolate happiness.
Love it!
Great! But I made a half batch (because of what I had on hand) and I think it being thinner is more approachable for my 4&2 year olds. They’re chocoholics (didn’t get it from me). Thanks for the recipe
These are too yummy! Especially when warm, my son and I ate them with a spoon hehe
One of the best snacks! So easy to make too!
So good! I made as directed and they turned out great; and super simple to make! I used a 9×13 pan as I wanted a thinner bar. Had to stop my 3 year old from devouring them all 🙂
We made these yesterday and I can’t tell you who loves them more, him or me! I didn’t have rice syrup so I used a combination of honey and date syrup. Anything loose I rolled into tight granola balls. Perfection. Don’t leave the cherries out. They’re the best part!
I tried these out today and used honey instead of the brown rice syrup. They turned so good! We loved them and will definitely make again.
Easy and SO good – great for adults and kids!
can I replace brown rice syrup with something? honey? maple syrup? I’m guessing it’s the sweetener. thank you!
Honey is the best option and you’re welcome!
Very tasty! I used the brown rice syrup and it really held the bars together and it was the perfect amount of sweet. I made half the wise of recipe and it’s enough for me to snack on and for my son’s lunches this week!
I can never seem to find brown rice syrup! I don’t want to invest in the $20 for one recipe.. could I use honey or maple syrup or a combo? Don’t want it to be too sweet. Can’t wait to try!!
I bought brown rice syrup at Superstore today (I’m Canadian) and it was $4 Canadian for a small jar. It was my first time using it and I’m really surprised how well it held the bars together like store bought!
Would almond butter work in this recipe?
Yes, as long as it’s similar in consistency to normal peanut butter (and not super thin)
So easy and yummy! I bought Annies cinnabunnies and my kids didn’t like them so I was looking for a way to avoid wasting the box. They worked really well in this recipe and the added cinnamon flavor was delish. I used corn syrup and they turned out perfect! Plus it was a fun acitivity with my boys on whst is hopefully one of the last cold mn days! Thanks Amy!
Oh such a good idea!