With just a few simple ingredients and a super simple process, you can make my healthy and easy Sugar Cookies. They have the classic flavor and texture with less sugar. And they’re so super fun to make with the kids!

Easy Sugar Cookies
This time of year is made for cookie baking and I love to have at least one baking session with my girls. Because baking with the kids is often a challenge, this cut-out Sugar Cookie recipe has just a few simple ingredients and requires nothing other than your hands to mix it together.
I love the challenge of developing a recipe that has all of the classic texture and flavor, but with a little less sugar and in that way, this healthy sugar cookie is a great option. They have a perfectly crisp texture with about 1 gram of sugar per cookie (not counting the icing).
(For a larger batch perfect for the holidays, check out my Christmas Cookie Cut-Outs for Kids.)
Sometimes I make this whole recipe with the kids and sometimes I bake the cookies and we just decorate them together. It really depends on my energy level and what else we’re up to that day.
Both ways are perfect in their own right, if, of course, a little bit messy…because, kids!
(Find more tips for baking with kids here. And check out my Jam Cookies for another fun recipe!)
TIP: They’re a perfect option for younger toddlers—or to simply have an easy recipe in your back pocket to bake with kids.
Table of Contents
- Easy Sugar Cookies
- Ingredients You Need
- Ingredient Substitutions
- Step-by-Step Instructions
- Gluten-Free Sugar Cookies
- Dairy-Free Sugar Cookies
- What do I do if my rolled out dough is sticky?
- What kind of icing is best?
- What kind of food coloring do you use?
- Tips for Baking with Kids
- Make-Ahead Tips
- How to Store
- Best Tips for Success
- Easy Sugar Cookies (Healthy and Delish!) Recipe
Ingredients You Need
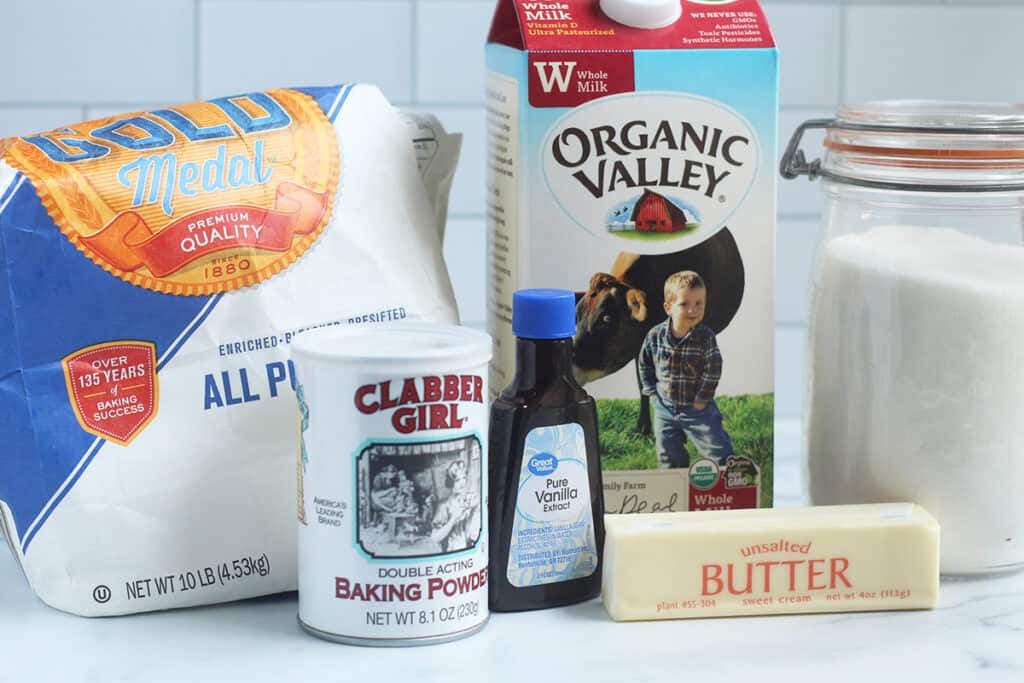
To make these healthy sugar cookies, you’ll need:
- All-purpose flour: This helps them be light and tender.
- Sugar: I use granulated sugar here.
- Baking powder
- Butter, softened at room temperature: I prefer unsalted butter in baking recipes.
- Milk: I usually use whole milk, but you can use a nondairy milk if you prefer.
- Vanilla extract:
- Pure vanilla extract tends to have a better flavor than imitation vanilla.
- Easy Icing, optional
TIP: These are egg-free, which makes them a nice option for kids with allergies.
Ingredient Substitutions
- You can use whole-wheat pastry flour, white whole wheat flour, or half all-purpose and half whole-wheat. The cookies will be darker in color, but the results will otherwise be the same.
- You can use coconut sugar in place of the granulated sugar.
- Make them nondairy with vegan butter and nondairy milk.
Step-by-Step Instructions
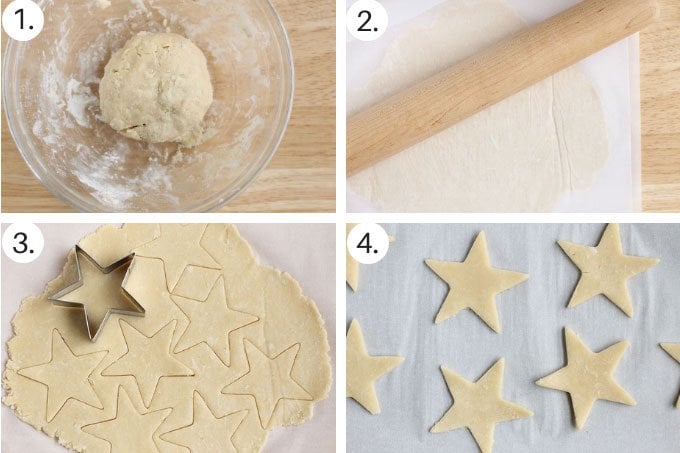
Here’s a look at the simple process involved in making these cookies. Scroll down to the bottom of the post for the full information.
- Form the dough, make a flattened disc of dough and wrap in plastic. Refrigerate. This helps to ensure that it rolls out easily and isn’t too sticky.
- Preheat the oven. Roll out the dough between parchment paper.
- Cut out the dough with a cookie cutter. You can flour the cutter a little if that helps.
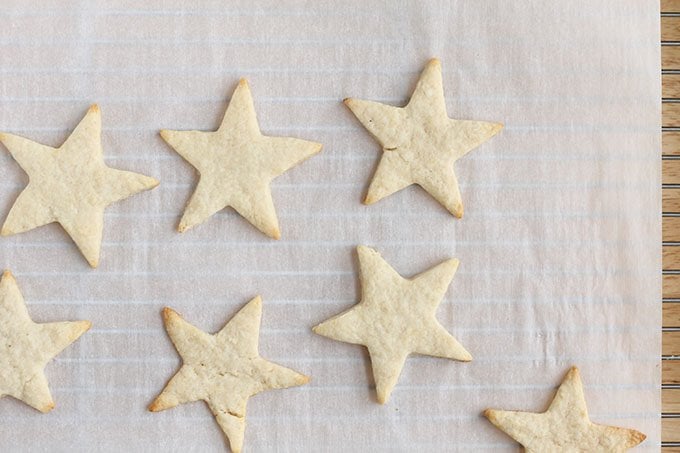
- Place onto lined baking sheets and bake.
TIP: You can serve these as is, or plan to decorate them with icing and/or sprinkles.
Gluten-Free Sugar Cookies
You can substitute this gluten-free flour blend if you’d like to make these gluten-free. It’s nearly impossible to tell the difference!
Dairy-Free Sugar Cookies
Yes, you can make these without dairy, but you’ll need to make a few adjustments. Here’s the info:
- Use plain unsweetened nondairy milk in place of dairy milk.
- Use coconut oil, just softened (so not totally liquid, but softer than when it comes out of the jar at room temp). I tested it with about 10 seconds in the microwave in a heat-safe bowl.
- After you initially chill the dough and roll it out, cut out the shapes and put it back into the fridge without trying to get the shapes out. They need to firm up more! Let the sheet pan chill for 10 minutes, then use a flat knife to pop up the shapes. Place on a parchment-lined baking sheet and bake as directed.
What do I do if my rolled out dough is sticky?
A easy way to make sure that the cut outs transfer easily to the baking sheet is to dust the parchment paper with flour. That should take care of sticking.
Or, you can roll out the dough, stamp out the shape, and put the whole thing into the fridge for 10 minutes before transferring the shapes to the prepared baking sheet.
Both are good options!
What kind of icing is best?
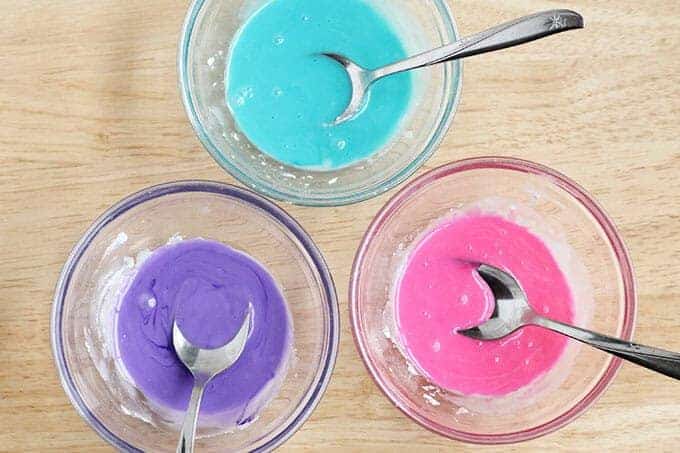
I like to use a simple mix of powdered sugar and milk to make the icing for these cookies. It’s super easy to stir together and you can color it with food coloring if you want to. It hardens up as it sets.
A little of the icing goes a long way, so while it does add a bit more sugar, you’re still starting off with less in the base of the cookie.
TIP: Alternatively, you can press some sprinkles into the raw cut outs before placing them into the oven to add some color without the icing.
What kind of food coloring do you use?
I used gel food coloring from Wilton in these photos, which has a nice and bright color, though I also like the natural food coloring from McCormick.

Tips for Baking with Kids
As I mentioned, I often bake the cookies and then let the kids decorate them. It can be a challenge to bake an entire recipe with two kids in the kitchen—I find it a lot to manage!—but it can also be fun if you’re in the right mental state of mind.
To make it a little easier, bring the ingredients down to a work surface everyone can reach (like the kitchen table), and help the kids remember to do one step at a time.
This dough is relatively forgiving, so it’s okay if it gets mixed well! Here are some specific steps the kids can do:
- Help dump the ingredients into a bowl.
- Mix the butter into the flour with their hands.
- Roll out the dough between the parchment paper.
- Stamp out the cookie cutters. (I recommend that the adult transfers them to the baking sheet.)
- Paint on the icing with a paintbrush!
TIP: You can ALWAYS simplify this down to just one step to do together—that will still be fun!

Make-Ahead Tips
You can make the dough the night before or a few hours in advance and store it in the fridge wrapped in plastic wrap. It will need to sit at room temperature for about an hour to soften up, or you can remove it from the plastic, put it onto a plate, and microwave for 5-10 seconds.
(I’m sure someone will call the baking police on me for suggesting that, but I’ve found that sometimes baking with kids requires you to break up the process into smaller steps!)
How to Store
Store prepared cookies in an airtight container at room temperature for 3-5 days. Or freeze in a freezer bag with as much air removed as possible for up to three months. Thaw at room temperature
Best Tips for Success
- Gluten-Free: Use this gluten-free flour.
- Dairy-Free: Use plain unsweetened nondairy milk in place of dairy milk. Use coconut oil, just softened (so not totally liquid, but softer than when it comes out of the jar at room temp). I tested it with about 10 seconds in the microwave in a heat-safe bowl.
- If the dough sticks after you initially chill the dough and roll it out, cut out the shapes and put it back into the fridge without trying to get the shapes out so it firms up more. Let the sheet pan chill for 10 minutes, then use a flat knife to pop up the shapes.
- If the dough is a little crumbly, be sure that it’s throughly combined and then if it’s still crumbly, add 1/2-1 tablespoon additional liquid until it comes together. It shouldn’t take much more so add a small amount at a time.
- You can use whole-wheat pastry flour, white whole wheat flour, or half all-purpose and half whole-wheat. The cookies will be darker in color, but the results will otherwise be the same.
- You may also like Christmas Cut-Outs, Chocolate Sugar Cookies, Gingerbread Cookies, and Salt Dough Ornaments.
I’d love to hear your feedback on this recipe, so please comment below to share!
This post was first published November 2018.

Easy Sugar Cookies (Healthy and Delish!)
Ingredients
Cookies
- 1 cup all-purpose flour
- 2 tablespoons sugar
- 1/2 teaspoon baking powder
- 1/4 cup unsalted butter (softened at room temperature)
- 2 tablespoons milk
- 1/2 teaspoon vanilla extract
Easy Icing (optional)
- 1/4 cup powdered sugar
- 2-3 teaspoons milk
- 1-2 drops food coloring (optional)
Instructions
- Place all ingredients into a bowl and use your hand to mix together to form a dough. (If the dough is a little crumbly, be sure that it’s throughly combined and then if it’s still crumbly, add 1/2-1 tablespoon additional liquid until it comes together.)
- Make a flattened disc of dough and wrap in plastic. Refrigerate while the oven preheats.
- Preheat the oven to 375°F and line two baking sheets with parchment paper.
- Roll the dough ¼-inch thick between two pieces of lightly floured parchment paper. (The flour will ensure that the cut outs are easy to move.)
- Cut out the dough with a cookie cutter and transfer to the prepared baking sheets. Bake for 7-9 minutes, until lightly browned around the edges. (If for some reason the cut outs are hard to transfer, place the rolled out dough with the stamped shapes into the fridge for a few minutes to firm up.)
- Remove from the oven, let cool on the baking sheet for a minute, and transfer to a wire rack to cool completely.
- Make the icing if using: Stir the ingredients together in a small bowl. You want it to be able to spread easily on the cookies and not be too thick. If you place some on the cookies and it runs right off, add a little more powdered sugar. If it's too thick to spread, add a drop or two of milk. You can color the icing with a drop of food coloring if desired.
- Use a small butter knife or paintbrush to spread on the icing or pipe on as desired. If adding sprinkles or other decorations, add them to the iced cookies right away before it dries.
Notes
- Store prepared cookies in an airtight container at room temperature for 3-5 days.
- Gluten-Free: Use this gluten-free cup-for-cup style flour.
- Dairy-Free: Use plain unsweetened nondairy milk in place of dairy milk. Use coconut oil, just softened (so not totally liquid, but softer than when it comes out of the jar at room temp). I tested it with about 10 seconds in the microwave in a heat-safe bowl.
- If the dough sticks after you initially chill the dough and roll it out, cut out the shapes and put it back into the fridge without trying to get the shapes out so it firms up more. Let the sheet pan chill for 10 minutes, then use a flat knife to pop up the shapes.
- If the dough is a little crumbly, be sure that it’s throughly combined and then if it’s still crumbly, add 1/2-1 tablespoon additional liquid until it comes together.
- You can use whole-wheat pastry flour, white whole wheat flour, or half all-purpose and half whole-wheat. The cookies will be darker in color, but the results will otherwise be the same.
- To make this dough ahead: Store it in the fridge wrapped in plastic wrap for up to 24 hours. It will need to sit at room temperature for about an hour to soften up, or you can remove it from the plastic, put it onto a plate, and microwave for 5-10 seconds.


Easy and forgiving dough. I used a mix of almond and whole wheat flour, it worked. Made it with my toddler and he could roll and cut it himself. Thanks a lot!
Amazing easy and delicious
Easy recipe and two thumbs up from a kindergartener! Didn’t take long to put it all together and a forgiving recipe. No special tools needed. Will definitely make this again and again!
Used these for Christmas cookies and loved them!
I’m wondering how you would adapt them for baking thumbprint cookies– specifically how big of a ball you would use and hour long to bake them. Any ideas?
We’ve made these many times and my kids love them! So easy!
Saved the magic on Christmas Eve. I was so tired and the idea of starting a 2-3 hour project for the usual sugar cookie recipe had me rethinking what we were going to leave for Santa. I remembered seeing a recipe link for these cookies, looked it over and decided to go for it. So glad I did, the kids had a great time making them and they turned out wonderful. My new favorite flavor for the cookies, not so sweet and the frosting was super easy. Thank you!!!
Oh yay!!
I chilled the dough in a gallon ziplock bag and rolled it out in the bag, then cut the bag open to do the cut outs. I did not have any problems with sticking. Thanks for the recipe!!
Step 1 doesn’t even work, can’t get a dough ball. Maybe it needs an egg?
If you take your time and work the butter into the flour as directed, it works just great. If it’s a little dry, add a splash of milk. If you add an egg it will be far too wet. Enjoy!
Thanks for the reply and the recipe. Adding more butter and milk until it got stickier and making the shape directly a disc (instead of a ball first) was easier. Ended up being popular on Christmas!
My almost 3 year old daughter, my mom and I had the best time making these cookies today. My daughter was beside herself cutting them out & decorating them then tried a bite and said “wow.” They really are delicious & very easy.
They obviously have sugar but I love that they’re not loaded with sugar. New Christmas tradition for sure ❤️