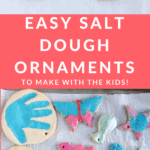
Learn how to make classic salt dough with the kids, with baking, painting, and storage info. This method is straight forward, easy, and thorough—and they a perfect kids holiday gift for grandparents, teachers, and loved ones!
Salt Dough
This salt dough is a staple of childhood and I love doing this Christmas activity with my kids each year—and throughout the rest of the year too! We love to make salt dough handprints, ornaments, and sometimes, just any old shape they want to. It’s an easy project that we can do together—and then share as kid-made holiday gifts, keepsakes, or house decorations.
Salt Dough Recipe
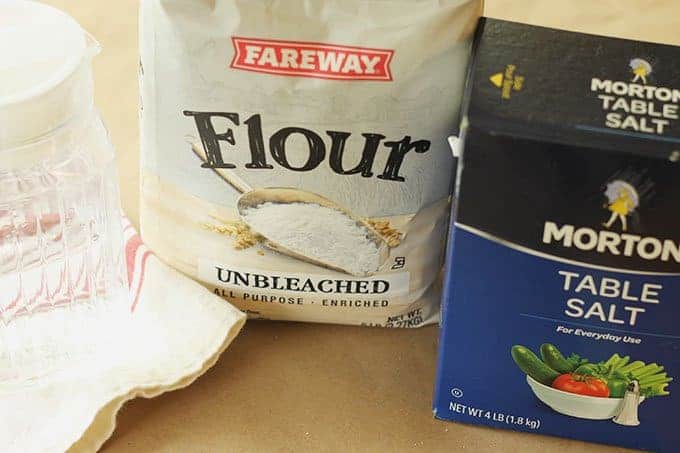
Making salt dough at home is as easy as combining three pantry staples together into a dough. It’s fairly fool proof (as long as you follow the measurements!) and is a recipe that even little kids can help make.
Ingredients in Salt Dough
To make this recipe, you’ll need:
- table salt
- all-purpose flour
- water
TIP: That’s it! (I buy store brand, cheap flour for this since project to keep it very budget-friendly.)

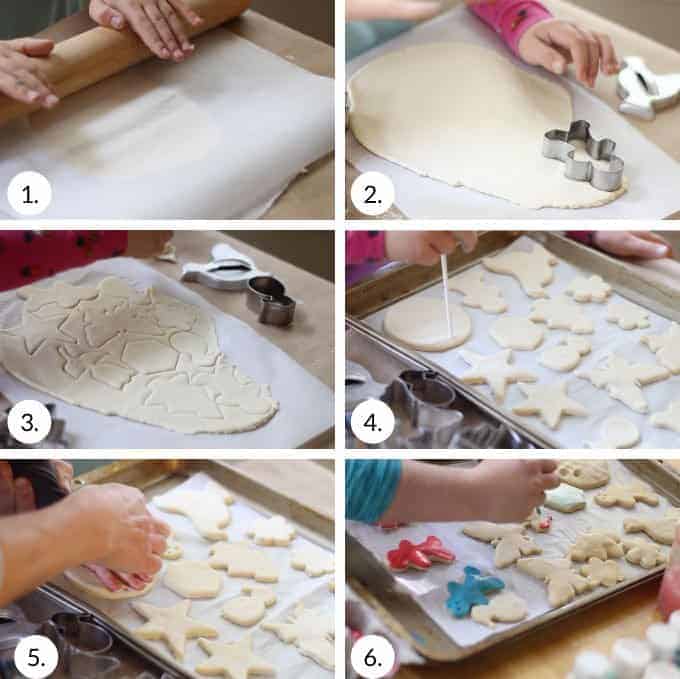
How to Make Salt Dough Ornaments Step-by-Step
Here’s a look at how to make the dough for this salt dough. Scroll down to the bottom of the post for the full information.
- Measure out the flour and water. (photo 1)
- Add the water. (photo 2)
- Stir with a wooden spoon. (photo 3)
- Keep stirring until the dough is mostly together and is hard to stir any longer. (photo 4)
- Knead a few times with hands to bring the dough together. (photo 5)
- Place dough between two pieces of parchment paper and roll out. (photo 6)
TIP: You can divide the dough in sections so multiple kids can have their own dough to work with.
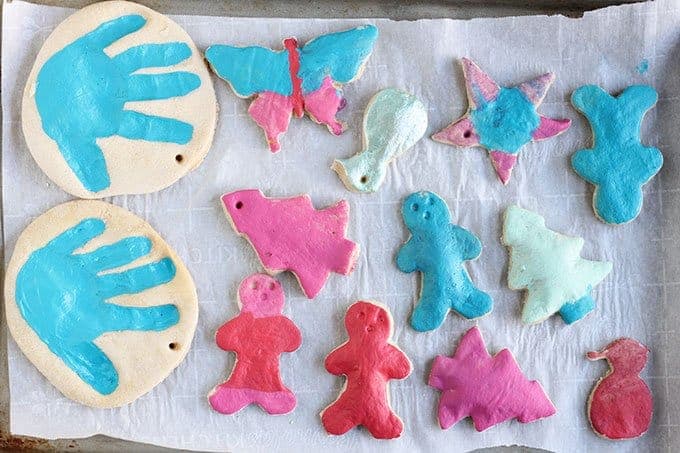
How to Cut Out, Bake and Decorate Salt Dough Ornaments
Once you start rolling, here’s a look at what will follow if you want to make these into ornaments. (Skip the hole poking if you want to just make these as shapes for the kids to paint.)
- Roll out, changing directions occasionally, until about 1/4-inch thick. (This may not get precise if you’re working with kids and that’s okay!) (photo 1)
- Stamp cookie cutters. (photo 2)
- Remove the dough around the shapes, then either transfer the whole piece of parchment paper to a cookie sheet OR transfer just the shapes to a parchment-lined cookie sheet. (photo 3)
- Poke holes so you have a place for a string to hang as ornaments. (photo 4)
- Press in a hand to make a handprint, if desired. (photo 5)
- Bake, let cool and decorate! (photo 6)
TIP: Re-roll any remaining dough after Step 3 here to make additional ornaments.
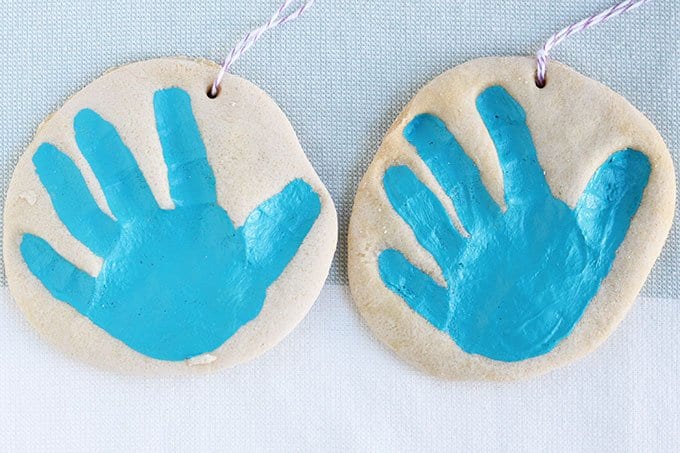
Salt Dough Handprint Ornament
Capturing a handprint in salt dough is a perfect grandparent gift, or a keepsake ornament to make for your own tree. I love pulling out our little collection year after year. Know that getting a good print may take a few tries if doing a baby’s hand!
TIP: Check the size of your round cookie cutter against your child’s hand to make sure that it’s big enough. You may need one that’s 4-5 inches in diameter.
Best Paint for Salt Dough Ornaments
If the kids are wearing smocks, the table is protected, and you are reasonably sure they won’t paint all over their hands and faces, I like using regular acrylic craft paint since it holds up best on crafts. With younger kids who may wind up wearing more of the paint, I’d recommend tempura washable paints.
TIP: We put our paint into the base of old egg cartons since we always have those on hand. You can also use paper plates.
How to Preserve Salt Dough Ornaments
To help preserve your finished dried ornaments, you can coat with a layer or two of Mod Podge or spray with a sealer. Either work well. I’d recommend coating or sealing both sides, so do one side and let it dry, and then do the second side. If using the sealer, do it in a well ventilated area without the kids too close by.
TIP: To store these ornaments from year to year, you’ll want to wrap in bubble wrap. Store in a container that won’t be banged around, dropped or exposed to excess moisture.
Why is my salt dough puffing up?
If you mistakenly use self-rising flour, they may puff. And sometimes it happens randomly. Keep the oven temperature low and if it happens consistently, you can try baking at an even lower temperature for a slightly longer amount of time.
Tips for Making the Best Salt Dough Ornaments
- If the dough is too wet and sticky, knead in a little more flour. If it’s too stiff, add a little more water. There is a big range in the way different flours absorb liquid, so there is a normal range of variation in liquid needs. It should be easy to work with—soft and not too stiff and not excessively sticky.
- Use paper lollipop sticks or a skewer to make your holes.
- Use a 4-5 inch round cookie cutter to make handprint ornaments.
- Tie on baker’s twine or thin ribbon to hang as ornaments.
- Try to get the dough to an even thickness before baking so the ornaments bake evenly.
- Bake for the time indicated and then longer if your ornaments still feel soft. They should be firm to the touch without much give.
- Let cool fully before painting.
- If you want to paint the background of a handprint ornament, do that before you paint the inside of the hand. Let dry before adding a second color. Some people like to paint the whole thing white or cream to give it a more finished look.
- Use acrylic craft paint for older kids who can be trusted with paint and tempura washable paints with younger toddlers.since it holds up best on crafts. With younger kids who may wind up wearing more of the paint, I’d recommend.
- To help preserve your finished dried ornaments, you can coat with a layer or two of Mod Podge or spray with a sealer.
I’d love to hear your feedback on this project and what your kids thought of it, so please comment below to share!

The Best Easy Salt Dough
Ingredients
- 4 cups flour
- 1 cup table salt
- 1.5 cups water
Instructions
- Mix the ingredients together in a large bowl using a wooden spoon. When it becomes too stiff to stir, use clean hands to bring the dough together.
- NOTE: If the dough is too wet and sticky, knead in a little more flour, about 1 tablespoon at a time. If it's too stiff, add a little more water, about 1 tablespoon at a time. There is a big range in the way different flours absorb liquid, so there is a normal range of variation here. It should be easy to work with—soft and not too stiff and not excessively sticky.
- Knead a few times until the dough is uniform and soft, about 3-5 minutes.
- Divide dough into 2 or 4 sections and roll out to about 1/4-½ inch thick between two sheets of parchment paper. This will help prevent sticking.
- Cut out with cookie cutters. Transfer shapes to a parchment-lined baking sheet.
- Repeat rolling and cutting out shapes to use up the dough.
- Preheat oven to 250 degrees F.
- Do a 4-5-inch circle and press in a child's handprint if desired.
- Use a paper lollipop stick or a skewer to make a hole to hang as an ornament.
- If making ornaments, bake for 90 minutes to 2 hours; if baking handprints, bake for 2-3 hours. Continue baking both ornaments and handprints as needed until they are until just firm to the touch, checking every 20 minutes. (It's not a problem if yours take longer than the initial baking time—it varies based on thickness and size...which will likely vary if you are baking these with kids!) They do not need to be rock hard, but should not feel squishy. Handprints will likely take longer than smaller ornaments and may take closer to 4 hours.
- Remove from oven, let cool, and paint if desired with acrylic or washable tempera paint.
- Once paint is completely dry, seal with Mod Podge if desired.
Notes
- Divide the recipe in half to make a smaller portion of dough if desired.
- Use paper lollipop sticks or a skewer to make your holes.
- Use a 4-5 inch round cookie cutter to make handprint ornaments.
- Tie on baker's twine or thin ribbon to hang as ornaments.
- Try to get the dough to an even thickness before baking so the ornaments bake evenly.
- Bake for the time indicated and then longer if your ornaments still feel soft. They should be firm to the touch without much give but do not need to be rock hard. It is not a sign of a problem if yours take longer than mine did to bake—flours and ovens vary!
- Let cool fully before painting.
- If you want to paint the background of a handprint ornament, do that before you paint the inside of the hand. Let dry before adding a second color.
- Use regular acrylic paint for older kids who can be trusted with paint and washable tempera paint with younger toddlers.
- To help preserve your finished dried ornaments, you can coat with a layer or two of Mod Podge or spray with a sealer.


Thanks for the instructions and guidance, the dough was easy to make and fun to work with. Have you ever turned them over? Our top looks tough but the bottom is “wet”. The kids really enjoyed the activity and the flour recipe was great, thanks!
I haven’t done that but you certainly could if the tops were set firmly!
Thank you for recipe and the instructions, the dough was easy to make and fun to work with!
Is it possible to make mugs out of it?
And use the mugs?
I am worried that the water will go inside of it and make it into dough again
I don’t think they would hold up well if you put water in them. You’d want a real clay for that!
Can you save left over dough
Put it in a zip top bag with as much air removed as possible and store in the fridge for up to 3 days. Let sit at room temp for a bit to soften up before using.
Do you ever flip these while baking? The tops of ours seem hard but the underside is “wet”. Kids really enjoyed this activity and the dough recipe was great, thanks!
I haven’t tried that but it seems like it could work! (Sorry that I wasn’t able to respond to this earlier!)
I made hand print ornaments with my one year old and it was a lot of fun! I followed the directions exactly and everything turned out great. Thanks for another fun activity!!
Should you write on the ornaments with a permanent marker before or after applying the mod podge sealer?
I think I would do it after it’s totally dried
Mine came out brown /burnt? Left 2hrs like said? What did I do wrong
Did you bake them at the temperature in the post? I haven’t had that happen since the temp is so low and typically mine have always taken longer. I am sorry to hear that you experienced that though!
Hi- just wanted to remind readers that salt dough is toxic to dogs (and they find it very tempting). Please keep out of reach of reach of your pups.
Our ornaments were hard, but after painting they are soft again! Would it be possible to put them in the oven again after they are painted?
I haven’t done that, but I think it would be fine since the temperature is so low
My ornaments were dry and hard when I took them out of the oven, but softened up again after I applied the Mod Podge. Is there a way to salvage these?
Are they soft with the Mod Podge fully hardened?
Can I use iodized salt instead of table salt?
I have only used table salt but I would think that would be okay
I am making this right now and you said for 2 hours but ita been in for 10 minutes ans their already hard are they done?
After 10 minutes of baking at the time in the recipe, I would be surprised if they are super firm unless they sat out for a while before you baked them?
Woukd it work to use markers instead of paint for younger kids?
It probably would though you’d have to try a few kinds and see what shows up.
Can you use pastry flour if that’s what you have on hand?
I haven’t tried that so I can’t say for sure!