
With a dough that doesn’t require any electric equipment—just a bowl and clean hands!—and a super straight-forward method that’s ideal for doing together, these are our go-to cut-out Christmas Cookies for kids.

Every year when the holidays are in sight, we make at least one batch of cut-out cookies. (Okay, usually we make a few batches!) And this Christmas dessert for kids, which doesn’t require a hand held mixer or stand mixer, is our favorite recipe to make together.
Plus, you can add an easy icing and some sprinkles to really am up the festive factor if you want to.
They’re a seriously delicious and easy sugar cookie meant for the holidays!
Why this Recipe Works
I love that the dough is forgiving and is hard to mess up, and that it rolls out easily without a ton of chilling (or any if you want to just fast forward the recipe a little).
(You may also like my Christmas Pancakes, Easy Gingerbread Cookies, Christmas Pizza, and Christmas Muffins for more festive ideas.)
Table of Contents
Easy Cut Out Cookies
My goal with any recipe meant to bake with kids is to make the process of making the dough and rolling out the cookies doable. Having little kids on hand in the kitchen is often fairly unpredictable (and messy!) so this cut-out cookie dough keeps that in mind.
I like to roll this out between sheets of parchment to help reduce any potential sticking, though a little flour also works.
There are a lot of photos in this post because I wanted to be sure to include all of the info—it’s very straight-forward though, promise.
Ingredients You Need
To make these Christmas cookies for kids, you’ll need a few basic pantry staples.
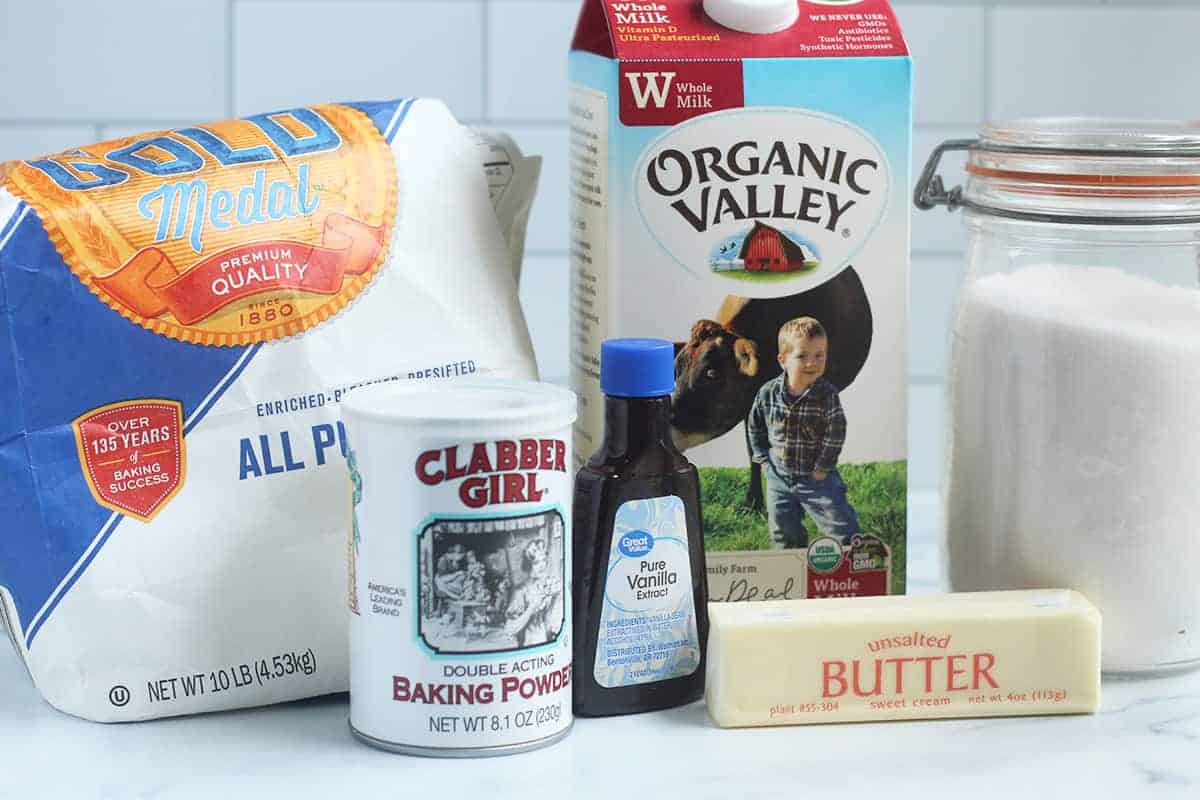
- All-purpose flour: This keeps the baked cookies tender and crisp around the edges.
- Unsalted butter: You’ll want this to be softened at room temperature, so plan to leave it out for at least an hour.
- Milk: I use whole milk, but you can use low fat if that’s what you have on hand.
- Sugar: Granulated sugar works best in this recipe to ensure the classic sugar cookie texture. I did my best to make the amount as low as possible for kids.
- Vanilla extract: You can use pure or artificial vanilla extract as they both work the same in this recipe.
- Baking powder: Double check to make sure your baking powder is fresh and active for the best results.
Ingredient Substitutions
- Gluten-Free: Use a 1:1 style of gluten-free baking mix in place of the all-purpose.
- Dairy-Free: Use plain unsweetened nondairy milk in place of dairy milk. Use coconut oil, just softened (so not totally liquid, but softer than when it comes out of the jar at room temp). I tested it with about 10 seconds in the microwave in a heat-safe bowl.
- Egg-Free: These cookies are already egg-free. For more holiday and everyday options made without eggs, browse my Favorite Egg-Free Cookies.
Featured Review ⭐️⭐️⭐️⭐️⭐️
“Super easy for me (a novice baker) and our family had a great time decorating them with the icing recipe! We made different colored batches of icing in small sauce bowls and used mini espresso spoons and toothpicks to decorate. My 3 year old loved it. The cookies tasted great too!” —Gina
How to Make Christmas Cookies for Kids
Here’s a look at the process for making the Christmas cookies for kids so you know what to expect. Scroll down to the bottom of this post for the full recipe, including the amounts and timing.

Step 1. Stir together the dry ingredients in a bowl to ensure the baking powder and salt are evenly distributed.

Step 2. Add the remaining wet ingredients to the same bowl.

Step 3. Mix the dough together using clean hands (or you can use a food processor).

Step 4. Roll out the ball of dough between two sheets of parchment paper to prevent sticking.

Step 5. Cut out the dough with cookie cutters.

Step 6. Place onto a parchment lined baking sheet and bake.
TIP: If the dough starts to stick to the cookie cutters, either dust with flour or pop the dough into the fridge for a few minutes.
Your toddler won’t eat? Help is here!
Sign up for our email updates to get tips and ideas sent your way!
Tips for Frosting the Cookies
To decorate these Christmas cookies for kids, you’ll want to:

Step 1. Bake until lightly golden brown around the edges. Cool on a rack.

Step 2. Stir together the icing ingredients in small bowls.

Step 3. Paint on icing (or use a little knife) and add sprinkles as you and the kids like. The icing will harden as it sits, so add any sprinkles right after applying it to ensure they stay put.
How to Store
You can store these fully cooled Christmas Cookies for Kids in an airtight container at room temperature for up to 5 days. You can also freeze unfrosted cookies in a freezer bag, with as much air removed as possible, for up to 3 months. Thaw at room temperature before frosting.
To make this dough ahead: Store it in the fridge wrapped in plastic wrap for up to 24 hours. It will need to sit at room temperature for about an hour to soften up, or you can remove it from the plastic, put it onto a plate, and microwave for 5-10 seconds.

Best Tips for Success
- If the dough sticks after you initially chill the dough and roll it out, cut out the shapes and put it back into the fridge without trying to get the shapes out so it firms up more. Let the sheet pan chill for 10 minutes, then use a flat knife to pop up the shapes.
- If the dough is a little crumbly, be sure that it’s throughly combined and then if it’s still crumbly, add 1/2-1 tablespoon additional liquid until it comes together.
- You can use whole-wheat pastry flour, white whole wheat flour, or half all-purpose and half whole-wheat. The cookies will be darker in color, but the results will otherwise be the same.
- Lower sugar option: Reduce sugar to ¼ or ⅓ cup if desired.
- My Sugar Cookie Icing for Decorating is here to help, too.
- You may also like Salt Dough Ornaments, Rainbow Sprinkle Cookies, and more of my Favorite Christmas Cookies.
More Easy Holiday


I’d love to hear your feedback on this recipe if you try it, so please comment and rate it below!

Easy Christmas Cookies for Kids (Fun Cut-Outs!)
Ingredients
Cookies
- 2 cups all-purpose flour
- 1/2 cup sugar
- 1 teaspoon baking powder
- 1/2 cup unsalted butter (softened at room temperature)
- 1/4 cup milk
- 1 teaspoon vanilla extract
- 1/4 teaspoon salt
Easy Icing (optional)
- 1/4 cup powdered sugar
- 1-2 teaspoons milk
- 1-2 drops food coloring (optional)
Instructions
To make the cookies:
- Place the dry ingredients into a large bowl. Stir together.
- Add the remaining dough ingredients and use your hand to mix together to form a dough. (You can also use a food processor If you prefer. If the dough is a little crumbly, be sure that it's throughly combined and then if it's still crumbly, add 1/2-1 tablespoon additional milk until it comes together.)
- Make two flattened disc of dough and wrap in plastic. Refrigerate while the oven preheats.
- Preheat the oven to 375°F and line two baking sheets with parchment paper.
- Working with one ball of dough at a time, roll about ¼-inch thick between two additional pieces of parchment paper.
- Cut out the dough with a cookie cutter and transfer to the prepared baking sheets. Re-roll the scraps of dough and continue cutting out. (If you have any difficulty moving the cut outs, lightly flour the parchment paper.)
- Bake for 8-10 minutes, until lightly browned around the edges. (If you have some smaller shapes than others or some thinner cookies than others, you may need to remove them from the baking pan first, and allow larger or thicker ones to bake for an additional few minutes.)
- Remove from the oven, let cool on the baking sheet for a minute, and transfer to a wire rack to cool completely.
- Meanwhile, repeat with the remaining dough.
Easy Icing (optional)
- Stir the ingredients together in a small bowl. You want it to be able to spread easily on the cookies and not be too thick. If you place some on the cookies and it runs right off, add a little more powdered sugar. If it's too thick to spread, add a drop or two of milk. You can color the icing with a drop of food coloring if desired.
- Use a small butter knife or paintbrush to spread on the icing or pipe on as desired. If adding sprinkles or other decorations, add them to the iced cookies right away before it dries.
Notes
- Store fully cooled cookies in an airtight container at room temperature for 3-5 days.
- If the dough sticks after you initially chill the dough and roll it out, cut out the shapes and put it back into the fridge without trying to get the shapes out so it firms up more. Let the sheet pan chill for 10 minutes, then use a flat knife to pop up the shapes.
- If the dough is a little crumbly, be sure that it’s throughly combined and then if it’s still crumbly, add 1/2-1 tablespoon additional liquid until it comes together.
- You can use whole-wheat pastry flour, white whole wheat flour, or half all-purpose and half whole-wheat. The cookies will be darker in color, but the results will otherwise be the same.
- To make this dough ahead: Store it in the fridge wrapped in plastic wrap for up to 24 hours. It will need to sit at room temperature for about an hour to soften up, or you can remove it from the plastic, put it onto a plate, and microwave for 5-10 seconds.
- Gluten-Free: Use this gluten-free cup-for-cup style flour.
- Dairy-Free: Use plain unsweetened nondairy milk in place of dairy milk. Use coconut oil, just softened (so not totally liquid, but softer than when it comes out of the jar at room temp). I tested it with about 10 seconds in the microwave in a heat-safe bowl.
- Lower sugar option: Reduce sugar to ¼ or ⅓ cup if desired.
Nutrition
This recipe was first published October 2021.



















So good! And it was so fun to do with my toddler!
Made the dough Christmas day but did not get to make them until three days later. I tried the 10 seconds in the microwave recommendation to soften the dough and worked perfect. My 3 year had a blast rolling out the dough and cutting out the cookies. Did not get to make the icing part of the recipe so we ate our cookies plain but they were really good. The whole family loved them.
LOVE that the dough is kid friendly and mix with your hands friendly. Worked perfect for me! Thank you
Super easy for me (a novice baker) and our family had a great time decorating them with the icing recipe! We made different colored batches of icing in small sauce bowls and used mini espresso spoons and toothpicks to decorate. My 3 year old loved it. The cookies tasted great too!
So easy and delicious!
Hi! Would these work in a cookie press? Or would your easy sugar cookies be better using a cookie press? Thank you! Looking forward to making. Is one more of a butter cookie than the other?
The dough in each is very similar so you could try it with either. I haven’t tried that option so I can’t say for sure, but maybe try it with a small amount and see how it goes!
Thank you!
So easy and delicious!
Can I make this dough ahead of time and freeze it for a week later?
Sure!
I doubled this recipe and used it to make holiday themed pinwheel cookies. Tried the recipe as is and also used vegan butter/oatmilk substitutes for a dairy allergy friendly version. worked out great!
Perfect for little hands. Have used thi recipe now for 3 years going!