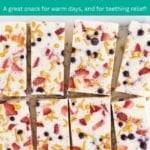
Transform yogurt and fruit into the yummiest Yogurt Bars with this simple method. It’s a fun way to serve yogurt, it’s a great snack for warm days, and it’s a fun option for teething relief for littles.
We love all sorts of frozen desserts, from Strawberry Popsicles to Fruit Ice Pops and Mango Sorbet. And the latest option we are obsessed with are these yogurt bars.
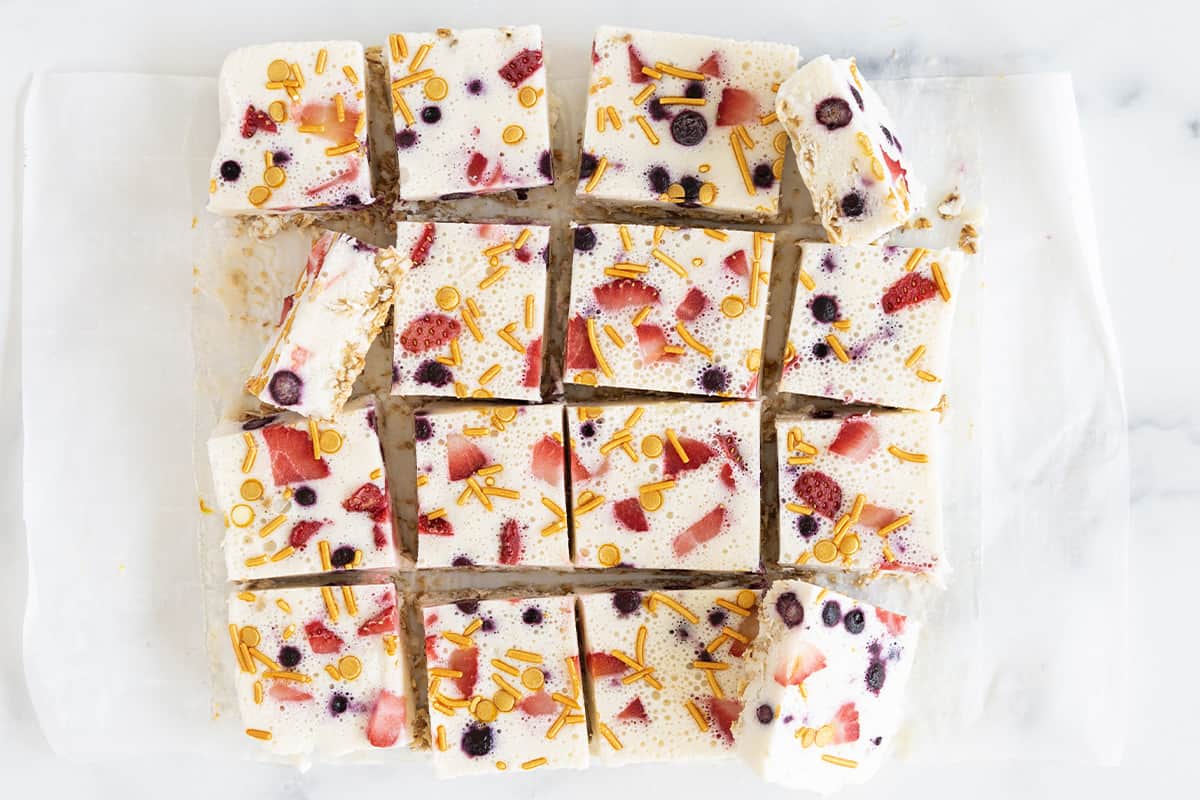
They’re basically a handheld frozen yogurt bar with fresh fruit flavor that makes for a delightful snack.
The yogurt bars are perfect for bouts of teething and also afternoon snack, dessert, or even breakfast on warm days.
Why This Recipe Works
With a lightly sweetened yogurt base, fresh fruit, and the option to add a granola crust, you can make homemade yogurt bars for less cost than the ones at the store…and with more nutrition.
(If you want yogurt bars that aren’t frozen, check out my Blueberry Yogurt Cake. Or for more yogurt recipes, try my Strawberry Yogurt, Vanilla Yogurt and Cucumber Yogurt Sauce. )
Table of Contents
Ingredients You Need
Here’s a look at the ingredients you need to have on hand in order to make this Yogurt Bars recipe.
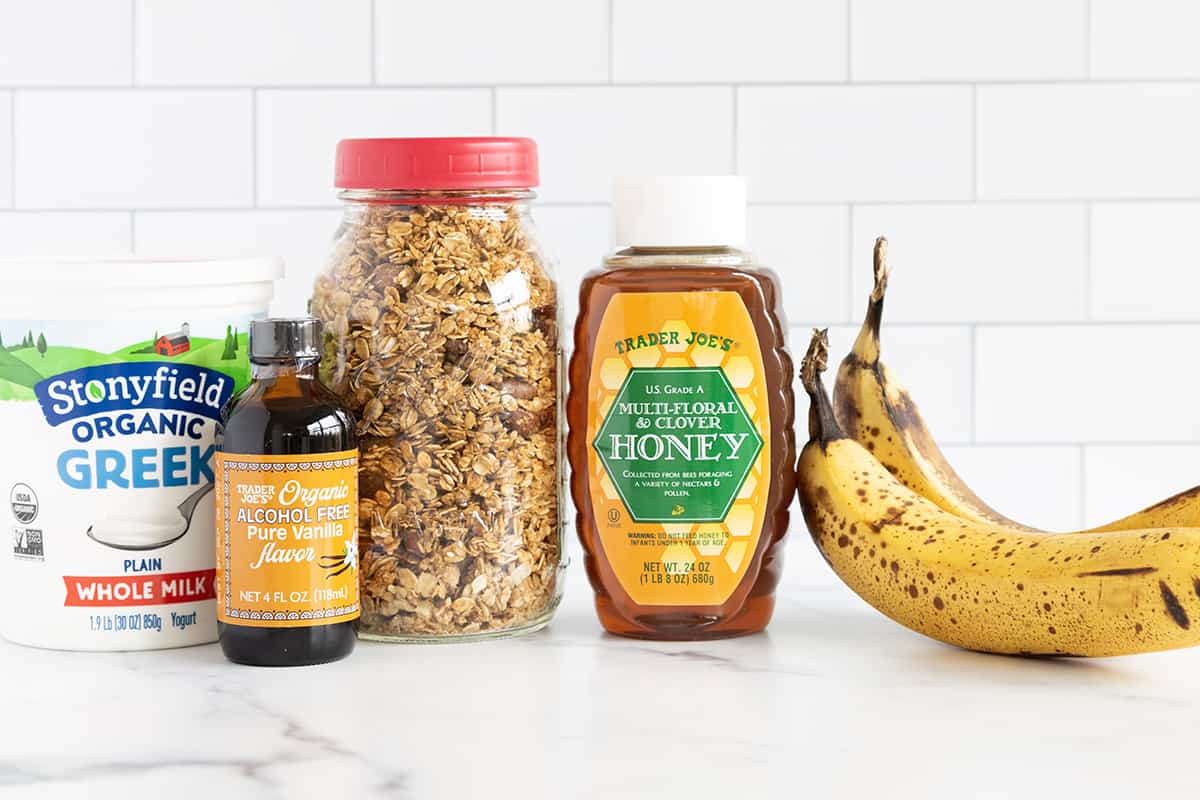
- Banana: I like to blend very ripe banana with yogurt to make the base of these bars. The banana adds sweetness and flavor and also helps prevent the mixture from freezing too solid to bite.
- Plain Greek yogurt: Greek yogurt, which has less water content than regular and therefore freezes a little less firm, is a great option here. I prefer to use whole-milk, full-fat yogurt since little kids need lots of beneficial fats in their diets.
- Maple syrup (or honey, optional to taste): After blending the yogurt mixture, you can taste it and adjust the sweetness as you like.
- Vanilla: I like to add a little vanilla extract to enhance the flavor of the yogurt bars.
- Granola: This is optional but a fun option: You can sprinkle the base of the pan with crushed granola base, then add the yogurt mixture on top. This helps the bars be easier to hold and is a fun texture experience. You could use graham crackers here instead.
- Berries or sprinkles (for topping, optional): Add whatever you like to the top of your bars such as diced strawberries, blueberries, raspberries, diced peaches, sprinkles, or granola for a colorful and fun finish.
Featured Review⭐️⭐️⭐️⭐️⭐️
“Wow. These were soo good. I made them this morning for my 1 year old as a make-ahead breakfast. They didn’t make it to dinner. My 3 year old, 6 year old, me, and my husband ate them all.” —Stacy
Step-by-Step Instructions
Below is an overview of how to make this Yogurt Bar recipe so you know what to expect from the process. Scroll down to the end of the post for the full recipe, including the amounts and timing.

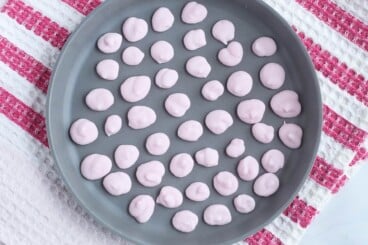
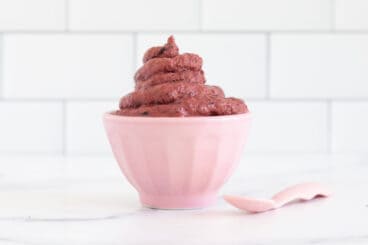
Step 1. Add the banana, yogurt, and maple syrup to a blender. Blend smooth. (Or, add to a bowl and use a potato masher to mash as smooth as you can.)

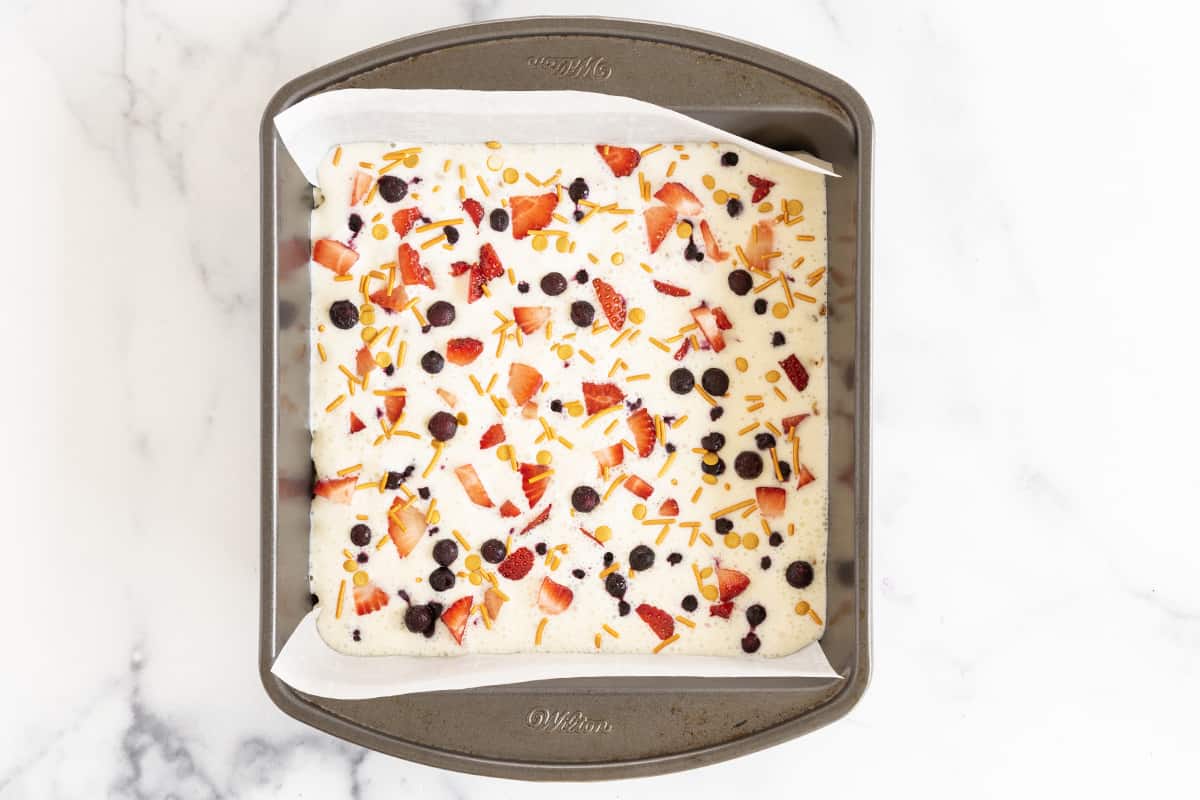
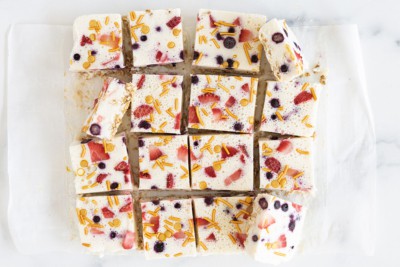
Step 2. Line an 8×8-inch baking pan with parchment paper. Sprinkle granola on the bottom of the pan. Pour the blended yogurt mixture overtop. Add optional toppings. Freeze for 4-6 hours.
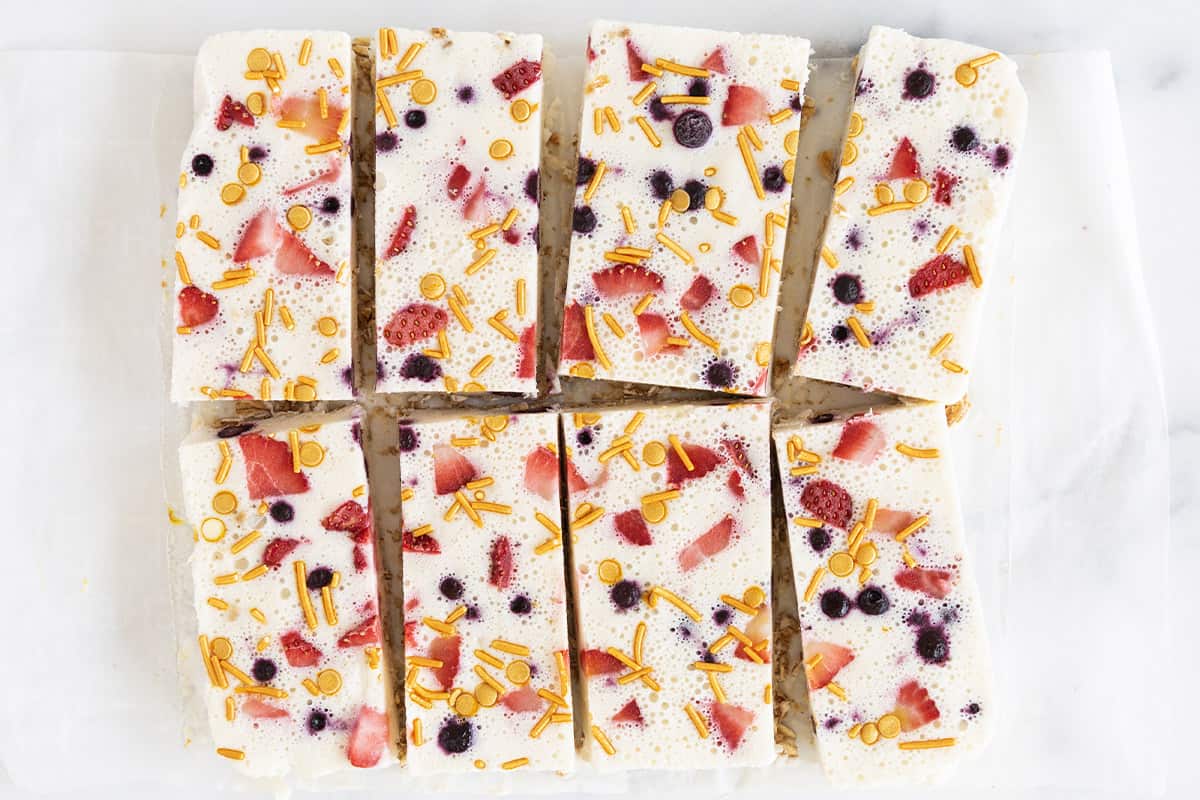
TIP: To serve, remove from the freezer and lift the bars out of the pan using parchment paper. Run a knife under very hot water and slice into bars. Serve immediately.
Your toddler won’t eat? Help is here!
Sign up for our email updates to get tips and ideas sent your way!
Frequently Asked Questions
Yes! These bars are made with simple ingredients and real yogurt, making them a nutritious snack or breakfast option.
Yes, if left at room temperature, they will melt. They are meant to be eaten mostly frozen. Let sit at room temperature for a few minutes to soften before eating.
Yes. Once frozen and sliced, you can freeze leftover bars in a sealed freezer bag for up to 3 months.
How to Store
Once frozen and sliced, you can freeze leftover yogurt bars in a sealed freezer bag for up to 3 months. Let sit at room temperature for a few minutes to soften before eating.
Best Tips for Success
- Greek yogurt creates a slightly creamier texture, which makes them a little more pleasant (and softer) to bite into.
- You can replace ½ cup of the yogurt with canned full-fat coconut milk for an even creamier consistency in the finished bars.
- Dairy-free: Use Greek-style nondairy yogurt or full-fat canned coconut milk.
- Use a granola without whole nuts or swap in graham crackers for the granola if desired.
- Trade in mango or wild blueberries or a different fruit for the banana if you prefer.
- Use vanilla yogurt, peanut butter yogurt, or add almond butter, as you like.
Related Recipes
Snacks
Favorite Yogurt Melts
Desserts
Homemade Frozen Yogurt

Desserts
Easy Strawberry Popsicles

Snacks
Fruit Ice Pops Recipe
I’d love to hear your feedback on this post, so please rate and comment below!
Easy Yogurt Bars
Ingredients
- 1 cup sliced ripe banana (from about 1 large banana; or other desired fruit such as frozen wild blueberries or mango)
- 1½ cups Greek-style plain yogurt (whole-milk yogurt preferred)
- 2 tablespoons maple syrup (or honey, optional to taste)
- 1 cup crushed granola (without any large nuts; press lightly between your fingers to break up large clumps)
- berries or sprinkles (for topping, optional)
Instructions
- Add the banana, yogurt, and maple syrup to a blender. Blend smooth.
- Line an 8×8-inch baking pan with parchment paper. (This will make it easy to lift the bars out of the pan and slice.)
- Sprinkle granola on the bottom of the pan. Pour the blended yogurt mixture overtop. Smooth and add optional toppings if using.
- Freeze for 4-6 hours
- To serve, remove from the freezer and lift the bars out of the pan using parchment paper. Run a knife under very hot water and slice into bars. Serve immediately.
Notes
- Freeze leftover bars in a sealed freezer bag for up to 3 months.
- Greek yogurt creates a slightly creamier texture, which makes them a little more pleasant (and softer) to bite into.
- You can replace ½ cup of the yogurt with canned full-fat coconut milk for an even creamier consistency in the finished bars.
- Dairy-free: Use Greek-style nondairy yogurt or full-fat canned coconut milk.
- Swap in graham crackers for the granola if desired.
- Trade in mango or wild blueberries for the banana if you prefer.
- To make without a blender, mash the banana with a potato masher. Stir it together with the yogurt, coconut milk, and the honey or maple syrup. Proceed with the recipe.
- This melts quickly so encourage the kids to enjoy it right away!
Nutrition
This post was first published in June 2023.


Wow. These were soo good. I made them this morning for my 1 year old as a make-ahead breakfast. They didn’t make it to dinner. My 3 year old, 6 year old, me, and my husband ate them all. Well, we did give the baby some. Lol.
My great grandson is only one year old , you say use honey. I thought honey is not safe, is that true?
Honey is only a safety concern for infants younger than 1 year old due to the risk of infant botulism. Over age one, their immune systems are generally considered to be developed enough for this not to be a concern. You can use maple syrup or omit it entirely as you prefer.
Perfect way to use up some fruit that was ready to go bad or in the freezer. We used chia seeds as “sprinkles.” I had to use a bit more granola than the recipe called for but my 3 yr old and I will def be having these again.