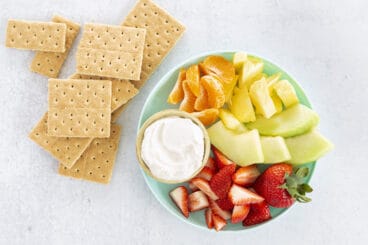
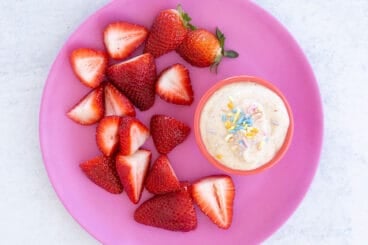
Transform pantry staples into the yummiest homemade Graham Crackers with this easy recipe. These make a perfect snack with a side of fruit or yogurt dip.

These Homemade Graham Crackers are SO yummy!! Which I admit surprised me because my kids think the store-bought ones are sort of meh. They have become one of our very favorite healthy snacks to make.
Quick Look: Homemade Graham Crackers
- Prep Time: 10 minutes
- Cook Time: 14 minutes
- Total Time: 24 minutes
- Serving: 8
- Flavor Profile: Vanilla crisp crackers with hint of cinnamon
- Difficulty: Easy homemade snack with simple steps and ingredients
- Why to Make: It’s an easy way to make a toddler favorite at home
SUMMARIZE & SAVE THIS CONTENT
Table of Contents
With just enough sweetness, a pleasant crunch (that’s not too firm or crisp for younger toddlers), and a wonderful flavor, these homemade crackers are an excellent snack to share with the kids.
Why this Recipe Works
The method is straightforward—you don’t need a stand mixer, electric mixer, or anything other than a bowl and your hands—and they are easy to adjust for allergies. A toddler snack win if there ever was one!
And they store really well for up to three weeks at room temperature—or in a snack container—so you don’t have to worry about the texture changing as they sit. I love knowing that they won’t be wasted!
(You may also like my Homemade Fruit Snacks recipe, Animal Crackers, and Cheese Crackers.)
Ingredients You Need
Here’s a look at the ingredients you need to make this Homemade Graham Cracker recipe so you know what to have on hand and ready to go.
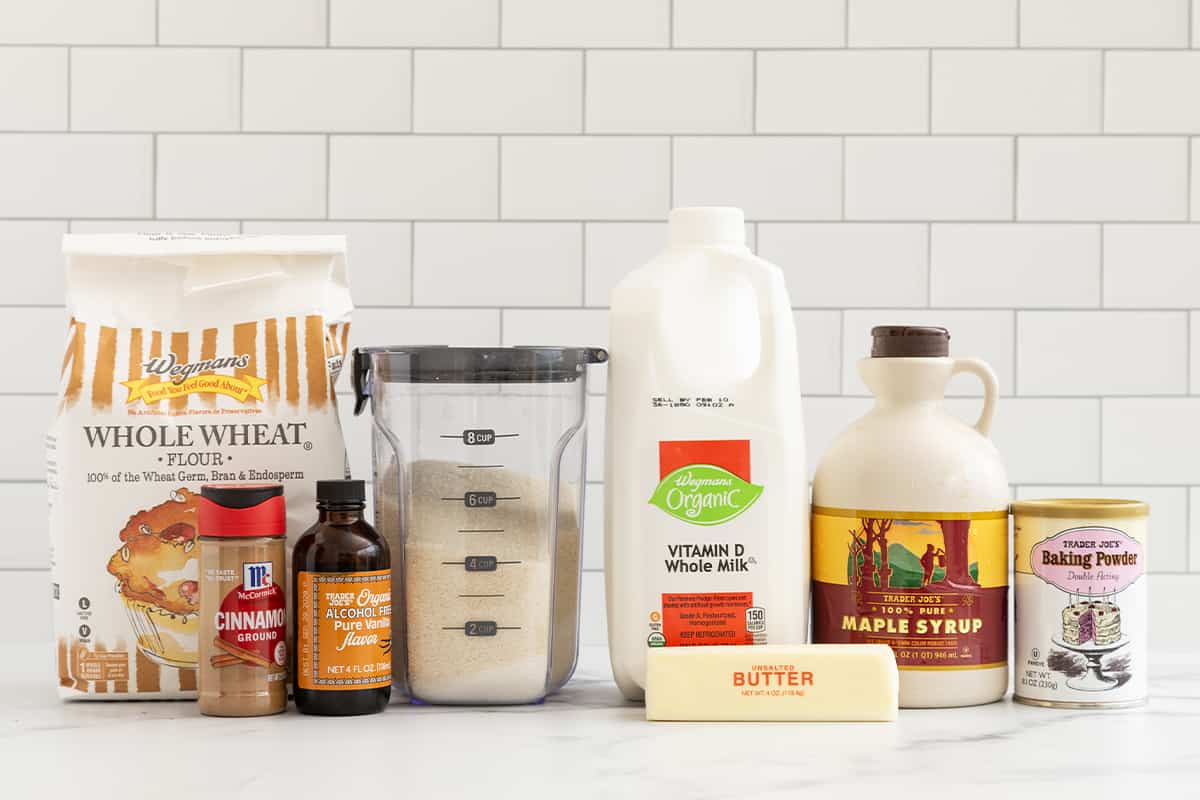
- Whole wheat flour: I use whole wheat flour here instead of graham flour simply because it’s so much easier to find. And it results in a similar flavor and texture (or better!) than crackers made with graham flour.
- Cinnamon: A touch of cinnamon adds pleasant flavor to the graham crackers, without overpowering them. (They don’t taste overtly cinnamon-y, just delish.)
- Sugar: I use a combination of sugar and honey in this dough because it’s what helps to create the crisp texture of the crackers. (If you omit the sugar, they turn out much softer, in my experience.)
- Honey: This helps to create the classic graham cracker texture, in combination with the sugar. Both are used in modest amounts to keep the crackers lower in added sugars. Use maple syrup instead of honey for kids under age 1.
- Milk: I use whole milk in my baking and cooking, but any type you prefer will work here.
- Unsalted butter: I bake with unsalted butter so I can control the saltiness, so that’s what I use here. If you have only salted butter, simply omit the salt in the recipe.
- Vanilla extract: You can use pure or artificial vanilla in this recipe. I usually use pure alcohol-free vanilla.
Featured Review ⭐️⭐️⭐️⭐️⭐️
“These are so easy to make, I just whipped up a batch while my twins were napping. Delicious! I just use a pizza cutter to cut the dough into crackers and it works like a charm. This is a favorite recipe in our household!!” —Savanna
How to Make Homemade Graham Crackers
Below is an overview of how to make the Homemade Graham Crackers recipe so you know what to expect from the process of this easy snacks to make at home. Scroll down to the end of this post for the full recipe, including the amounts and timing.

Step 1. Add the ingredients to a bowl.

Step 2. Use your hands to bring it together into a dough, making sure all of the butter is worked in.

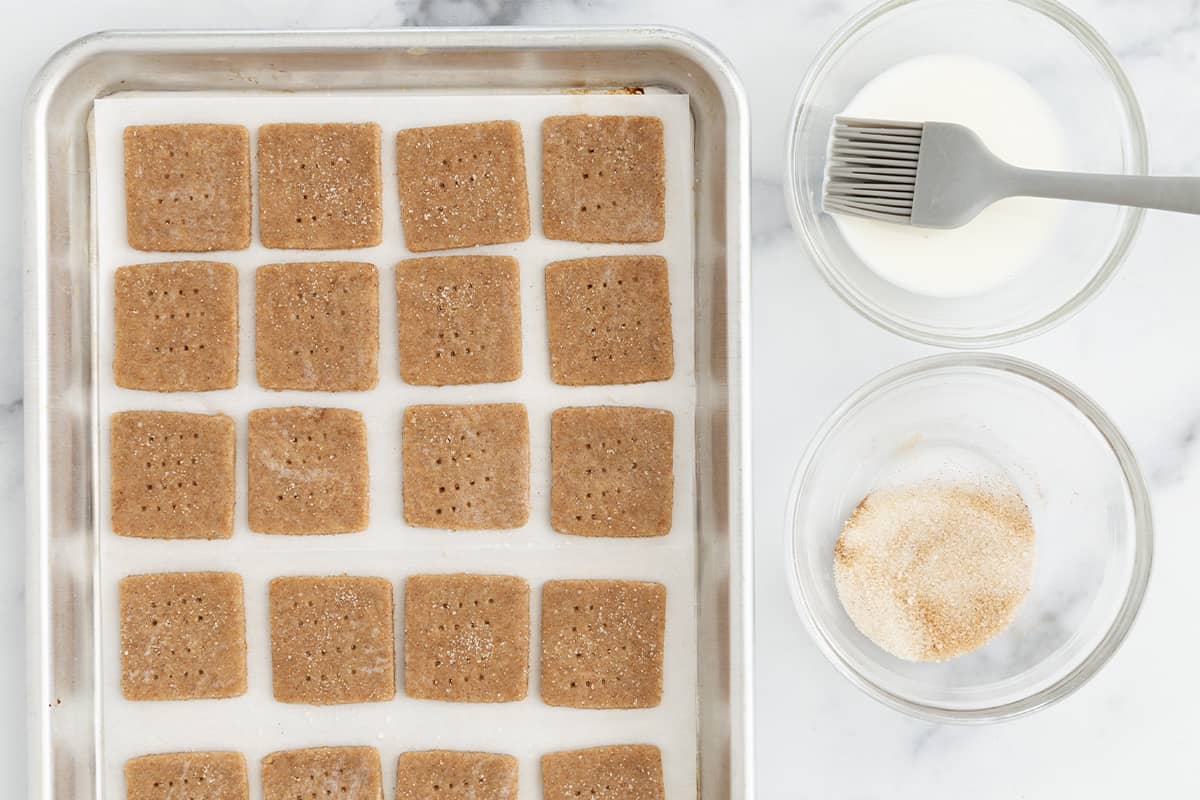
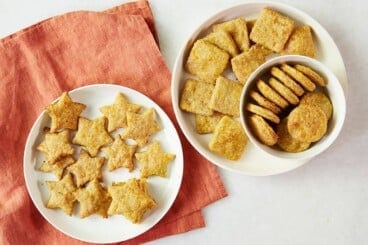
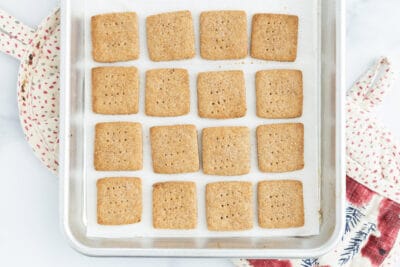
Step 3. Roll out between two pieces of parchment paper. Cut with a cookie cutter. I’m using a 2-inch square here, but you can make rectangles or even cut them with a knife.

Step 4. Poke with a fork, brush with milk, and sprinkle with cinnamon-sugar, optional. Bake until lightly golden brown. Do not underbake.
TIP: If the dough is sticky at any point, you can pop it into the refrigerator for 5 minutes to chill and to firm up.
Your toddler won’t eat? Help is here!
Sign up for our email updates to get tips and ideas sent your way!
Homemade Graham Crackers FAQs
I like to use whole wheat flour since it’s easy to find at the store, works really well in the recipe, and produces a nutty, delicious flavor with whole grains and fiber.
You can serve these crackers with fruit, yogurt, cottage cheese, or any other sides you like.
These are low in added sugar, they have a fresh delicious flavor, and a crisp texture. We love the flavor a lot more than ones that you buy at the store.
How to Store
Let Homemade Graham Crackers cool completely on the baking sheet, then store in an airtight container at room temperature for up to three weeks.
Best Tips for Success
- Brushing the dough with milk and sprinkling with cinnamon and sugar is optional but enhances the texture.
- Use maple syrup in place of honey for kids under age 1.
- Use dairy-free milk if desired.
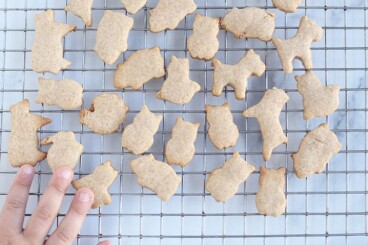
- Cut into any other shapes you prefer.
- If the dough is sticky at any point during rolling, pop it into the refrigerator for 5 minutes to chill and firm up.
- When making my own graham crackers recipe, I roll the dough out between sheets of parchment paper, as that helps it to not stick.
- Slide a knife under your cutouts to make them easy to transfer to your baking sheet.
More Easy Snacks
I’d love to hear your feedback on this recipe so please comment below to share.
Homemade Graham Crackers
Ingredients
Graham Cracker Dough
- 1 cup whole wheat flour
- 2 tablespoons sugar
- ½ teaspoon baking powder
- ½ teaspoon cinnamon
- ⅛ teaspoon salt
- ¼ cup unsalted butter (softened at room temperature)
- 2 tablespoons milk
- 2 tablespoons honey
- ½ teaspoon vanilla extract
Cinnamon Topping (optional)
- ½ teaspoon cinnamon
- ½ teaspoon sugar
- 1 tablespoon milk
Instructions
- Preheat the oven to 375 degrees F and line a baking sheet with parchment paper.
- Place all ingredients into a bowl except the topping ingredients and use your hand to mix together to form a dough. (If the dough is a little crumbly, be sure it’s thoroughly combined. If it’s still crumbly, add ½-1 tablespoon additional milk until it comes together. You can also form the dough by pulsing the ingredients in a food processor.)
- Make a flattened disk of dough.
- Roll the dough ¼-inch thick between two pieces of parchment paper. Try to get them as even as possible so they bake in the same amount of time.
- Cut out with a 2-inch square cookie cutter. Transfer to the prepared baking sheet. Use a fork to poke holes in each square.
- Optional: Add the remaining cinnamon and sugar together in a small bowl. Brush the dough squares with milk. Sprinkle with cinnamon and sugar.
- Set the timer for 12 minutes and bake. Continue baking in 2-minute increments up to 18 minutes until the tops and edges are lightly golden brown. Expect the crackers to visually brown as they bake. (Mine usually take 16 minutes.)
- Remove from the oven, let cool completely on the baking sheet. They will firm as they cool.
- Store in an airtight container for up to three weeks.
Equipment
- storage container
Video
Notes
- Let cool completely on the baking sheet, then store in an airtight container at room temperature for up to three weeks.
- Use a 1:1 style of gluten-free flour blend, if desired, to replace the whole wheat flour. You may need an extra tablespoon or so of the flour to make sure the dough isn’t too sticky.
- Brushing the dough with milk and sprinkling with cinnamon and sugar is optional, but enhances the texture.
- Use maple syrup in place of honey for kids under age 1.
- Use dairy-free milk if desired.
- Cut into any other shapes you prefer. I used a 2-inch square here.
Nutrition
This post was first published February 2024.


I used 100% organic ingredients. I used all purpose flour, maple sugar instead of regular and salted butter (because it’s all I had). I sprinkled with primal cinnamon sugar cookie topping.
My oven 370° for 12 mins for thinner ones and 14 mins for thicker. Delicious! Thank you!
I made this recipe for my toddler and she loves them! I got a bit creative with the ingredients and how I shaped the crackers (a pasta roller works wonders if you don’t have the right cookie cutter). First, I doubled the recipe because, hello, cook once, eat twice! Second, I used maple syrup instead of honey. I have honey in the pantry! Third, I added 4tbsp wheat germ for extra nutrition (2tbsp if you are not doubling the recipe). Finally, I added some all spice and nutmeg and vanilla because why not! I will absolutely be making these again. I have stored them in the freezer too.
Sounds great, thanks for sharing!
Could I use all purpose flour instead?
Sure, and just add a little more flour if the dough is sticky.
Do you think these would hold their shape if I used cookie cutter stamps? Thanks!
They might not have clean, crisp edges, but if you use a non-detailed cutter, then it should work!
I think so!
Could I add ground flax seed or chia seed to these? Would I need to add less flour?
I made these and they were great. On the second try that is lol. The first time i burned them a bit but that’s on me because my oven is old and the closest to a 190°C setting i had was 200°C, which i found the sweet spot for these crackers to be baking them for around 9-10 minutes. I also needed to add a bit more flour because even with 1 cup of it, it was really sticky, so i added maybe around ¼-½ cup, which was in total around maybe 160-180g of whole wheat flour. These go great with milk and bananas(and banana milk/smoothies lol).
Have you experimented with or have suggestions for making a chocolate version of these?
I haven’t but I would try replacing 2 tbsp of the flour with cocoa powder. Let me know how it goes!
That worked great! They are delish! Thank you!
Do you think this would work with coconut oil instead of butter?
I haven’t tried it so I can’t say for sure, but it should work.
These are so easy to make, I just whipped up a batch while my twins were napping. I’ve made them several times without the added sugar and they were okay but I just made them for the first time and added the sugar. Delicious! It’s such a small amount but makes a big difference. I just use a pizza cutter to cut the dough into crackers and it works like a charm. This is a favorite recipe in our household!
These are crunchity-vicious! Seriously, You don’t notice that its wheat flour, if you’re used to white. The wheat flour blends right in! I also omitted the topping and both I and my preschooler didn’t miss a thing! Thank you!
I made these for my granddaughter they were fabulous. I use little tiny flower, butterfly and hard cookie cutters and it held the shape perfectly. I baked the first batch for 15 minutes and the second batch I cut back by a few minutes for a lighter crust.
These were delicious! I doubled the recipe since they are good for 3 weeks, but they were gone within days. I will triple the recipe next time!