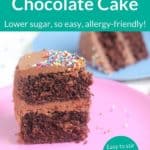
This super easy stir-together Healthy Chocolate Cake is a cinch to make, and it has less sugar than traditional cakes. It happens to be egg-free and vegan, too!
I’ve been searching for a “house cake”—you know, one that becomes the traditional cake we make as kids birthday cakes and special occasions. One that we’ll think back on fondly. This is it!
Quick Look: Healthy Chocolate Cake
- Prep Time: 10 minutes
- Cook Time: 18 minutes
- Total Time: 28 minutes
- Serving: 8-10
- Flavor Profile: Classic chocolate cake with moist and tender crumb
- Difficulty: Easy, perfect for baking without fussy methods or tools
- Why to Make: It’s a quick, reliable way to enjoy chocolate cake with less sugar
SUMMARIZE & SAVE THIS CONTENT
Table of Contents
This cake is easy enough to make without much notice because as we all know, sometimes you just need a slice of cake for no good reason! (That’s similar to my Healthy Vanilla Cupcakes, too.)
Why This Recipe Works
With an easy one-bowl method that requires zero electric mixers or fancy tools, you can stir together chocolate cake batter that bakes up moist, tender, and filled with the flavor you expect. It’s a great kids birthday cake or a holiday dessert.
It is also made with less sugar than traditional cakes (which is my personal flavor preference) and has some ingredient options so you can decide how “healthy” to make it. (Maybe healthier is a better term, but whatever you call it, it’s so darn good!)
(I also have a delicious Easy Vanilla Cake version, a Funfetti Cake that’s also vegan, and Vegan Chocolate Cupcakes as more easy dessert options.)
Ingredients You Need
To make the Healthy Chocolate Cake, you’ll need to have the following ingredients on hand and ready to go.

- Flour: You can use whole wheat, all-purpose, or a mixture of the two. I usually use all-purpose flour.
- Vegetable oil: I typically use canola oil or vegetable oil here, but avocado oil would work, too.
- Sugar: A little granulated sugar is the sweetener of choice in this cake because it blends in so well and adds moisture.
- Baking soda: Fresh, active baking soda helps the cake bake through and rise nicely. (This works much better than baking powder, so be sure to use baking soda.)
- Cocoa powder: I like Saco or Hershey’s Special Dark for the best chocolate flavor.
- White vinegar: This works with the other ingredients to deliver the perfect texture you expect in a chocolate cake. This is the best vinegar type to use since you cannot taste the flavor in the baked cake.
- Vanilla extract: Paired with cocoa powder, vanilla extract is an extra flavor note.
- Quick Chocolate Frosting: Or a frosting of your choice.
TIP: The cake is dairy and egg-free, and there’s not even any butter. You can make it gluten-free by using a gluten-free cup-for-cup flour blend. It’s like a magic cake!
Featured Review ⭐️⭐️⭐️⭐️⭐️
“So easy that I baked this between contractions while I was in labor with my second to have a birthday cake on the day of her birth!” —Kris
How to Make Healthy Chocolate Cake
Here’s the basic process of making the Healthy Chocolate Cake. Scroll down to the bottom of this post for the full recipe, including the amounts and timing.
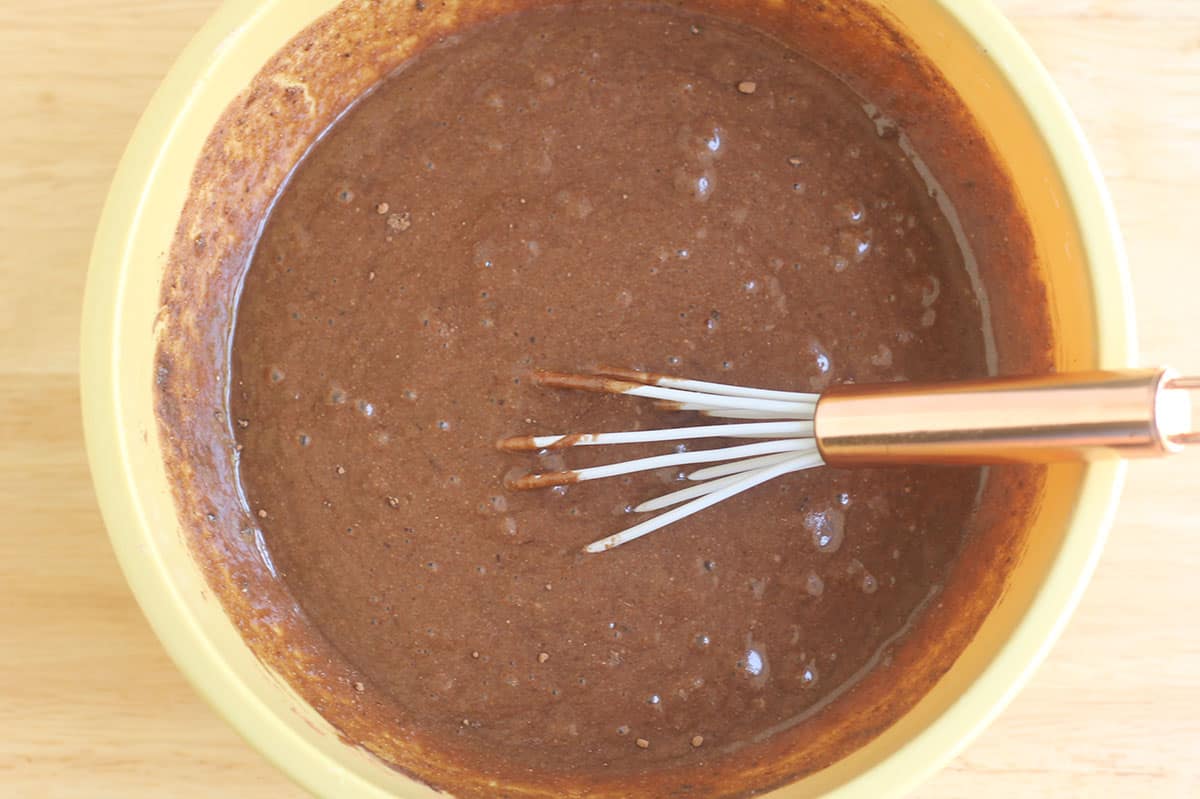
Step 1. Stir together the ingredients in a large bowl with a whisk. Make sure you get all the lumps out of the cocoa powder.
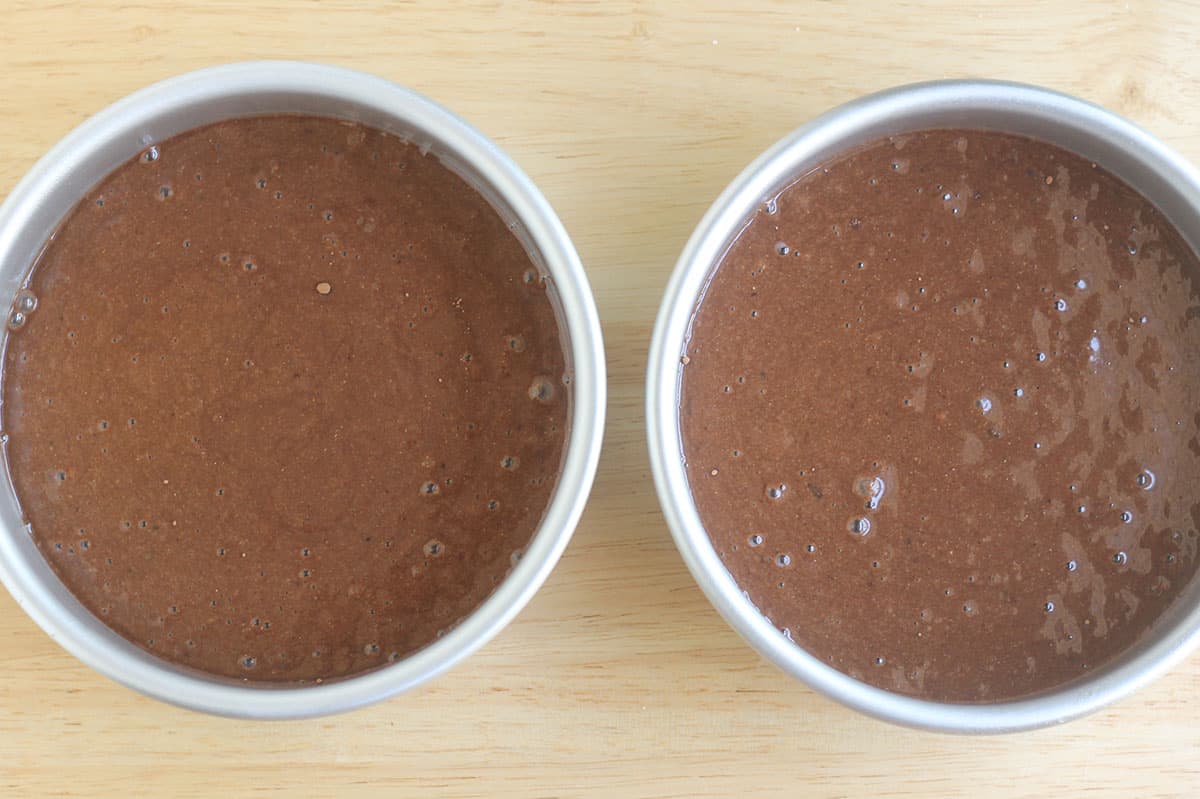
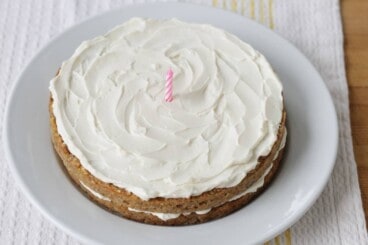
Step 2. Divide batter evenly between two 6-inch pans (coated with nonstick spray and parchment paper rounds).
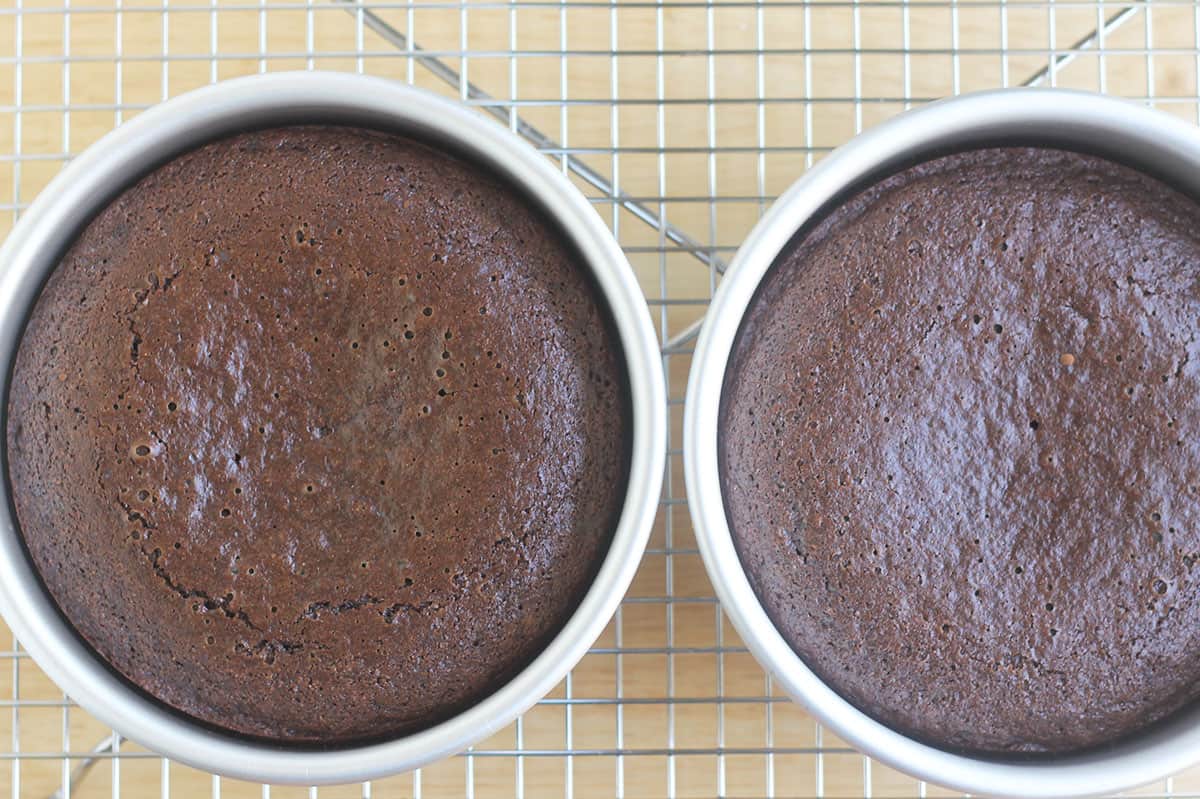
Step 3. Bake until just firm to the touch and a toothpick or cake tester inserted into the center comes out clean.
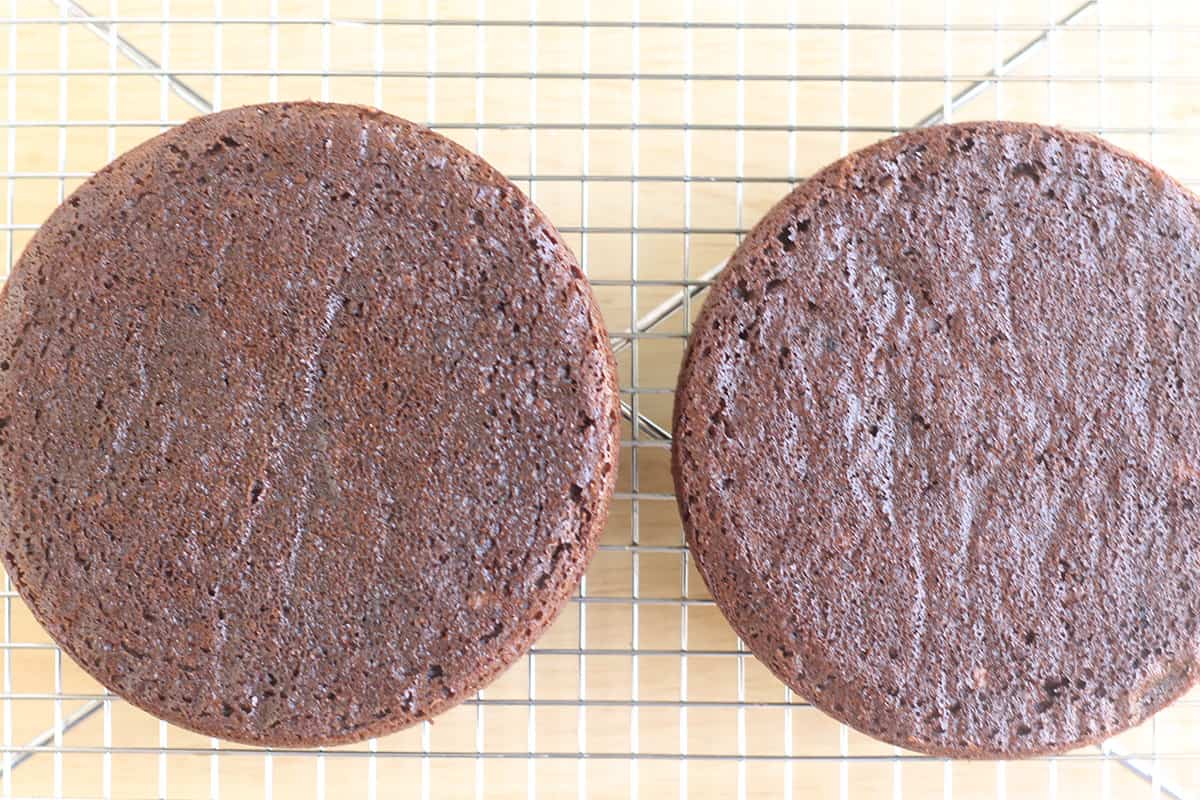
Step 4. Remove the cakes from the pans. Let cool on a wire rack.
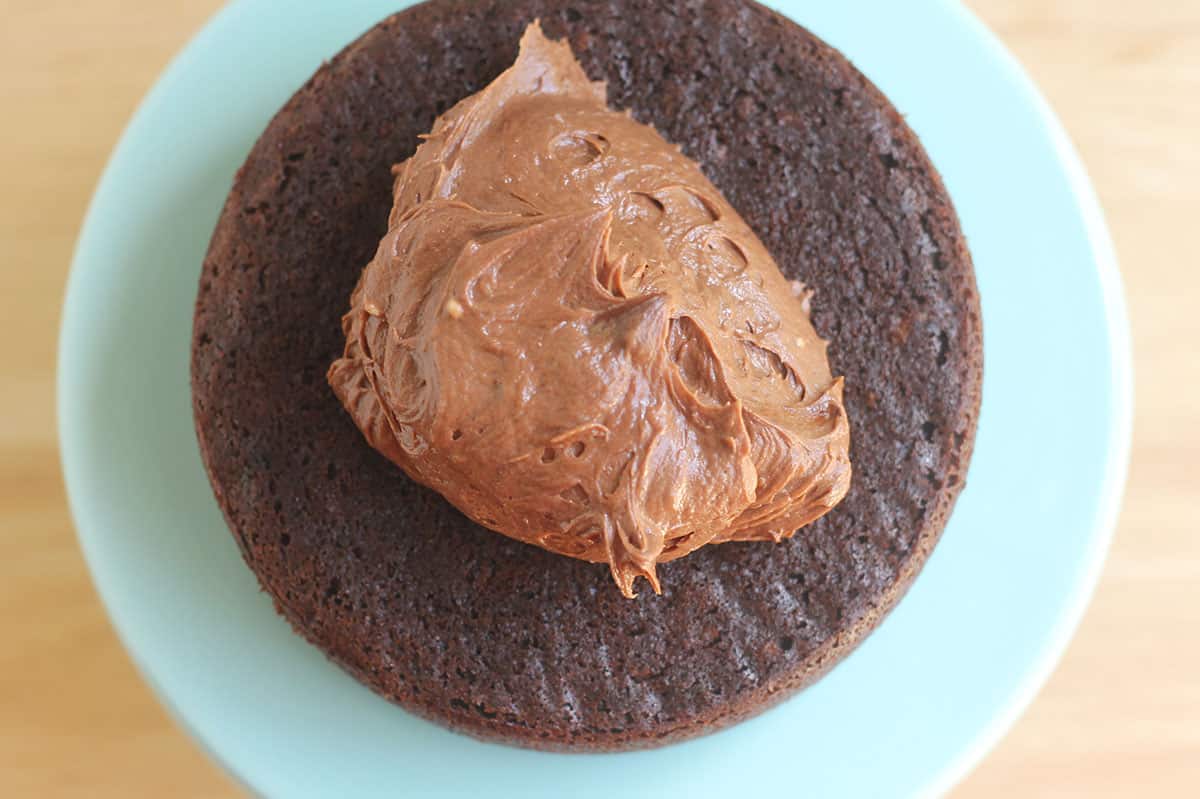
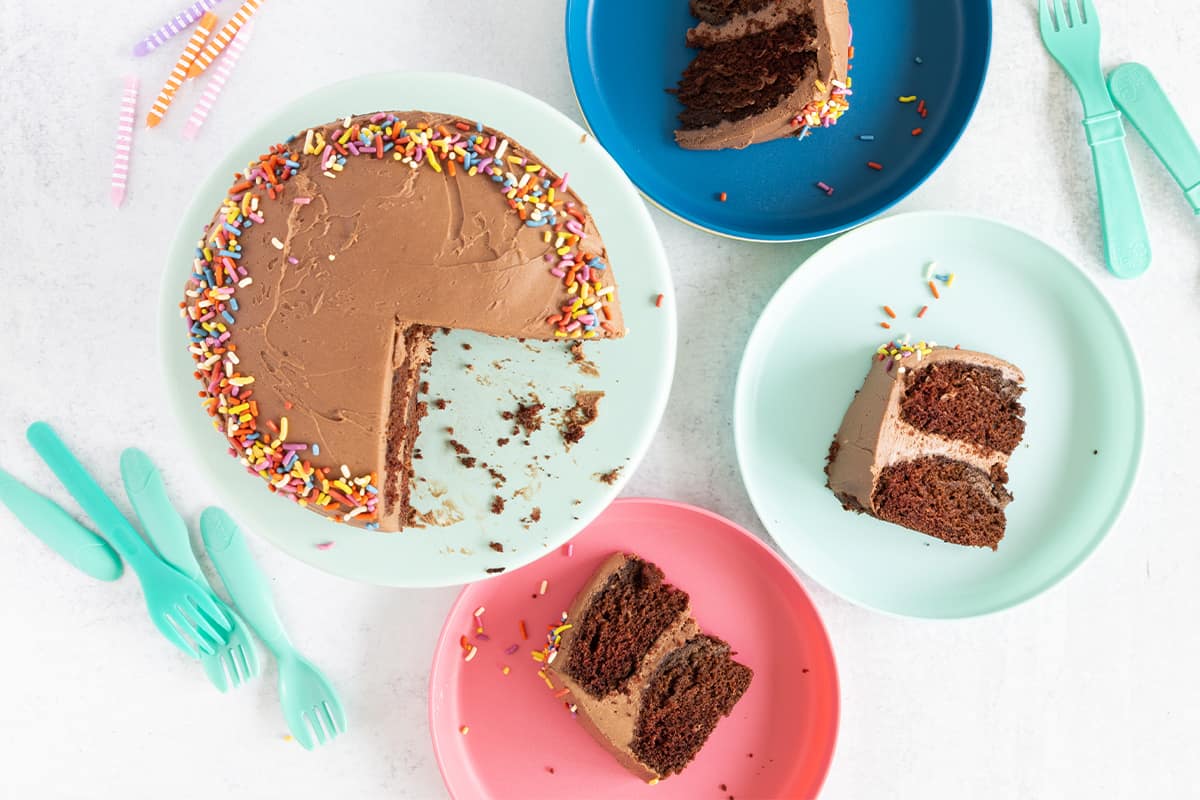
Step 5. Place 1 cake onto a platter or cake stand. Add a big spoonful of desired frosting. Spread to cover the top.
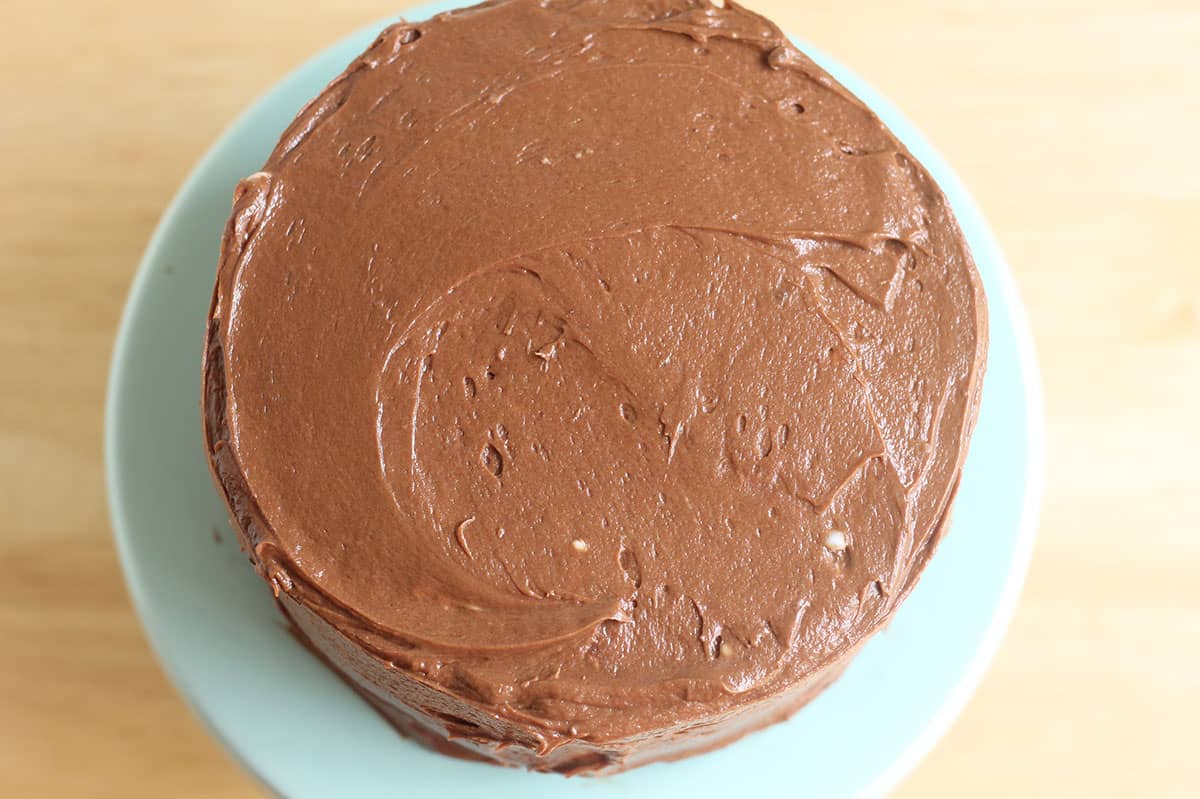
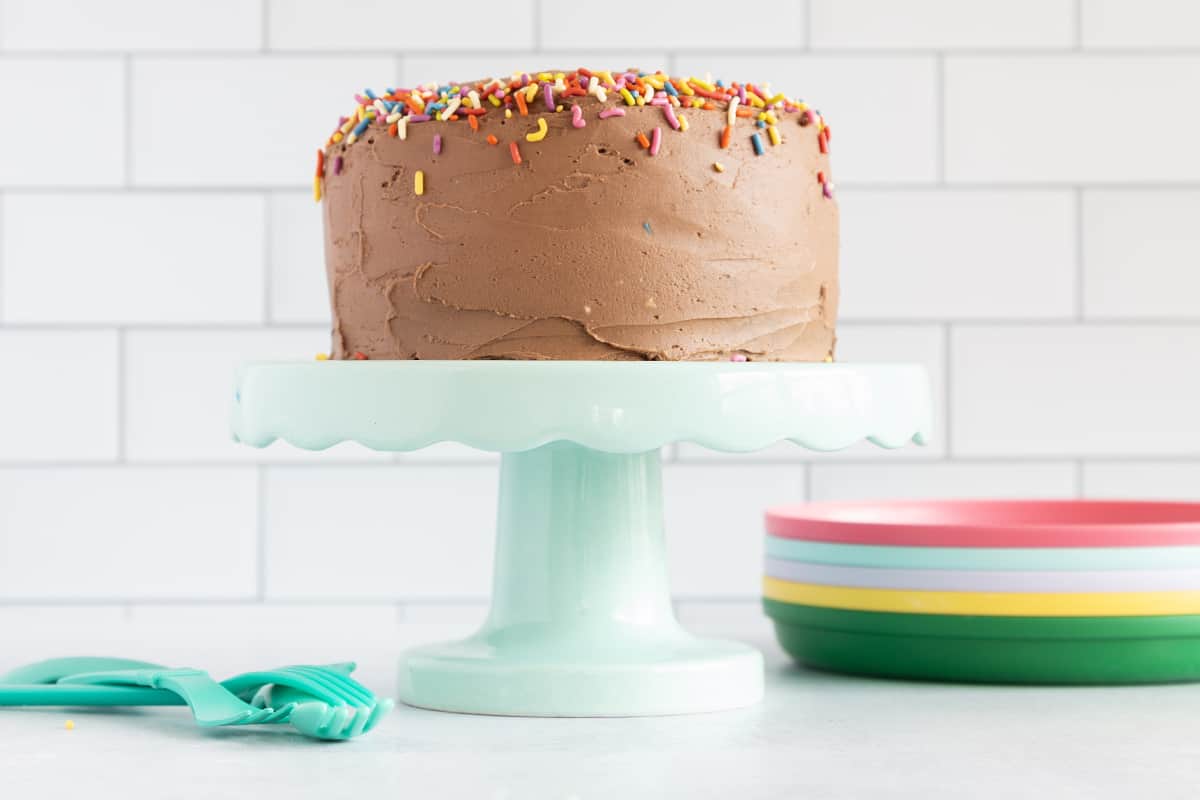
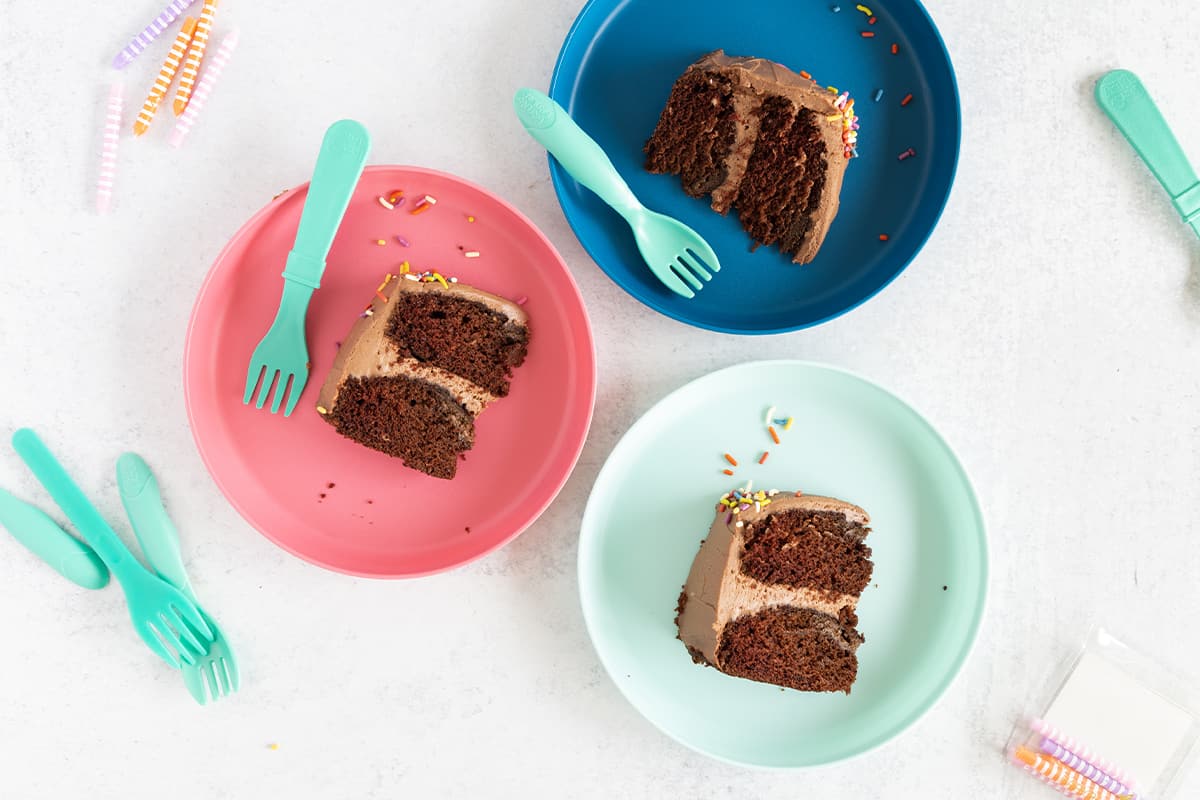
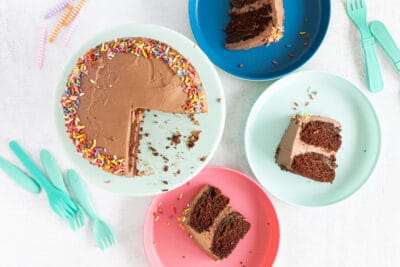
Step 6. Add the second cake and the rest of the frosting. Spread over the top and sides. Add sprinkles if desired.
Your toddler won’t eat? Help is here!
Sign up for our email updates to get tips and ideas sent your way!
Frosting Options
Frost with my Quick Chocolate Frosting, Chocolate Cream Cheese Frosting, regular Cream Cheese Frosting, or Strawberry Frosting, or use any other frosting that you enjoy.
Of those options, we almost always use the Chocolate Cream Cheese Frosting for a delicious double chocolate cake.
Healthy Chocolate Cake FAQs
I use that word to signify that this cake is lower in sugar than most comparable chocolate cake recipes. I worked hard to make sure it’s plenty sweet, without being too sweet.
We like to use a cookie cutter to form a shape, then fill with sprinkles. We also sometimes just do chocolate frosting and forget any other decorating!
Yes, you can freeze chocolate cake and this one freezes so well. We love to do that if we want half one day and half another day a few weeks ahead. Wrap a section or slices of cake in plastic wrap and place into a freezer bag. Remove as much air as you can and freeze for up to 6 months. Thaw at room temperature or overnight in the fridge.
How to Store
You can make the Healthy Chocolate Cake layers the day before you plan to serve. Let cool fully, then place on 2 separate plates and wrap well with plastic wrap. Store at room temperature. Frost just before serving if possible.
Store leftovers, wrapped well in the fridge. I am partial to how this cake tastes when it’s chilled, right out of the fridge.
You can also freeze slices for future enjoyment. Wrap tightly in plastic wrap (wrapping slices on small paper plates makes this easy) and freeze for up to 6 months. Thaw at room temperature or in the fridge.
Best Tips for Success
- To make this in a 9-inch cake pan, use just 1 pan and bake for 16-20 minutes or until a cake tester inserted in the center comes out clean. Be sure to grease the pan well to ensure it doesn’t stick. Double the recipe to make a 2-layer 9-inch cake.
- To bake as cupcakes, use ¼ cup batter in each standard size muffin cup (greased well with nonstick spray) and bake for 14-16 minutes, or until a cake tester inserted into the center comes out cleanly.
- Gluten-free: Use cup-for-cup gluten-free flour blend in place of the wheat flour.
- Be sure to grease the pan well to ensure the cake doesn’t stick.
- If you are at all worried about your cakes sticking to the pans, trace the pans onto parchment paper. Cut out the rounds, trimming slightly so they fit inside of the cakes. Place each round of parchment paper into the cake pan, then spray the paper and sides of the pan with nonstick spray.
More Easy Desserts
I’d love to hear your feedback if you try this recipe for your family, so please comment below to share!
Healthy Chocolate Cake (Lower Sugar)
Ingredients
- 1½ cups all-purpose flour (or whole-wheat flour)
- ⅔ cup sugar
- 1 teaspoon baking soda
- ¼ teaspoon salt
- ⅓ cup cocoa powder (I like Saco or Hershey's Special Dark)
- 1 cup water
- ⅓ cup vegetable oil (or melted butter or avocado oil)
- 1 tablespoon white vinegar
- 1 teaspoon pure vanilla extract
- 1 recipe Quick Chocolate Frosting or Chocolate Cream Cheese Frosting
Instructions
- Preheat the oven to 350 degrees F and grease two 6-inch cake pans very well on the bottom and sides with nonstick spray. (I use classic Pam spray.)
- Add the ingredients to a medium bowl and whisk gently to combine. Divide the batter between the prepared pans, using about 1 cup and 2 tablespoons in each pan.
- Bake for 18-20 minutes or until the middle is firm to a light touch and a cake tester inserted into the center comes out clean. Try not to overbake.
- Let cool on a wire rack for 5 minutes, then carefully remove the cakes from the pans by running a paring knife around the edges to loosen. Working with 1 pan at a time, carefully turn the pan over onto a wire rack. The cakes should slide out easily. Let cool completely on the wire rack.
- To frost, place 1 cake onto a cake stand or plate. Add ⅓ of the frosting to the top of the cake. Spread to the edges. Top with the second layer and the remaining frosting, then spread over the top and the sides. Add sprinkles if desired.
Equipment
Notes
- Store leftovers wrapped well in the fridge. You can also freeze slices for future enjoyment. Wrap tightly in plastic wrap (wrapping slices on small paper plates makes this easy) and freeze for up to 6 months. Thaw at room temperature or in the fridge.
- You can make the cakes the day before you plan to serve. Let cool fully, then place on 2 separate plates and wrap well with plastic wrap. Store at room temperature. Frost just before serving if possible.
- Frost with my Quick Chocolate Frosting, Chocolate Cream Cheese Frosting, or Strawberry Frosting. You could also use classic Cream Cheese Frosting.
- To make this in a 9-inch cake pan, use just 1 pan and bake for 16-20 minutes or until a cake tester inserted in the center comes out clean. Be sure to grease the pan well to ensure it doesn’t stick. Double the recipe to make a 2-layer 9-inch cake.
- To bake as cupcakes, use ¼ cup batter in each standard size muffin cup (greased well with nonstick spray) and bake for 14-16 minutes, or until a cake tester inserted into the center comes out cleanly.
- Gluten-free: Use cup-for-cup gluten-free flour blend in place of the wheat flour.
- Use a mix of all-purpose and whole wheat flour or all of one or the other. (All whole wheat will be a smidge denser.)
- Try to avoid over-baking to ensure the cake is moist and doesn’t crumble too much.
- Be sure to grease the pan well to ensure the cake doesn’t stick.
- If you are at all worried about your cakes sticking to the pans (these 6-inch pans do not tend to stick, but I can’t speak for every other cake pan) trace the pans onto parchment paper. Cut out the rounds, trimming slightly so they fit inside of the cakes. Place each round of parchment paper into the cake pan, then spray the paper and sides of the pan with nonstick spray. Proceed with the recipe.
Nutrition
This recipe was first published September 2020.


This is absolutely delicious! I made it in a 9in square pan and it came out with a great texture. I topped it with the quick chocolate frosting recipe and kept it in the fridge before we ate it. We all preferred eating it cold with this icing.
Hi! I baked this cake and it was delicious but it was a little flat. For a higher cake, would you recommend baking 2 cakes and stacking them or doubling the recipe? Thank you!
Sure, that will work!
Baked this for my husband’s birthday and what a WIN – made from stuff we had around the house, he couldn’t believe it wasn’t made from a mix (complimentary!). So easy. So good. Has that delicious, puddingy, rich texture I crave in a chocolate cake. Made a simple glaze and it was a hot – honestly, would’ve been good without icing too!
Love to hear that!
Hey Amy, any tips for baking two 9×9 inch square tin cakes? Joining them together side by side. Thank you!
Hi- I think you will want to double the recipe and then divide the batter in half and bake the two pans. Baking time should be 16-18 minutes by my best guess.
Hi, how long this cake last at room temperature? Or in the fridge. Thanks
It’s best stored in the fridge once it has frosting (if you use a frosting that has dairy) and can be kept in the fridge in an container for about a week
This recipe saved my life for my daughter’s 3rd birthday. We just came back from visiting family, had no groceries, and no money, but I was still able to make a delicious chocolate cake to celebrate her. Thank you a million times over for this recipe!!
Oh hooray!!
I’m in the UK and can’t find white vinegar in my local supermarket, is there a substitute I can use or would it be fine without?
You need something acidic so it reacts with the baking soda. Maybe another vinegar that doesn’t have a super strong flavor (so like not a wine vinegar). Or possibly lemon juice
Would apple cider vinegar work? Thanks!
I haven’t tried it that way so I can’t say for sure, but let me know if you test it out!
Looks delicious, can’t wait to try it. Is there any vegan frosting options you recommend? Some of my guests can’t unfortunately have dairy!
You can make the cream cheese frostings with vegan cream cheese and butter. Or there are some pretty widely available vegan options in the baking aisle of most US supermarkets now.
This cake is delicious and easy to make. We’re lucky we had any leftovers. I made this as a sheet cake and it worked fabulously. My recommendation if you’re making it this way is to double the recipe. I lined the pan with parchment paper and baked it so I could easily remove and transfer to a different platter for frosting and decorating.
Can I add red food color to make this red velvet?
Red velvet cake typically has less cocoa powder, so I am not sure that it would look or taste like what you are after if you just add food coloring. (And you’d need to adjust the other ingredients if you change the amount of cocoa powder.)
This looks good. Can I substitute apple sauce or honey for the granular sugar?
I do not think it will turn out if you add applesauce. It may work with honey but I haven’t tested it that way so I can’t say for sure.
This looks great! I‘d like to make this for my son‘s 3rd birthday and was wondering if I could add egg(s) and if yes how many (also goes for the vanilla cake recipe). Thank you!
I haven’t added eggs to this recipe since it’s so good without them so I can’t say for sure, but I hope you have a great time celebrating your son!
I followed the recipe to a T, and my cake batter is still completely liquid in the middle and fully cooked on the edges, just as happened to many others who commented. 40 min in the oven and the cake is still not done. And yes, I baked in 2 6-inch dishes. I followed the recipe and ingredients exactly as written. Amy kept suggesting to others that maybe their baking soda was expired, so I made sure to check mine and it’s not. I’m thinking that 350 is too high of a temp to bake this cake. It’s frustrating and I should have listened to the many other commenters and chosen a different recipe.
I am sorry to hear this. I have never had this happen in all of my years of making this so I am unable to know what went wrong. I wish I knew because it is a great cake!
This is probably the type of tin you have as this has happened to me with a different cake. Just lower the temp a little and cover with foil and it will take longer to bake 🙂
I have two 8 inch pans. Would
That work or should I double the recipe?
That will work (without doubling it)
I was so pleasantly surprised with this recipe!! I made this cake for my granddaughter’s birthday and it turned out fantastic!! So many people remarked at how good it was. I was a little nervous that the flavor would not be as good since it’s less sweet than other recipes I’ve made. Also, when I tasted the batter (this was a bonus since there were no raw eggs in it), the flavor was not as good as I thought it would be. However, the finished product was amazing! It was flavorful, without being too sweet, and it was perfectly moist. I doubled the recipe because I used a 9×13 pan. This meant that I had to bake it longer than the time frame in the recipe. Unfortunately, I didn’t pay attention to the total amount of time I baked it for. I set the time for 15 minutes, then kept baking in 3 minute increments until the toothpick came out clean. I will definitely be reusing this recipe!!
This was dangerously good