With ample protein in each serving, these fluffy Pumpkin Protein Pancakes are such a great meal to share with the kids on busy days. Plus, you can make them ahead and reheat them for quick meals throughout the week!

These satisfying Pumpkin Protein Pancakes are one of our new favorite fall breakfasts.
I love making protein pancakes (and Pumpkin Protein Muffins) using easy-to-find ingredients that are naturally higher in protein.
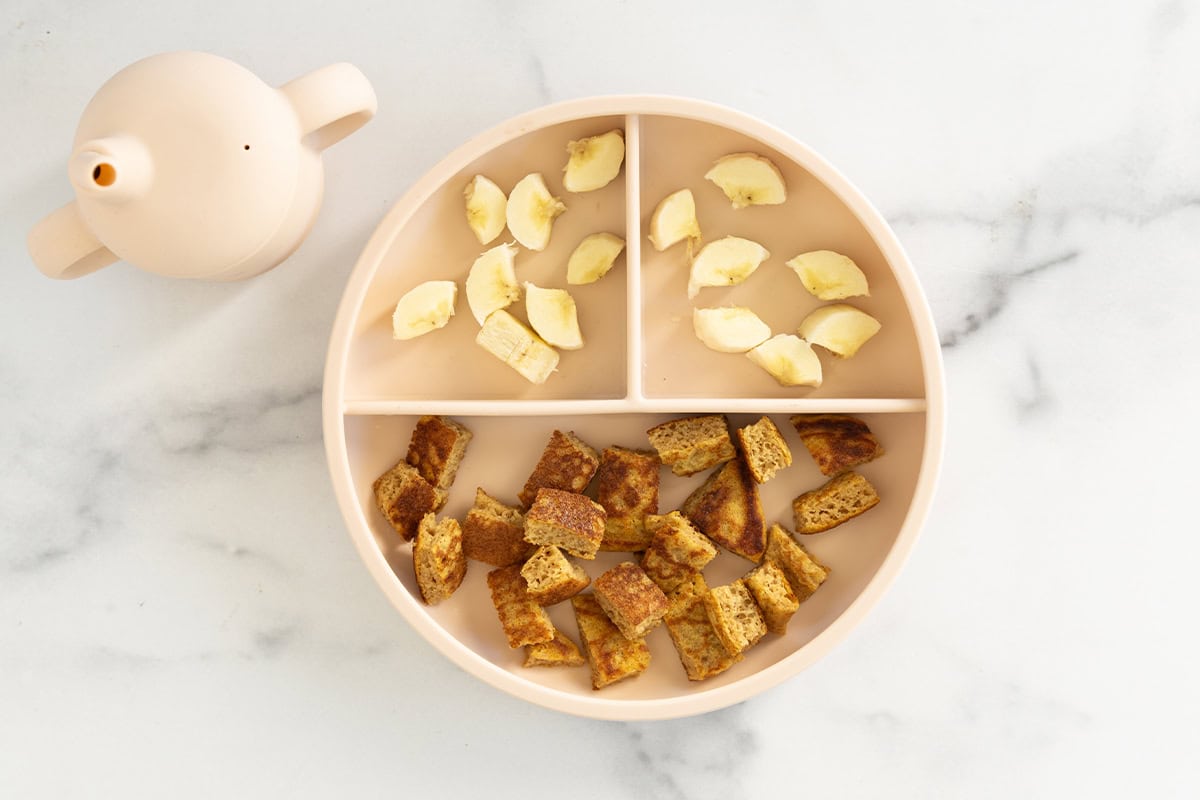
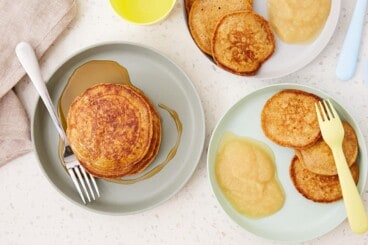
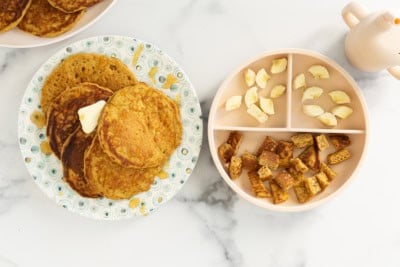
Which means you don’t need any unusual items to make this recipe. And you can serve them plain as a baby breakfast idea or 1-year-old recipe or with maple syrup, applesauce, or even nut butter to add more flavor for any age.
Why This Recipe Works
They stir together easily in one bowl, are seriously fluffy, and have a balanced mix of nutrients to help fuel us for the constant running around. They also reheat really nicely, so you can can serve them up for quick toddler breakfasts on future mornings.
(And if you have more pumpkin to use up, try my Easy Pumpkin Muffins, Soft Pumpkin Cookies, and yummy Pumpkin Smoothie.)
Table of Contents
Your toddler won’t eat? Help is here!
Sign up for our email updates to get tips and ideas sent your way!
Ingredients
Here’s a look at the ingredients you need to have on hand to make Pumpkin Protein Pancakes so you know what to pick up from the store or have ready.
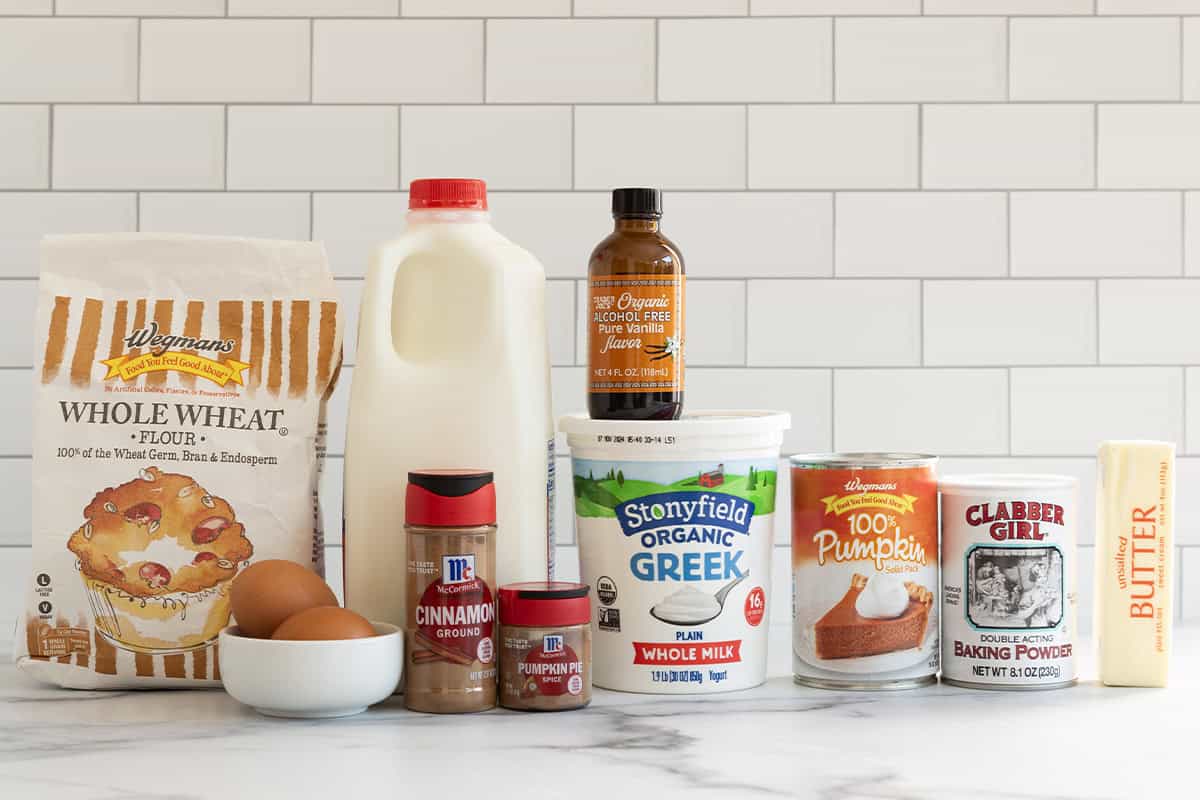
- Whole wheat flour: I use whole wheat flour in this recipe to add whole grains and because it works nicely to absorb the high levels of moisture in the pumpkin puree and yogurt.
- Baking powder: Be sure to use fresh baking powder in this recipe as it is key to the pancakes cooking through in the middle and rising to a fluffy state.
- Cinnamon, pumpkin pie spice, and vanilla: The combination of these cozy spices with vanilla lends a gentle pumpkin flavor that is just enough without being overpowering.
- Pumpkin puree: You can use canned pumpkin puree here to keep this super easy, or you can go with Homemade Pumpkin Puree if you prefer.
- Milk: A little milk ensures that the batter is the right texture to cook as pancakes. I use whole milk in my kitchen, but any type is fine here.
- Greek yogurt: Whole-milk yogurt will yield the creamiest results, and using Greek yogurt ensures the most protein and the best results. (Regular yogurt has more water content and will not work the same in the recipe.)
- Eggs: Eggs help the pancakes hold together. I use large eggs in my recipes. They also add to the protein content and the overall tender texture of the pancakes.
- Butter: I use unsalted butter in my cooking and baking so I can control the salt. I also use it to grease the pan when making pancakes.
- Protein powder (optional): You can add protein powder—plant-based, whey protein powder, homemade protein powder, or a kids protein powder—to this recipe for additional protein if you’d like. Remember that kids usually get enough protein in their diets without trying too hard, but if you are concerned or you want the pancakes to be more filling, it’s an option to add more.
Featured Review⭐️⭐️⭐️⭐️⭐️
“These are pancake perfection! I used unbleached all-purpose flour because that’s what I had on hand and they turned out so good. Perfect fluffy texture, but not at all dry. Tasted like pumpkin cookies and my whole household loved them!” —Haley
Step-by-Step Instructions
Here’s a preview of how to make these Pumpkin Protein Pancakes so you know what to expect from the process. Scroll down to the end of this post for the full information, including the amounts and the timing.
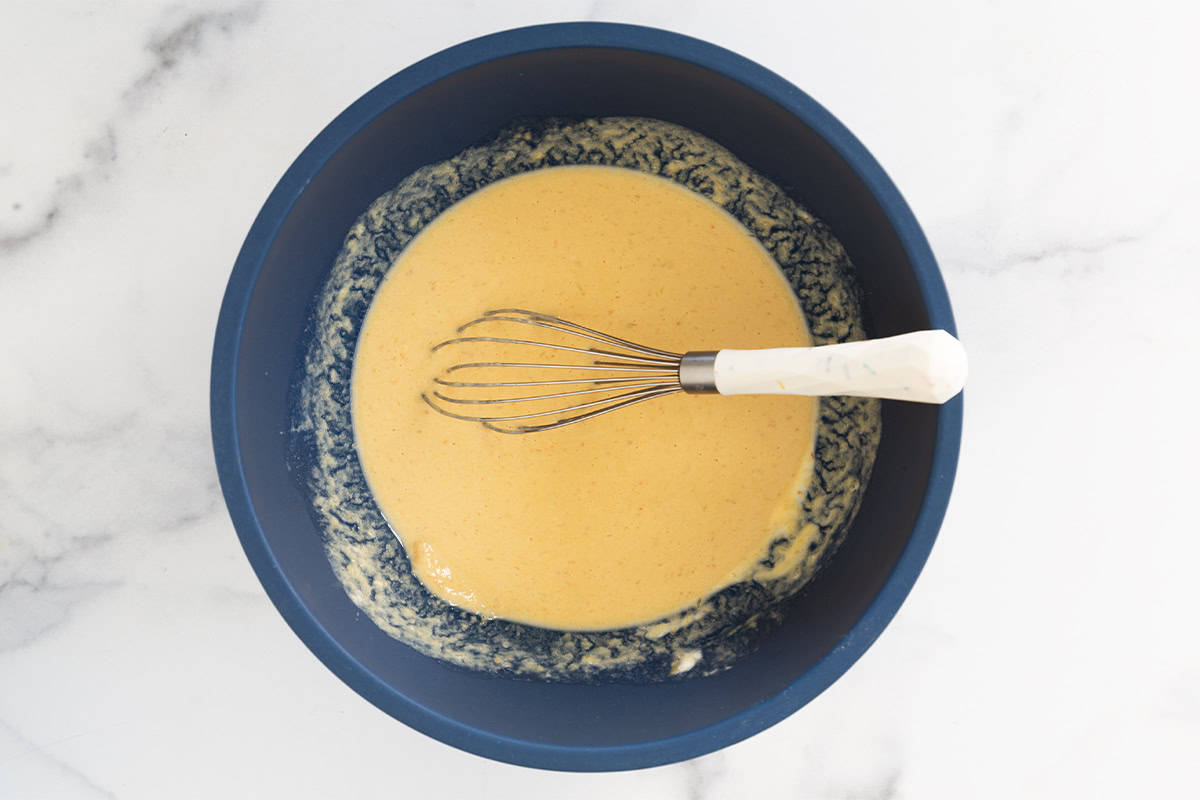
Step 1. Add wet ingredients to a large bowl and whisk to combine.
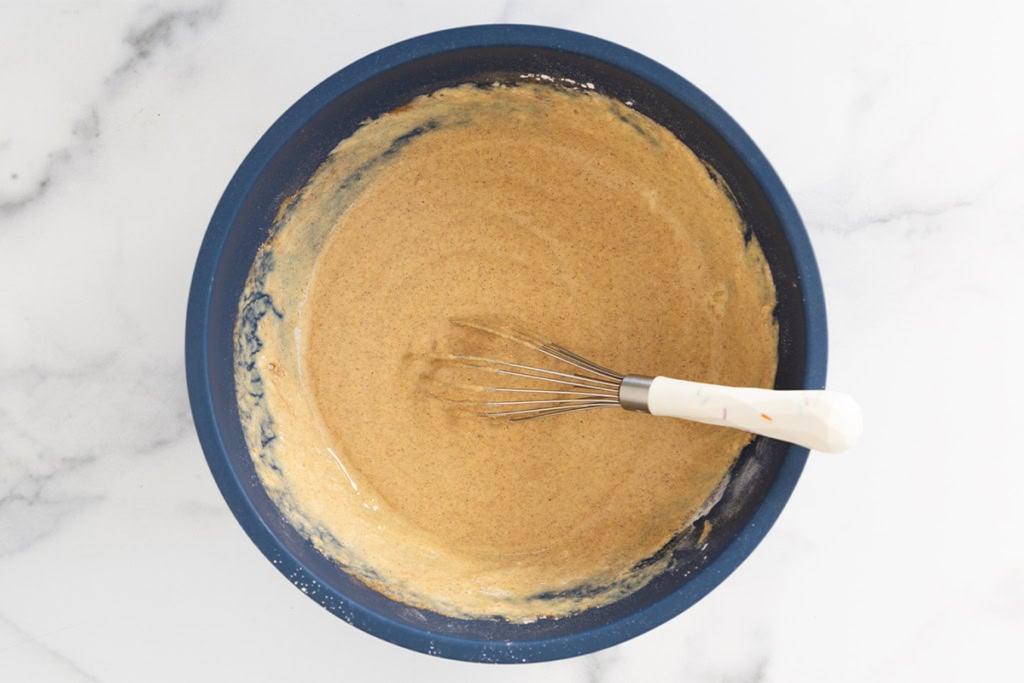
Step 2. Add the dry ingredients and gently whisk to combine.
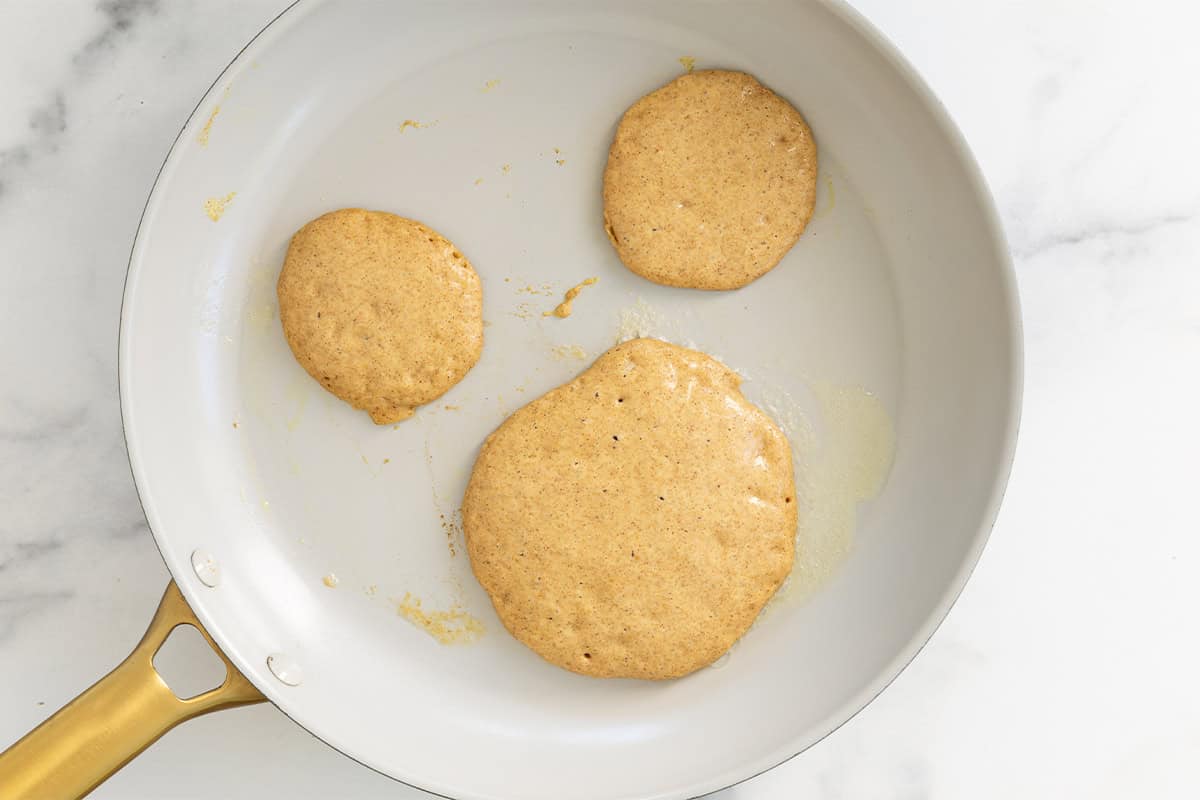
Step 3. Add a small amount of batter and spread thin to ensure the pancakes cook through.
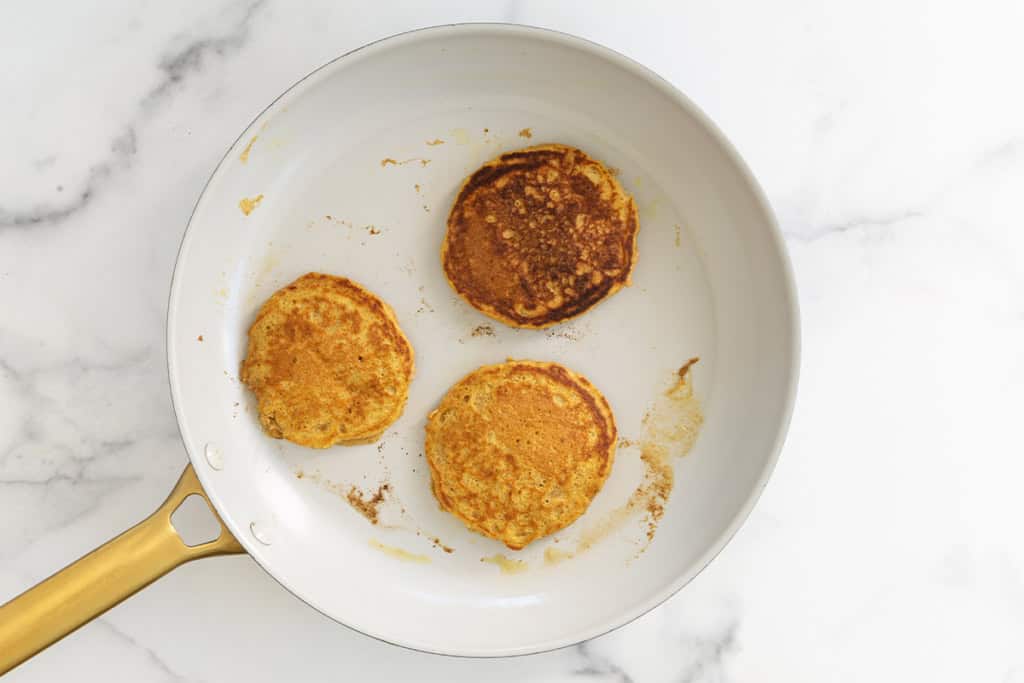
Step 4. Cook each side until set and lightly brown. Then flip.
Frequently Asked Questions
I haven’t tested that option but you may be able to add pumpkin and pumpkin spice to Kodiak pancake mix if you prefer.
I prefer to either make this recipe as directed below without protein powder or add unsweetened, plain whey protein since it has the least amount of flavor or texture impact to pancakes.
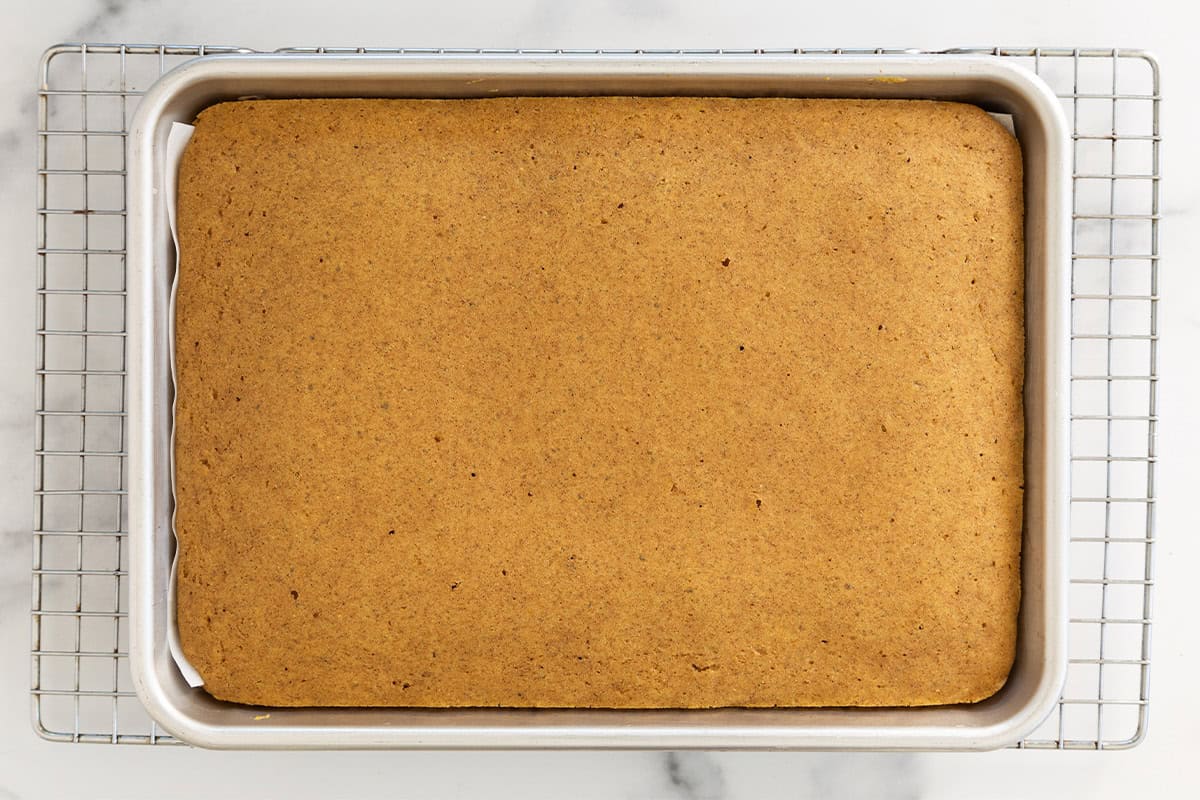
You can make the batter and pour it onto a lined sheet pan and bake in the oven for about 10-12 minutes.
How to Store
Store any leftover Pumpkin Protein Pancakes in an airtight container in the fridge for up to 5 days. Or, store cooled pancakes in a freezer bag in a single layer—or in layers with parchment paper between to prevent them from freezing together—for up to 6 months. Warm in 30-second increments on a heat-safe plate in the microwave.
Best Tips for Success
- Spread the batter thin, no more than ¼ inch thick. This will help the pancakes cook through.
- Depending on your stovetop and pan, you may need to turn the heat down to medium-low to ensure that the batter cooks all the way through without burning.
- I heat the oven to 200 degrees F and keep the cooked pancakes warm on a baking sheet in the oven while I finish the batch, though you could also serve them as you go.
- Dairy-free: Use nondairy milk.
- Gluten-free: Use buckwheat flour in place of the whole wheat flour. You may need a little bit more milk.
- Egg-free: The best option I’ve found for pancakes is to use a store-bought egg replacer like the one from Bob’s Red Mill.
Related Recipes

Breakfast
Fluffy Greek Yogurt Pancakes

Breakfast
Quick Cottage Cheese Pancakes
Breakfast
Favorite Sweet Potato Pancakes
Breakfast
Apple Sheet Pan Pancakes
I’d love to hear your feedback on this post, so please rate and comment below!
Pumpkin Protein Pancakes
Ingredients
- ½ cup pumpkin puree
- ½ cup Greek yogurt
- ¼ cup milk
- 2 eggs
- 2 tablespoons melted butter or neutral oil (plus more for cooking)
- 1 teaspoon vanilla extract
- 1 cup whole wheat flour
- 1-2 tablespoons sugar (optional)
- 2 teaspoons baking powder
- 1 teaspoon cinnamon
- ½ teaspoon pumpkin pie spice
- ¼ teaspoon salt
- ¼ cup protein powder (optional)
Instructions
- Add all the wet ingredients to a large bowl. Whisk to combine.
- Add all the dry ingredients. Whisk to combine.The batter should be pourable but thick.
- Heat a nonstick or cast-iron pan or griddle over medium-low heat. Add a sliver of butter, let melt, and swirl to cover pan.
- Add a small amount of batter, about ¼ cup at a time, and spread the batter thin, no more than ¼ inch thick, to ensure the pancakes cook through nicely. Cook for 3-4 minutes per side or until set and lightly brown. The pancakes should be mostly set around the edges and you should see little bubbles around the edges before you turn them over.
- Add more butter and repeat to cook the rest of the pancakes.
- Serve warm with syrup, nut butter, or yogurt.
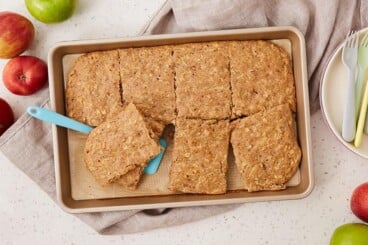
- (To make as a sheet pan pancake, preheat the oven to 400 degrees F. Grease a rimmed quarter or half sheet pan with nonstick spray and place a piece of parchment down on it. Add the batter and spread to about 1/2-inch thick. Bake for 10-12 minutes. Let cool slightly and slice to serve.)
Equipment
- Greenpan Nonstick Pan
Notes
- Store any leftover pancakes in an airtight container in the fridge for up to 5 days. Or, store cooled pancakes in a freezer bag in a single layer—or in layers with parchment paper between to prevent them from freezing together—for up to 6 months. Warm in 30-second increments on a heat-safe plate in the microwave.
- Spread the batter thin, no more than ¼ inch thick. This will help the pancakes cook through.
- Let the batter cook long enough in the pan so that it sets around the edges and slightly toward the center and that you see bubbles. This will ensure that the center cooks all the way through.
- Depending on your stovetop and pan, you may need to turn the heat down to medium-low to ensure that the batter cooks all the way through without burning.
- I heat the oven to 200 degrees F and keep the cooked pancakes warm on a baking sheet in the oven while I finish the batch, though you could also serve them as you go.
- Dairy-free: Use nondairy milk.
- Gluten-free: Use buckwheat flour in place of the whole wheat flour. You may need a little bit more milk.
- Egg-free: The best option I’ve found for pancakes is to use a store-bought egg replacer like the one from Bob’s Red Mill.
- Use cinnamon instead of pumpkin pie spice if desired.


Can I use oat flour instead?
I haven’t tested it so I can’t say for sure, but let me know if you try it!
Really good and super fluffy! (Tried it without protein powder)
Made these twice this week! The first time, I didn’t have any eggs and substituted flax meal and they were still great. The second time, I made them with eggs and per the recipe (and doubled it!) and they turned out perfectly! My boys loved them!!!
Delicious! Perfect consistency and just the right level of sweetness and spice.
Just made this today with fresh milled khorasan flour. My toddler and I enjoyed them!!
can you use regular plain yogurt?
Yes but also add 1-2 tbsp more flour to account for the added moisture.
These are pancake perfection! I used unbleached all-purpose flour because that’s what I had on hand and they turned out so good. Perfect fluffy texture, but not at all dry. Tasted like pumpkin cookies and my whole household loved them!
These are delicious and easy! I used didn’t have whole wheat flour but worked fine with whole wheat my kids loved them!
Would i need to make any adjustments for all purpose flour and to make waffles not pancakes? Looks delish and am excited to try this!
I haven’t tried it but I think it should work similarly!