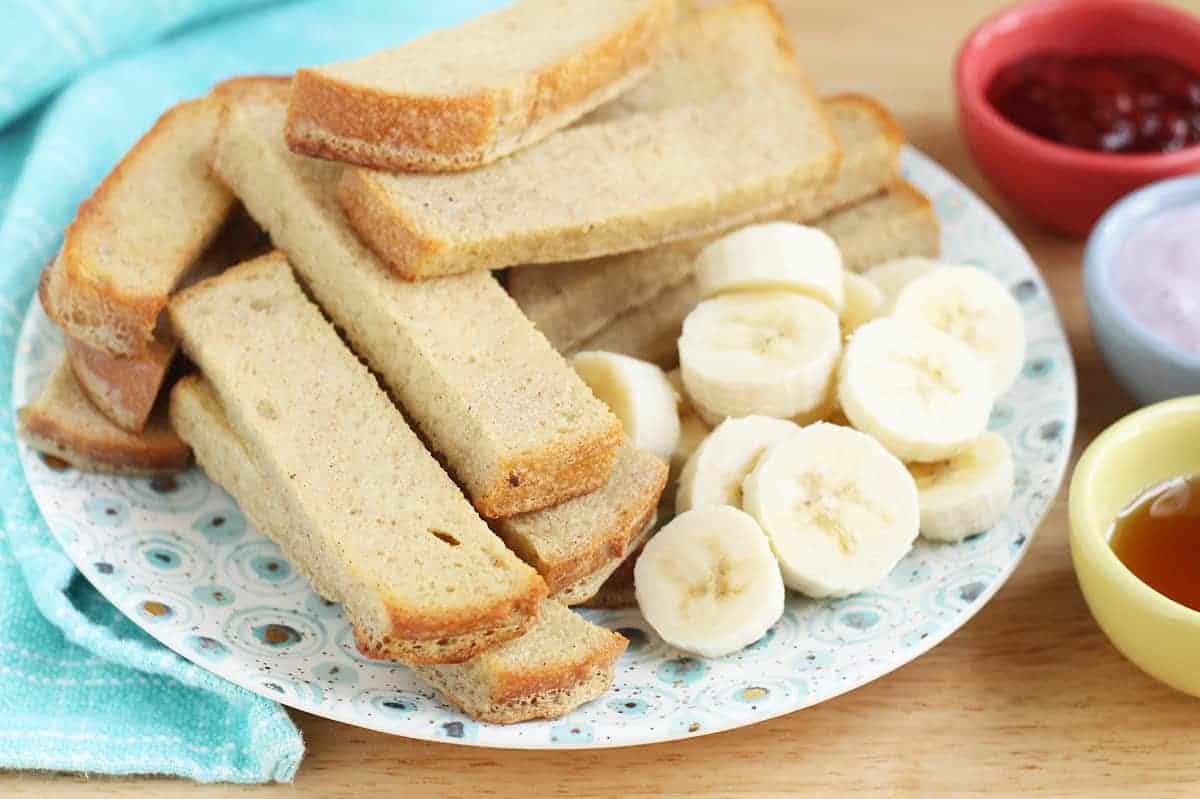
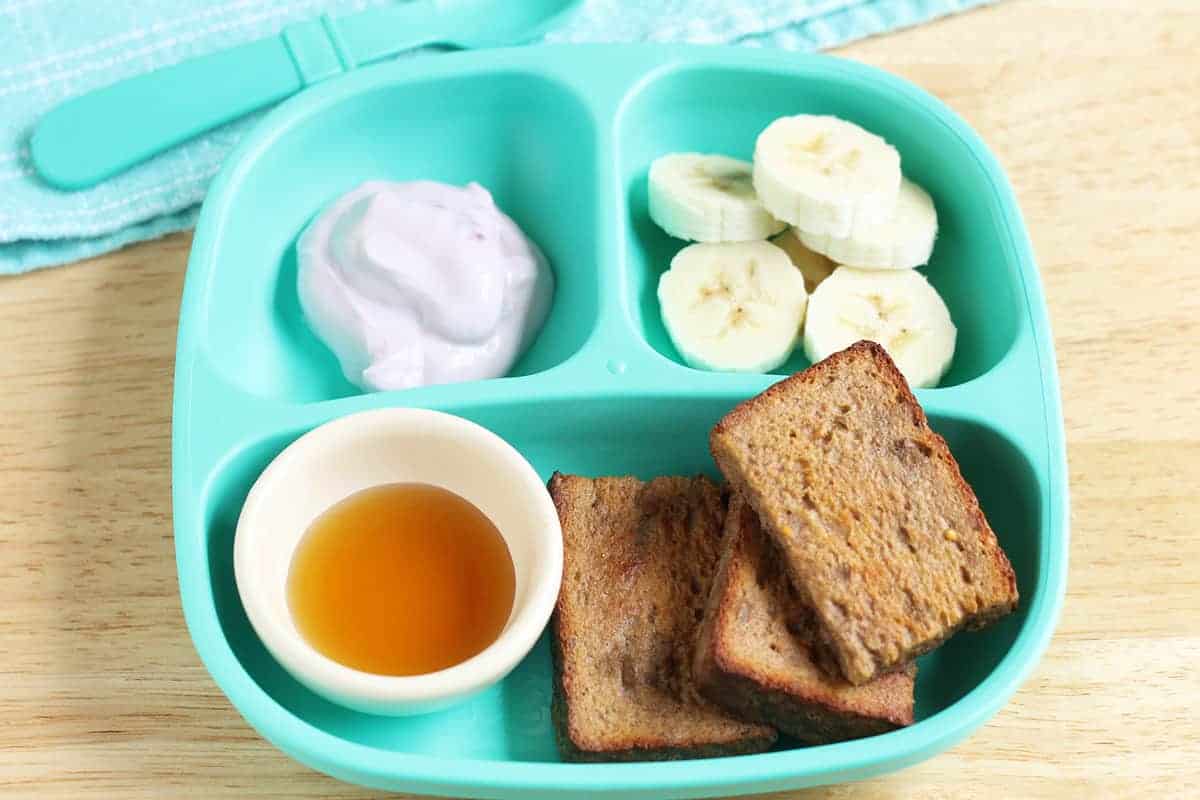
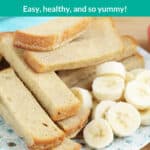
Make a batch of these super yummy Baked French Toast Sticks to share with the kids. It’s so much easier to bake French Toast, rather than standing by the stove flipping each slice, and the leftovers store so well for future meals! (There are lots of allergy-substitutions in the recipe too.)
French Toast Sticks
I am always looking for ways to simplify cooking for my family, especially with meals that can be a little labor intensive. Which is where these baked French Toast Sticks come in. The batch bakes up in the oven, which makes them so easy to make, and they have banana right in the batter—so they taste a little like banana bread!
Plus, the sticks are a super easy shape for little kids to pick up and eat with their hands…and dip as they like! They are a great toddler breakfast idea, an easy baby-led weaning breakfast, and a make-ahead breakfast for kids you can pop into the freezer.
While I admit that pan-fried French Toast is of course delicious, baking a whole pan of sticks at the same time is SO easy—and it allows you to stock the freezer in one fell swoop. Plus, since you bake the sticks on parchment paper, clean-up is as simple as tossing the paper away.
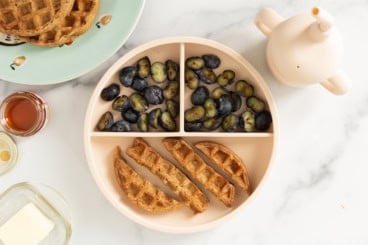
(You may also like French Toast Casserole with Apples, Pumpkin French Toast Sticks, Banana Yogurt Pancakes, and my Yogurt Waffles.)
Table of Contents
Your toddler won’t eat? Help is here!
Sign up for our email updates to get tips and ideas sent your way!
Ingredients You Need
To make this recipe you need the following ingredients:
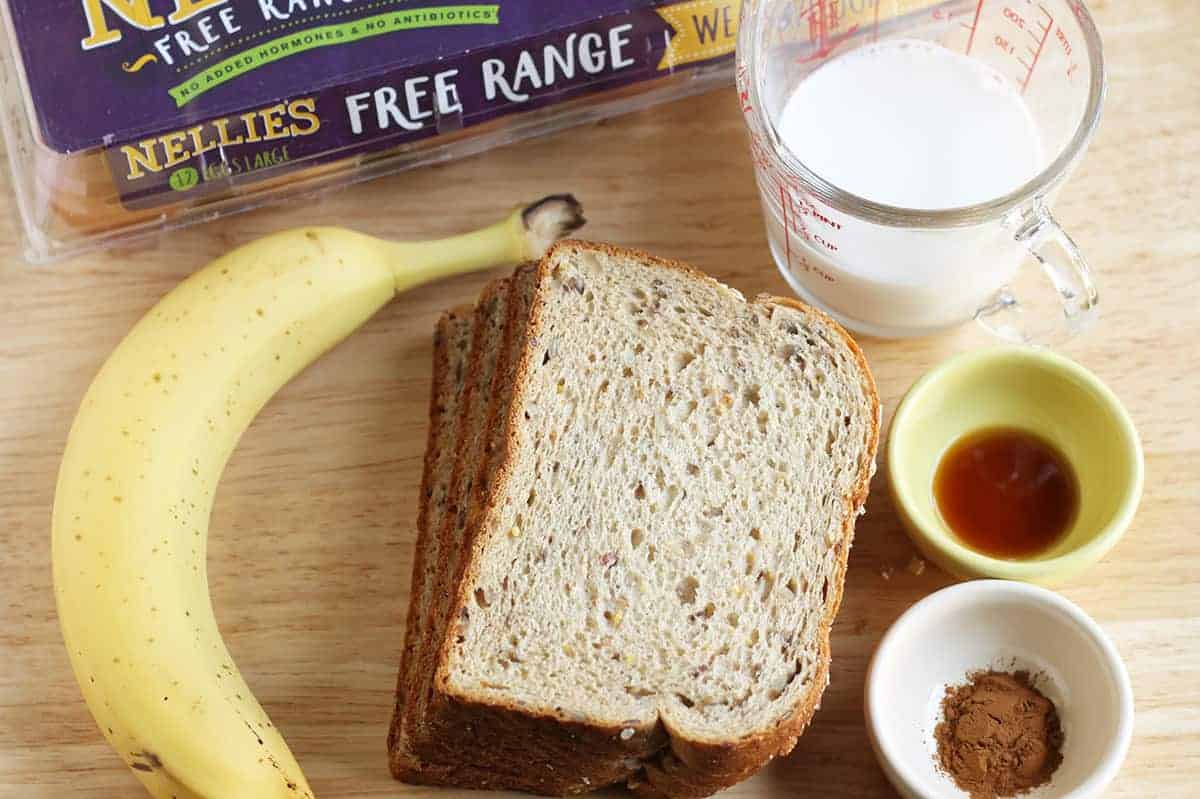
- Bread: A sturdy sourdough or whole grain bread work best here.
- Milk: I usually use whole milk, but any type will work similarly.
- Eggs
- Ripe banana: The riper the banana, the better the sweetness and banana flavor.
- Cinnamon
- Vanilla
TIP: You can adjust for allergies by using GF bread and non-dairy milk as you like.
Step-by-Step Instructions
Here’s a look at the easy process involved in making this Baked Banana French Toast recipe. Scroll down to the bottom of the post for the full information.
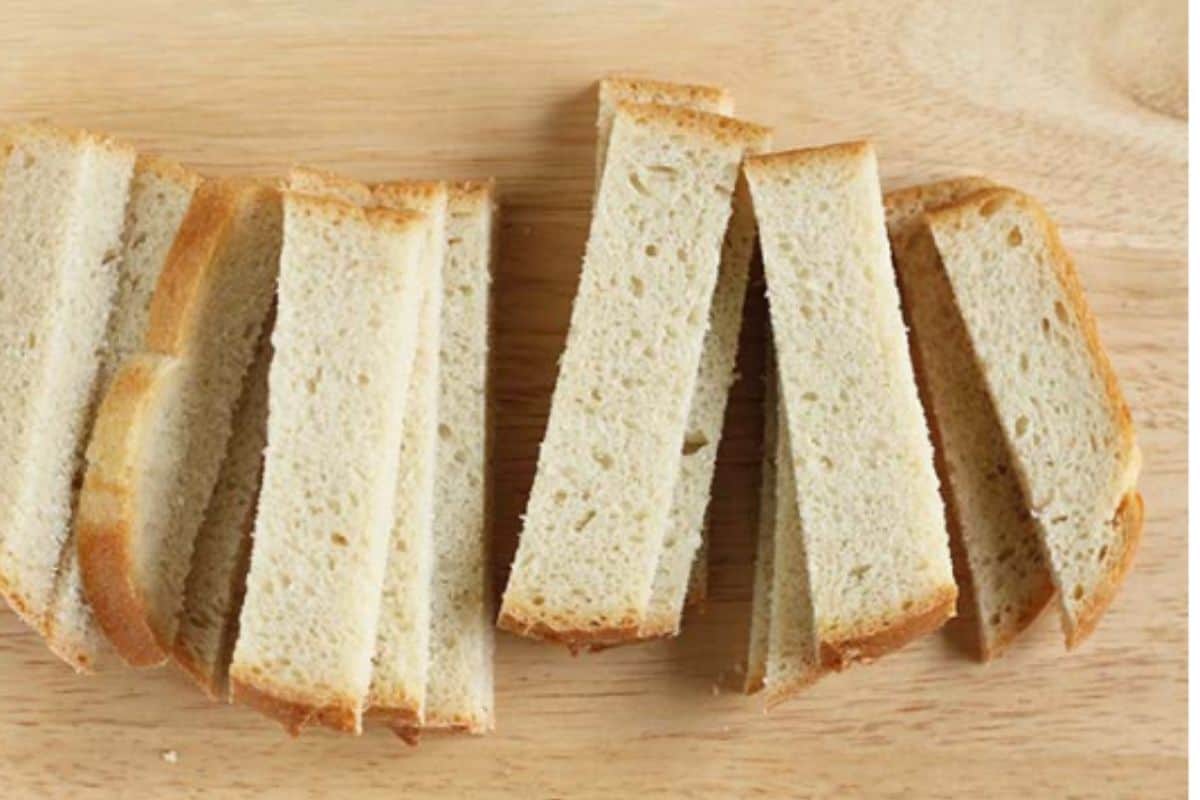
Step 1. Cut the bread into slices. I usually cut each slice into four slices.

Step 2. Blend together the eggs, banana, vanilla, and cinnamon. Dip the French toast sticks into batter.
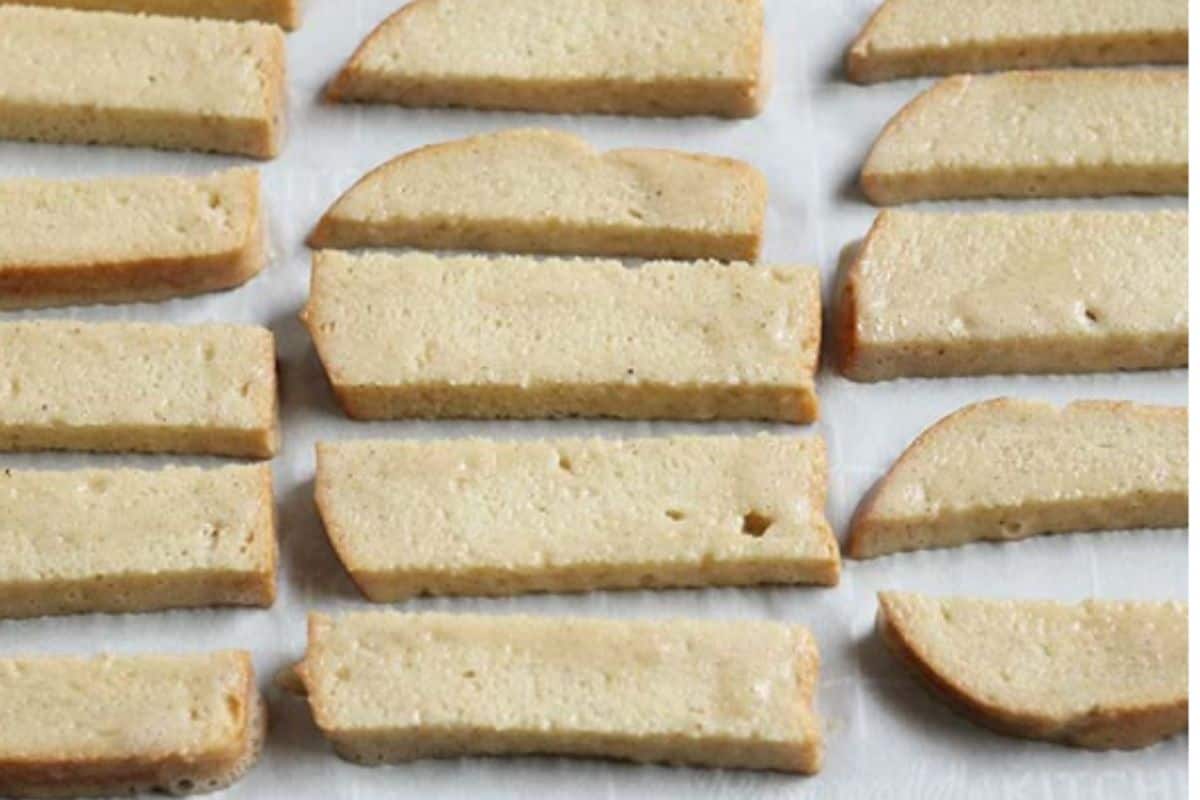
Step 3. Place onto prepared baking sheet.

Step 4. Bake, flipping over halfway through. Serve warm or let cool and freeze for later.
TIP: You can serve these with maple syrup, yogurt, applesauce, or warmed frozen fruit for dipping. You can also simply mash the ingredients together in a bowl if you don’t want to use a blender.
Frequently Asked Questions
To make this toddler breakfast ahead of time, or to save any leftovers, simply let the baked sticks cool fully. Then, place into a zip top freezer bag and store in the freezer for up to 3 months. To reheat, remove as many sticks as you need and place on a microwave-safe plate. Warm in 15 second increments until warm.
You can really use any bread you’d like. I usually use a whole grain sandwich bread or sliced sourdough bread.
Yes, you can omit the banana and add an extra egg and ¼ cup milk. Or you can substitute sweet potato baby food or pumpkin baby food.
Yes, you’ll need to use additional milk.
How to Store
To store, place cooled sticks into an airtight container and store in the fridge for about 3 days. Or add to zip top freezer bag and store in the freezer for up to 3 months. To reheat, remove as many sticks as you need and place on a microwave-safe plate. Warm in 15 second increments until warm.
Best Tips for Success
- Serve with toppings or dips such as maple syrup, yogurt, nut butter or jam depending on what your kiddos prefer.
- Use a fork to flip the sticks over quickly in the batter—you want them to absorb just enough batter to coat, but don’t let them sit in the batter. This ensures that they have a good texture when reheated.
- Let the sticks cool fully before storing in the fridge or freezer.
- To make without a blender, mash very, very well in a bowl with a fork.
- You can also bake full slices, then cut into sticks with kitchen scissors.
- Gluten-free: Use GF bread.
- Dairy-free: Use nondairy milk.
- Egg-Free: Omit the egg and increase milk to ½ cup.
- Banana-Free: Omit the banana and replace with Sweet Potato Baby Food or Pumpkin Baby Food or add an additional egg and ¼ cup milk.
- You may also like Yogurt Pancakes, 2-Ingredient Baby Pancakes, Easy Toddler Breakfasts, and Banana Breakfast Cookies.
Related Recipes
I’d love to hear your feedback on this recipe if you try it, so please comment below to share!

Baked Banana French Toast Sticks
Ingredients
- 8 slices whole grain or sourdough sandwich bread
- 2 large eggs
- 1/3 cup milk
- 1 small very ripe banana (about ½ cup slices)
- 1/2 teaspoon vanilla extract
- 1/2 teaspoon ground cinnamon
- Maple syrup (or yogurt, nut butter or jam to serve, optional)
Instructions
- Preheat oven to 350F. Line a rimmed baking sheet with parchment paper.
- Cut each slice of bread into into 4 sticks.
- Add the eggs, milk, banana, vanilla, and cinnamon to a blender. Blend until smooth. (Or, skip the blender and mash everything together in a bowl.)
- Dip each piece of bread into the batter, letting the excess drip off. Then place onto the prepared baking sheet.
- Bake for 8 minutes. Flip over and bake for an additional 10 minutes, or until lightly golden brown and cooked through.
- Serve warm with toppings or dips such as maple syrup, yogurt, nut butter, jam, or warmed frozen fruit.
Video
Notes
- To store, place cooled sticks into an airtight container and store in the fridge for about 3 days. Or add to zip top freezer bag and store in the freezer for up to 3 months. To reheat, remove as many sticks as you need and place on a microwave-safe plate. Warm in 15 second increments until warm.
- Use a fork to flip the sticks over quickly in the batter—you want them to absorb just enough batter to coat, but don’t let them sit in the batter too long. This ensures that they have a good texture when reheated.
- To make without a blender, mash very, very well in a bowl with a fork in Step 3.
- You can also bake full slices, then cut them up with kitchens scissors after they’re baked.
- Gluten-free: Use GF bread.
- Dairy-free: Use nondairy milk.
- Egg-Free: Omit egg and increase milk to 1 cup.
- Banana-Free: Omit the banana and replace with mashed roasted sweet potato or pumpkin puree or add an additional egg and ¼ cup milk.
Nutrition
This post was originally posted November 2019.


My kiddo is nearly 5 now, and I’ve been making these for her for at least 4 years. We keep a big bag of them in the freezer, and a couple French toast sticks with some fruit is her favourite pre-bedtime snack. Every single night.
From how much months can I serve this to my baby
You can offer it starting around 6 months, or after baby has started solids, as a baby led weaning style food. Or you can dice them into small pieces and offer as a baby finger food after about 9 months.
Not sure if my bread was too thin but the oven was not the right answer when I tried this. When I went to flip the sticks over at the halfway point, they were all horribly stuck to the parchment paper and I was almost shredding them to get them off. Not sure if I should have sprayed the parchment paper before adding the sticks at the beginning, but I ended up just finishing them off on the stove with butter instead. I also about 5 sticks that hadn’t fit on the pan to put in the oven in the first place, so I made those on the stove from the beginning and those came out beautiful. They all still tasted delicious and my toddler LOVED them, but if the future, I’ll just stick with the stove or I’ll buy super thick bread if I want to try the oven again.
Hi! Can you clarify how much milk to use when substituting for egg? The recipe says 1/2 cup and 1 cup. Thanks!
Omit the egg and use 1 cup total milk.
These are absolutely amazing! My twin girls devoured the whole tray for breakfast! About to make a double batch now for later and to freeze.
Thank you so much for the work you are doing! It is a lifesaver for this twin mom!
French toast sticks are sooo much fun for my kids! Even to pack for lunch at school, it’s such an easy option.
This was a big hit with my 4 year old and 1 year old! Thank you, Amy! It’s fun to try new things, especially when they work on my kids! That is rare:)